Initial setup, Start logger pro, Before launching logger pro , you should – Vernier Logger Pro 3 User Manual
Page 7
3
initial Setup
Note: The following setup instructions are for the
LabPro interface. They are similar to the LabQuest
and Go! Link interface instructions. Choose Logger
Pro 3 Help from the Help menu for further details.
The LabQuest Quick Start Guide contains information
specifi c to LabQuest.
Before launching logger Pro,
you should:
Power the LabPro using the AC
power supply or AA batteries.
Connect a sensor to LabPro.
Connect the USB or serial cable
to LabPro.
Attach the other end of
the interface cable to any
unused serial port or USB
port on your computer.
Start logger Pro
Locate the Logger Pro
icon and double-click on it.
Mac OS X users can fi nd the icon in the Logger Pro
folder created in Applications during installation.
Note: The fi rst time that you run Logger Pro
with your LabPro interface, a message may appear
notifying you of an update to the LabPro operating
system. Do not interrupt this update.
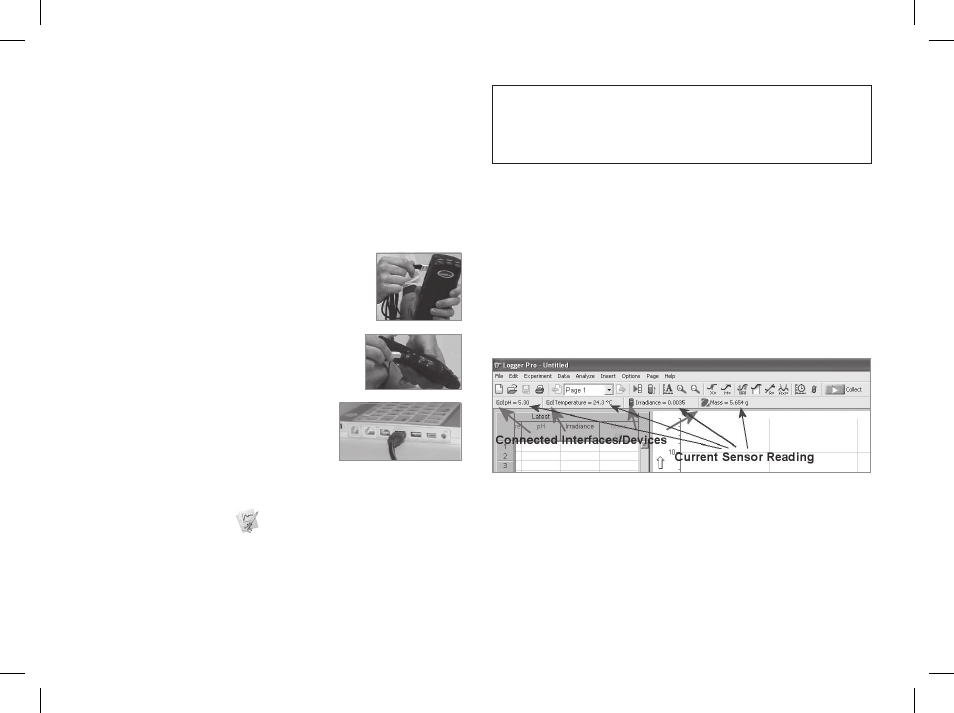
Logger Pro can collect data from multiple interfaces
and devices. If Logger Pro has successfully detected
these devices, you will see the device icon (see fi gure
below). Also, if an auto-ID sensor is attached, the
current sensor reading will appear below the toolbar
(as shown in the fi gure). Some devices, such as WDSS,
GPS or Ohaus balances, require manual connection in
Logger Pro. Choose Connect Interface
(device name)
from the Experiment menu to connect.
You have now successfully set up your equipment and
installed Logger Pro. Keep reading for instructions on
the various ways to collect and obtain data. You will
also learn how to use Logger Pro’s powerful features,
such as data analysis, movies, and customizing your
experiments.
In the fi gure above, a Go!Link, Go!Temp, LabPro and Ohaus
balance are connected to the computer.