The sensors dialog, Manage your page and data, Manage and adjust objects – Vernier Logger Pro 3 User Manual
Page 15
11
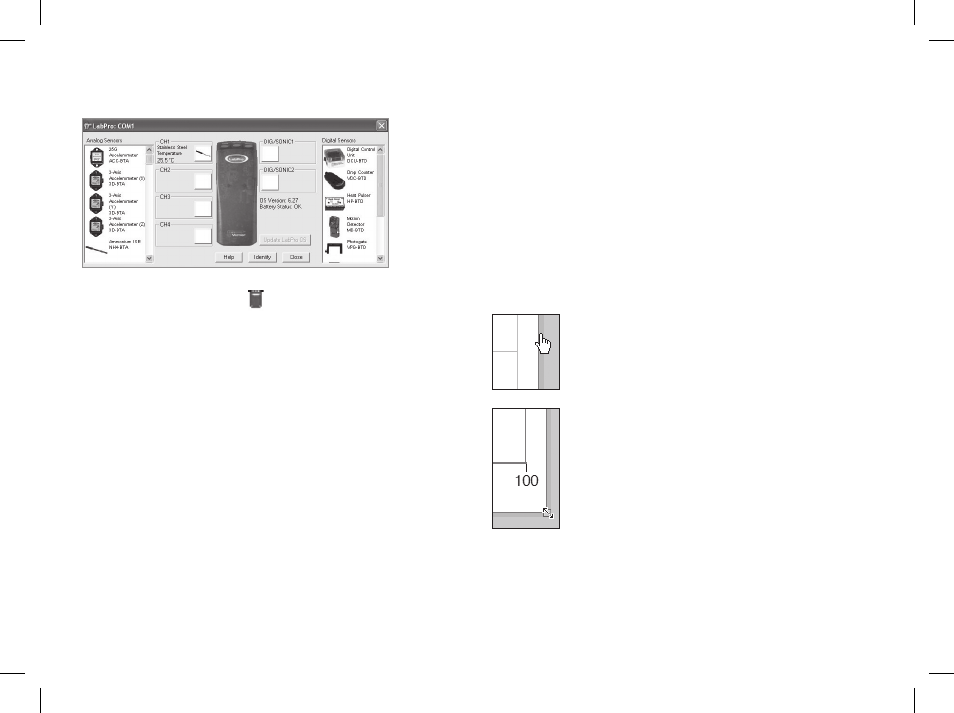
The Sensors Dialog
This dialog, called up by clicking the button for an
interface in the toolbar ( , for example) shows your
sensor information, the units and current readings.
The details of the dialog vary, depending on the use
of LabQuest, LabPro, Go!Temp, Go! Link, Go! Motion,
WDSS, spectrometers, GPS or Ohaus balances.
Use the scroll bars in the Sensor Catalogs to view
all sensors.
By clicking in a Channel box with a displayed sensor,
you may be able to:
Calibrate a sensor Perform a new calibration.
Get sensor information Includes collection details
and calibration information.
Zero a sensor Sets the current reading of a sensor
to zero.
Choose sensor Select another sensor for
the channel.
Change the current settings Select the available
units or calibration settings
Analog out (CH 4 only) This channel can be used
as a function generator.
Remove sensor Clears the channel of the sensor.
Manage Your Page and Data
There are numerous ways that you can customize the
presentation of your data.
Manage and adjust Objects
Move Objects Select the object by clicking
on it once. Move the cursor over the edge of
the selected object until the cursor turns into
a hand, then hold down the mouse button
while grabbing and moving the object.
Resize Objects Single-click on an object
to select it. When an object is selected, its
border becomes visible, along with eight
resizing handles.
Clicking and dragging a resize handle will
resize the object in the appropriate direction.