Rane MP 2016 User Manual
Page 2
Manual-2
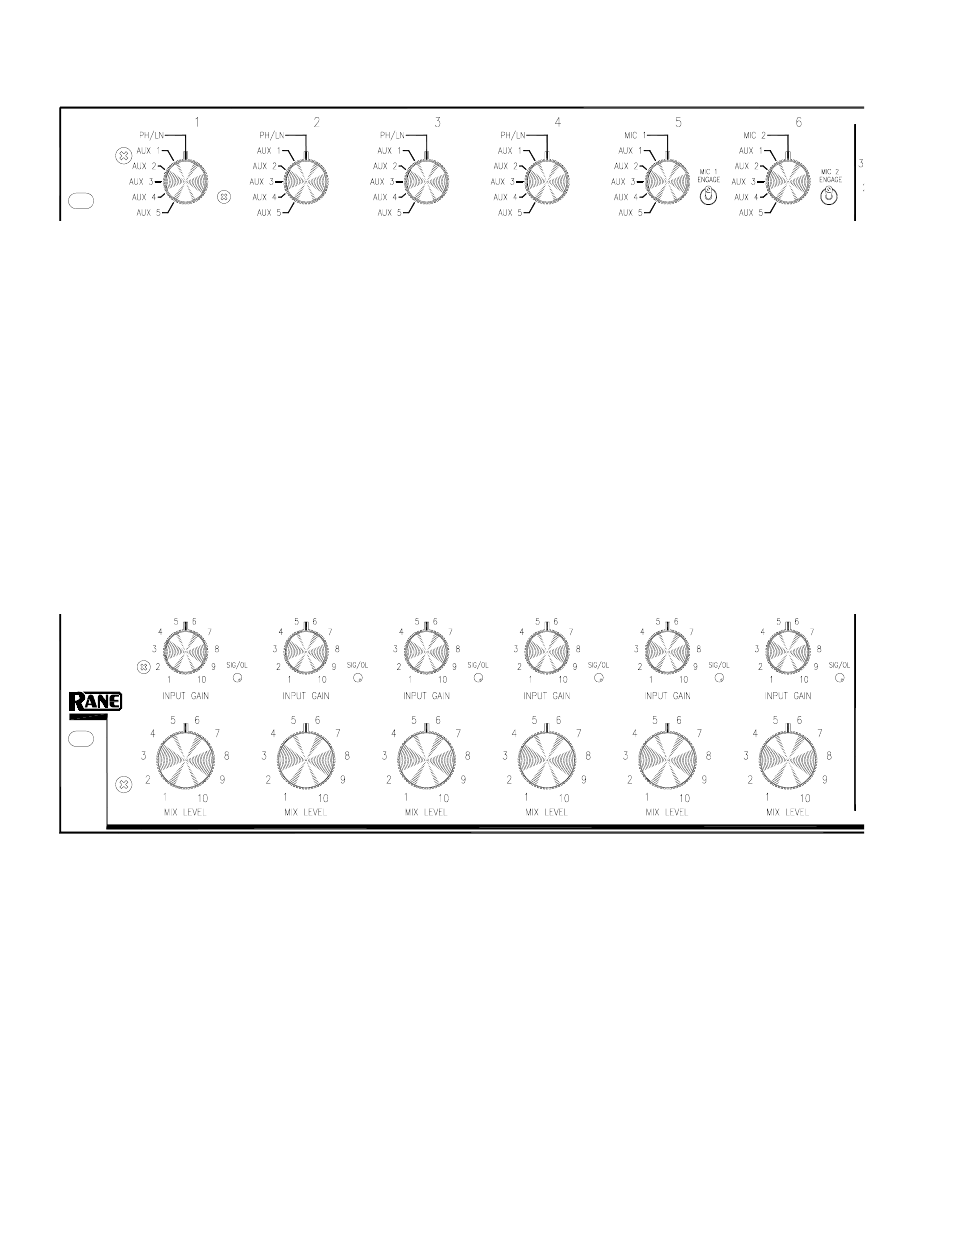
MP 2016 FRONT PANEL CONTROLS
INPUT SELECTORS 1-4
Each six-position Input Selector chooses a dedicated
PHONO/LINE preamplifier, or one of five stereo AUX
Inputs as its Input Channel source. (PHONO/LINE switches
are located on the rear panel).
INPUT SELECTORS 5-6
Each six-position Input Selector chooses a dedicated
mono MIC Input, or one of five stereo AUX Inputs as its
Input Channel source. (MIC GAIN trim, MIC/LINE switch
and MIC tone controls are located on the rear panel).
MIC ENGAGE
MIC 1 and MIC 2 ENGAGE switches allow switching a
mic on (up) or off (down). MIC Input must be selected and
MIC ENGAGE on to activate a MIC Input. When a mic is not
in use, be sure to switch MIC ENGAGE off. The MIC
ENGAGE switches also activate the Booth Ducker. This
attenuates the Booth Output -12 dB whenever a MIC EN-
GAGE switch is on, even if MIC Input is not selected
(internal jumpers allow disabling the Booth Ducker—see
Mic/Line Inputs on page Manual-6).
INPUT GAIN
INPUT GAIN controls allow the user to match input
levels. Adjust these controls to make the SIG/OL indicator
flash green. If the indicators turn red, reduce the INPUT
GAIN. Adjusting the INPUT LEVEL controls correctly
maximizes dynamic range and provides consistent MIX
LEVEL response.
Input
SIG/OL
These dual color indicators provide help in setting correct
input levels. A flashing green indication is optimal. The red
indicator should remain off during normal operation.
MIX LEVEL
These studio-grade controls determine the Master MIX
LEVEL. For optimum performance, set the INPUT GAIN
controls as indicated above, and then operate MIX LEVELS
between “7” and “10” for full mix. Use the HOUSE and
BOOTH LEVEL controls to set the output levels. Always set
the MIX LEVEL controls to minimum when not in use.