Manual- front panel description – Rane HC 6 2003 version User Manual
Page 4
Manual-
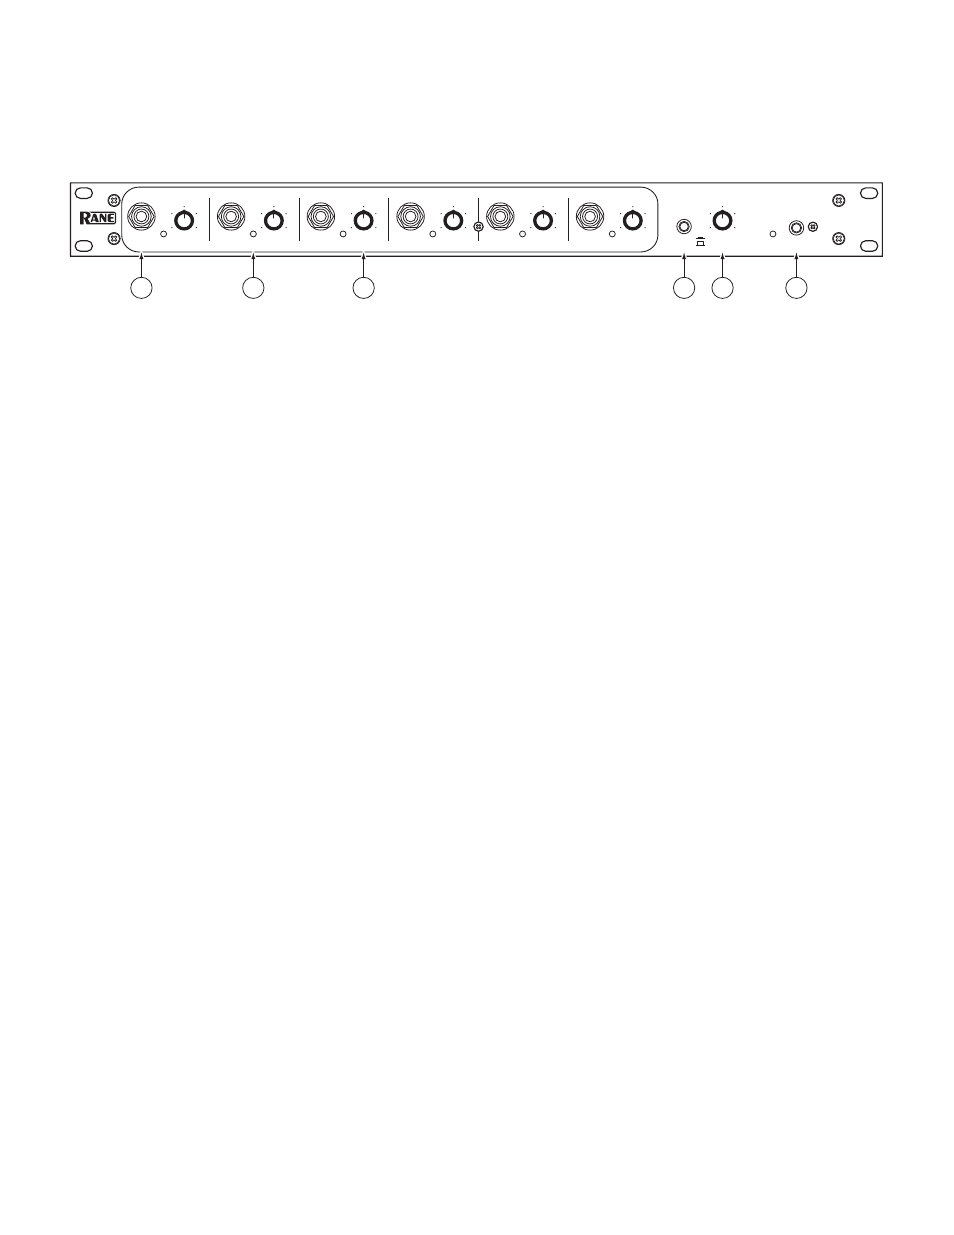
FRONT PANEL DESCRIPTION
1
Front panel PHONES Output jacks
are in parallel with the rear panel stereo Output jacks. Use them to monitor any of the six
Channels for level or mix adjustments, or for easy access when the HC 6 is rack mounted. Plugging into these front jacks does not
disengage the rear Outputs.
2
SIGnal present indicators
light (green) with any input signal above -20 dBu. See OPERATING INSTRUCTIONS (on page
Manual-4) for complete details.
3
Individual LEVEL controls
set the volume for each set of headphones, regardless of whether they are driven from the MASTER
INPUTS or from the direct stereo INs. When using the front and rear panel headphone jacks together, this control varies the level
of each headphone simultaneously.
4
MONO / STEREO switch
converts the MASTER INPUTS from stereo to mono so that a single input cable drives both sides of
the headphones.
5
MASTER LEVEL
sets the volume simultaneously to all headphones driven from the MASTER INPUTS. This does not alter the
volume on any headphones driven from the direct stereo INs.
6
POWER switch.
Your basic, straightforward power switch. When the yellow LED is lit, the HC 6 is ready to go.
MONO
10
0
2
4
8
6
10
0
2
4
8
6
CONSOLE
HEADPHONE
10
0
2
4
8
6
10
0
2
4
8
6
10
0
2
4
8
6
10
0
2
4
8
6
10
0
2
4
8
6
HC 6
LEVEL
STEREO
LEVEL
SIG
PHONES
6
5
LEVEL
PHONES
SIG
4
PHONES
SIG
LEVEL
3
PHONES
SIG
LEVEL
2
PHONES
SIG
LEVEL
1
PHONES
SIG
LEVEL
POWER
MASTER
1
2
3
4
5
6