Caution – WEATHER GUARD Model 88052 Window Screen, Sliding Door, Full, RAM ProMaster User Manual
Page 2
MODELS
DESCRIPTION
88013
88015
88033 88010
88011
88027
88017
88023
88014
88016
88028
88024
88025
88021
88031
88029
88030
88022
88026
88032
Qty.
1
2
Screens
If you have any questions, please give us a call. Call Toll Free 1-800-456-7865
KNAACK MANUFACTURING COMPANY
420 E. TERRA COTTA AVENUE - CRYSTAL LAKE, ILLINOIS, USA 60014 - 815-459-6020
©1999 Knaack Manufacturing Company
- NOTICE -
Any modification or unintended use of this product shall immediately void all manufacturers warranties.
Manufacturer disclaims all liability for injuries to persons or property resulting from any modification to, or
unintended use of this product.
1/4" Flat Washer
1/4-14x3/4" Self
Drilling Screw
Tab
Screen
1/4" Flat
Washer
Latch Area
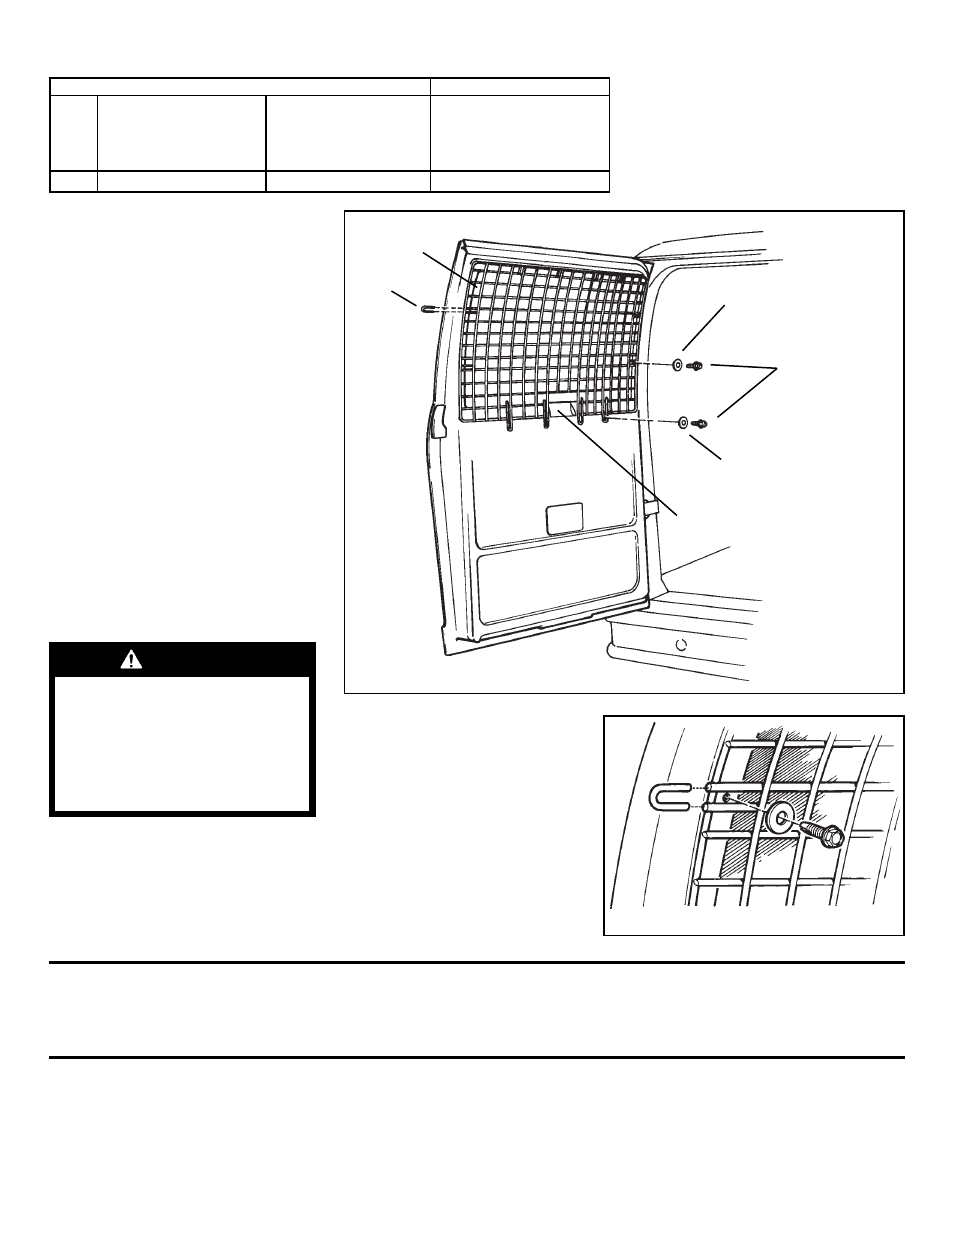
Figure 2.
CAUTION
To keep debris out of your
eyes when trimming screen
tabs or using self-drilling
Tek screws, always wear
protective eyewear.
2. Install the screen after proper
alignment.
INSTALLATION
INSTRUCTIONS
1. Align the Screen over the window
frame and note areas where the
screen may need trimming. Areas that
may need trimming or bending are the
Tabs and Latch. If you have window
latches, open the latch to it's highest
point and replace the screen to deter-
mine removal points. If trimming is re-
quired, be sure to file down any sharp
edges after cutting.
Figure 1.
PARTS LIST
TOOLS REQUIRED
• Drill with 5/16" Hex Driver Bit or
5/16" Nut Driver
• Hacksaw or Wire Cutters
• File
• Pliers
NOTE
These Wire Window Screens
are designed to fit in cargo
areas of cargo vans. If your
vehicle has interior window
trim, it may require removal.
NOTE - If tab removal was neces-
sary, the screen can still be fas-
tened by placing the screws to the
inside of the outer framing as
shown in Figure 2.
- Model 88051 Window Screen, Side Door, Full, RAM ProMaster Model 88050 Window Screen, Rear Door, Full, RAM ProMaster Model 88047 Window Screen, Rear Window, Full, Ford Transit Connect Model 88046 Window Screen, Side Door, Full, Ford Transit Connect Model 88045 Window Screen, Rear Door, Full, Ford Transit Connect Model 88044 Window Screen, Rear Door, Full, RAM CV Model 88043 Window Screen, Rear Window, Full, RAM CV Model 88042 Window Screen, Sliding Side Door, Full, RAM CV Model 88041 Window Screen, Rear Door, Full, Mercedes-Benz Sprinter Model 88040 Window Screen, Side Door, Full, Mercedes-Benz Sprinter Model 88028 Window Screen, Rear Door, Full, GM Model 88027 Window Screen, Side Door, Full, GM Model 88026 Window Screen, Sliding Door, Full, GM Model 88023 Window Screen, Sliding Door, Full, Ford Model 88022 Window Screen, Rear Door, Full, Ford Model 88021 Window Screen, Side Door, Full, Ford