Assembly – Ryobi RT102 User Manual
Page 13
13
aSSeMBLY
6
5
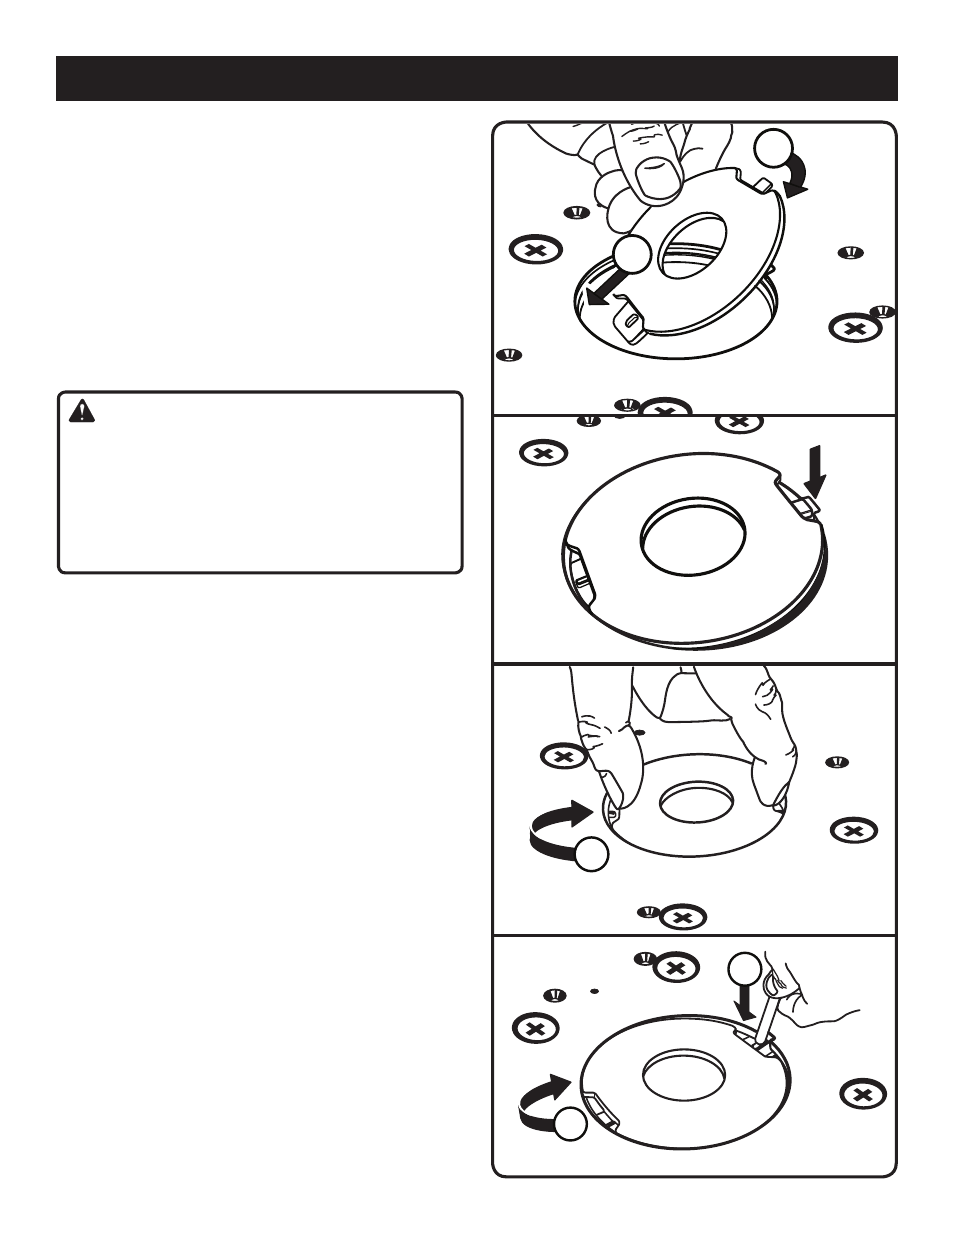
INSertING aND reMOVING tHrOat
pLateS
See Figures 13 - 16.
The throat plate provides a stable surface around the cutter
and prevents objects from falling through the throat plate
and damaging the spindle.
The proper size throat plate depends on the size and shape
of the cutter. When inserted, the throat plate opening should
be within approximately 1/4 in. (6.4 mm) of the outermost
edge of the cutter.
Follow these directions to insert the throat plates:
Position the throat plate over the opening in the router
table.
WarNING:
Make sure the router and router table are disconnected
from the power supply. Install the bit into the collet as
instructed in the router manual. Lower the bit below the
surface of table before installing a throat plate. Insert
the throat plate as described, raise the bit to the desired
depth of cut, and reconnect the router and router table
to the power supply.
1
2
1
3
Fig. 13
KEYWAY
Fig. 15
Fig. 14
Fig. 16
Align the large tab opposite the slot in the table and insert
it under the table. Then push the small tab into the slot.
Rotate the throat plate 180° until the raised portion on
the large tab is in the table slot.
Follow these instructions to remove the throat plates:
Use a small tool to depress the large tab until the raised
portion clears the underside of the table and rotate it out
of the slot.
Continue to rotate the throat plate until the small tab is
in the slot. The throat plate can now be removed.