Step 3: placing the control panel – Outdoor Great Room DIY Fire Pit User Manual
Page 3
90246 REV C 6/10/13 3
While the control panel included in your kit is meant to work universally for most fire pit block sizes, for
extreme cases, blocks may need to be cut to ensure a perfect fit. See below for installation methods.
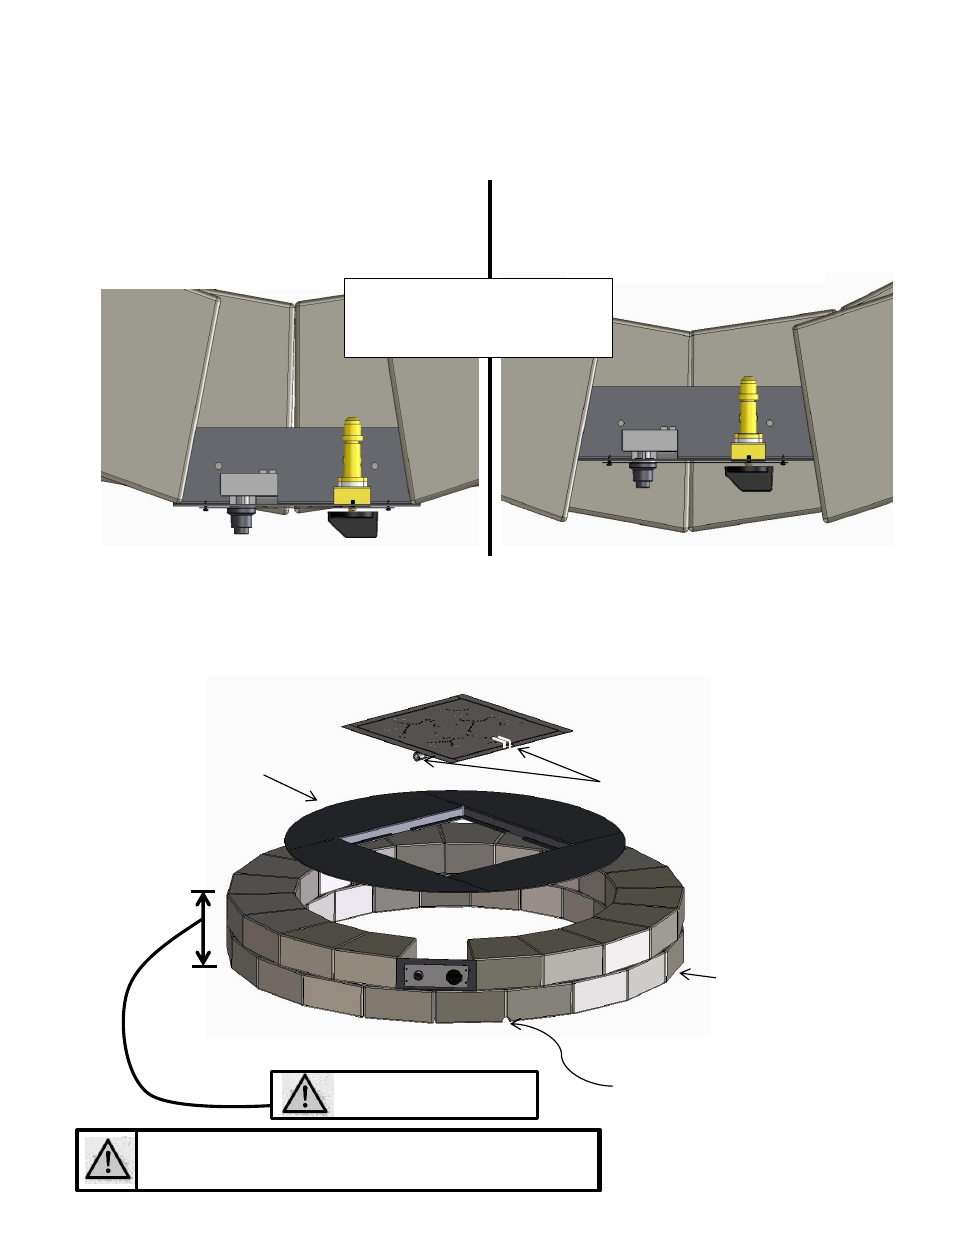
Step 3: Placing the control panel
(suggested method for common cases)
Option 1:
For smaller block sizes
Option 2:
For larger block sizes
For rectangular DIY fire pits, blocks should be cut to size for proper fit. Alternatively, mesh
screen or other material can be cut and attached to control panel to act as filler around control
panel.
Control panel assembly should be
glued or secured with ¼” concrete
anchors to the block below it.
Be sure to locate the
sparker electrode and
burner neck facing toward
control panel
Cut hole, remove material with
chisel, or leave gap between blocks
for incoming gas if needed.
Burner support ring should be
located one block layer above
control panel. (a longer flex-
line can be used if mounting
control panel elsewhere)
8” minimum clearance to
combustibles below burner
Space or cut blocks to
provide adequate
airflow under the
burner in case of a gas
leak. 10 square inches
total of ventilation is
required at ground
level.
Always follow local codes and block manufacturer suggestions
for building a safe block fire pit.