Assembly instructions, Step 1 step 2, Step 3 – Home Styles 5559-34 User Manual
Page 2
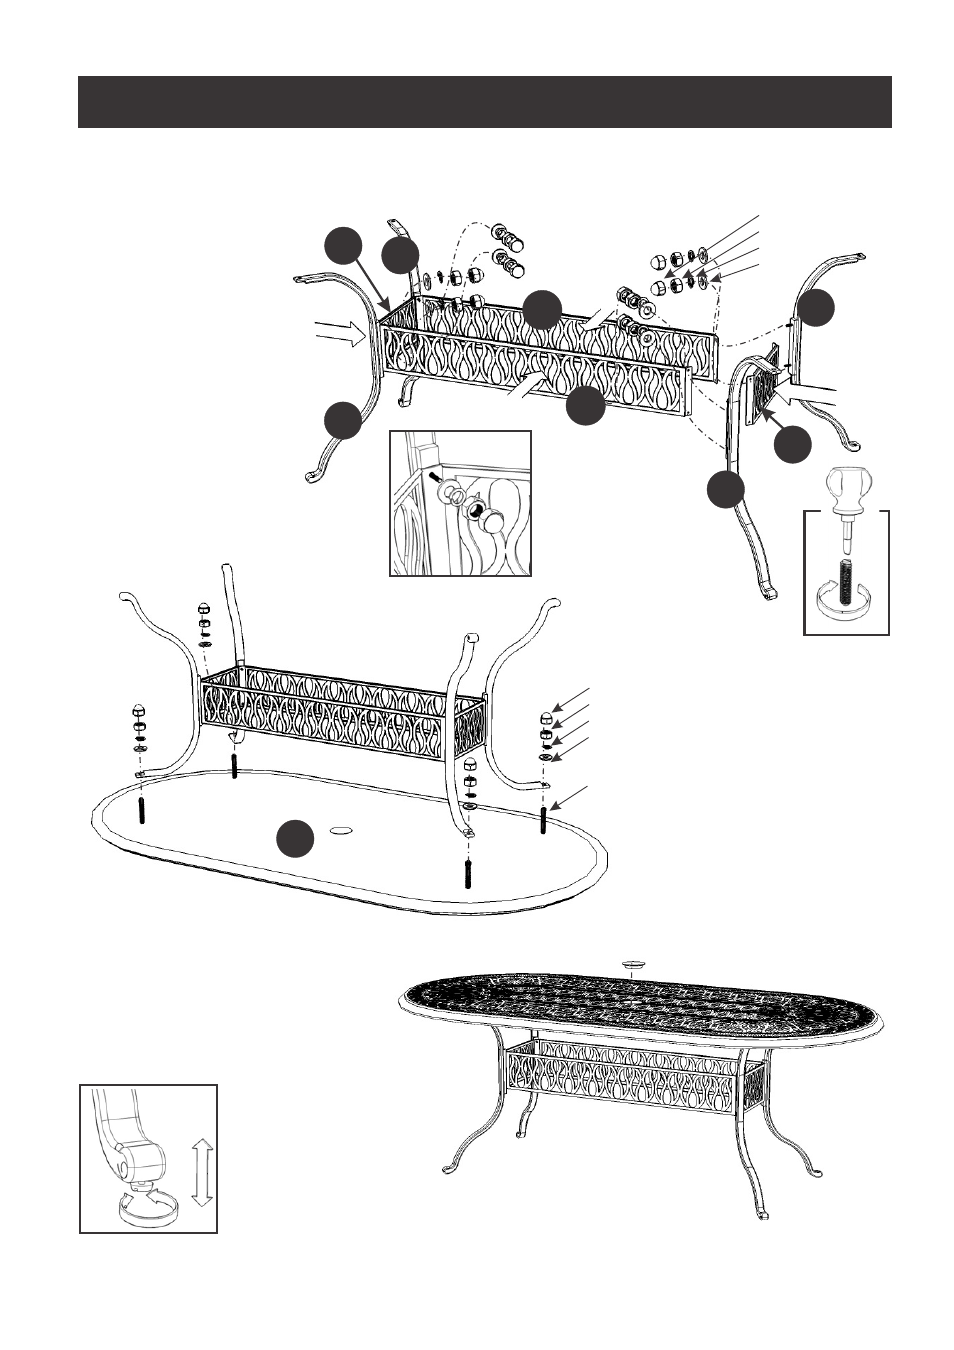
Assembly Instructions
STEP 1
STEP 2
Figure 1
Figure 2
IMPORTANT
* Do not tighten up all the screws until each part is properly assembled.
* You should keep Key Wrench in a safe place as you may need to tighten up the Head Cap Bolts in the future.
* After assembly, item must be level to work properly. Use the included adjustable levelers to level.
B
B
B
B
C
C
A
Nut Cap
Nut
Spring Washer
Flat Washer
Nut Cap
Nut
Spring Washer
Flat Washer
Bolt
Figure 3
Assemble Side Frames (C),
(D) and Legs (B) with
Flat Washers,
Spring Washers,
Nuts and Nut Caps.
(See figure 1)
Insert Bolts into the
pre-drilled holes of
Top (A) by using
Slotted Screwdriver.
(See Figure 2)
Attach unit to Top (A)
with Flat Washers,
Spring Washers, Nuts
and Nut Caps.
STEP 3
Turn the table to its’ upright position.
Cover the umbrella hole with Cover.
To level the table, adjust the adjustable
levelers on the bottom of legs.
(See Figure 3)
D
D