Xpres Cut Plus: Ultragraphics Roland GX-24 Manual User Manual
Page 7
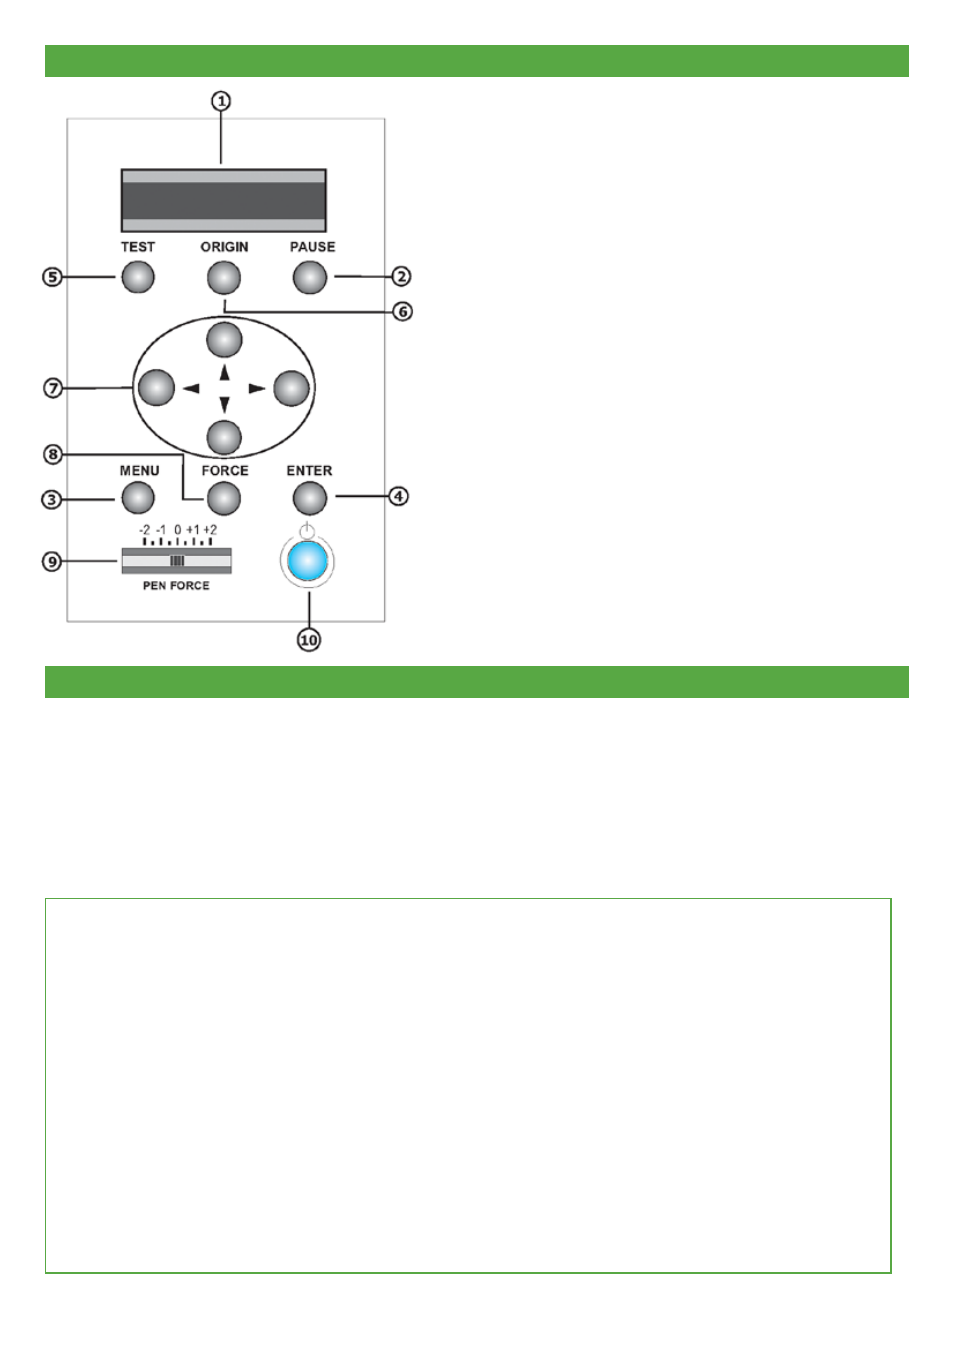
Roland GX-24 front panel overview
Roland GX-24 media sizes
7
1. Display Panel
this displays various settings
menus and other information
2. Pause Key
this interrupts the operation in
progress. Pressing it for a
second time resumes the
operation.
3. Menu Key
this key will allow you access to
all of the settings for the machine
and to adjust the settings within
menus.
4. enter Key
this key is used to confirm your
selections.
5. test Key
Pressing and holding this for one
second or longer cuts a
pre-registered test pattern.
6. origin Key
this key is used to set the start
position of the blade when
loading a new piece of material
into the cutter (textile vinyl only -
not for Xpres cut Plus use).
7. cursor Keys
these keys are used for
moving both the material forward
& backward in the cutter and
also to move the cutting head
from side to side (textile vinyl only
- not for Xpres cut Plus use).
8. Force
this displays the menu for
adjusting the blade force.
9. Pen Force slider
this lets you fine-tune the blade
force. You can even perform
adjustment while the cutting is in
progress.
10. Power Button
Pressing this switches on the
power, making the button light
up blue. to switch off the power,
you hold it down for one second
or longer.
Before cutting your A4 or A3 sized media, you will need to check whether the GX-24 media sizes have been set up correctly.
to change this, follow the steps below.
the Xpres cut Plus media sizes are as follows:
A4: Width 170mm x Length 247mm
A3: Width 257mm x Length 360mm
If your cutter has been set up by an Xpres engineer, skip the boxed section below and follow steps 1 - 6 on page 9.
note:
If you are changing your media sizes from A4 to A3 follow step 7 on this page to change the width and length.
If you have turned your Roland GX-24 on for the first time you will need to set the cutter to manual start and set the
appropriate media sizes above.
to turn on ‘Manual start’ and setup the media sizes, firstly load the media into the cutter by pressing ‘enteR’ on
‘seLect sHeet - *RoLL’. When it has read the width follow the next procedure.
1.
Press MenU twice (you will see UnsetUP on the display)
2.
Press the DoWn arrow key twice (you will see cRoPMARK
3.
Press the RIGHt arrow key twice (you will see cRoPMARK *AUto)
4.
Press the DoWn arrow key (you will see cRoPMARK *MAnUAL)
5.
Press enteR
6.
Press RIGHt twice (you will see BAse X 5.0mm)
7.
Use the UP or DoWn arrow keys. set BAse Y to 5.6mm and the LenGtH to 247mm.
You can now go to MAnUAL stARt to load the media as detailed in page 9.