Xpres Subli-Print Epson 1400: Manual User Manual
Page 5
8
9
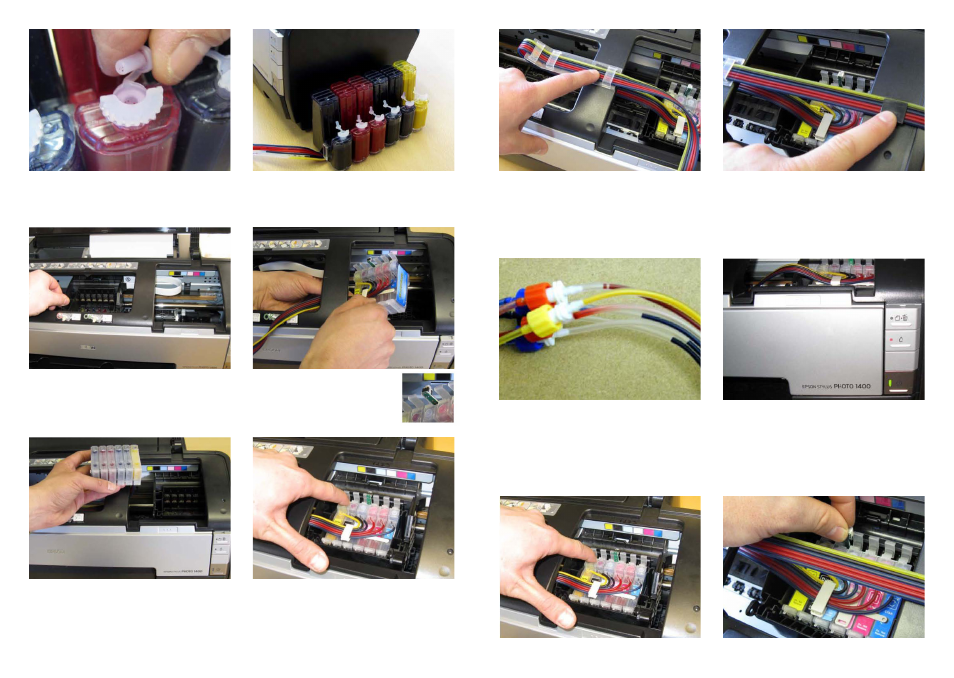
Remove the backing tape from the sticky pads on the tube
support arm.
Position the tube support so that the edge lines up with the
printer housing and the tubes are lined up with the tube clip
on the cartridges.
ENSURE THAT THIS AREA IS DUST AND GREASE FREE
Do not worry if you see a small amount of air in the tubes
when you first install the system. This will quickly find its way
to the top of the cartridges during the initial head charge.
This tiny amount of air in no way impedes the full working
order of the system.
If the red ink light is displayed when the printer is turned on.
Press the ink button to move the cartridges to the removal
position.
Remove the backing tape from the small support bracket
and fit as shown.
Ensure that all the cartridges are firmly pushed into place.
Press and hold the chip reset button for 5 seconds.
Plug in the mains power cable and turn on your printer. The printer will
go through the initial head charge before your system is ready for use.
Remove the centre section from the rubber bungs.
BE CAREFUL NOT TO DAMAGE THE BUNGS WHEN
REMOVING THE CENTRE SECTION
Move the print head as far to the left of the carriage as
possible.
…and place the cartridges on the housing whilst you
move the printhead back to the cartridge removal
position.
Repeat this for all colours then place to the right of the
printer as shown.
NEVER PLACE THE BOTTLES HIGHER THAN THIS
Feed the cartridges under the printer
housing...
TAKE CARE NOT TO BREAK THE CHIP
RESETTER
Place the cartridges into the cartridge housing and press
them down firmly by spreading fingers across all the
cartridges. (You will hear a ‘Click’ as cartridges slot in to
position).
Important: ENSURE THAT EACH CARTRIDGE HAS
CLICKED INTO PLACE.