Ab b – Workrite Cascade Assembly Instructions for 2-Leg Counterbalance Workcenters User Manual
Page 3
or
Magnetic
Workrite Ergonomics | 800.959.9675 www.workriteergo.com
3 of 8
Workrite Cascade Workcenter - Assembly Instructions
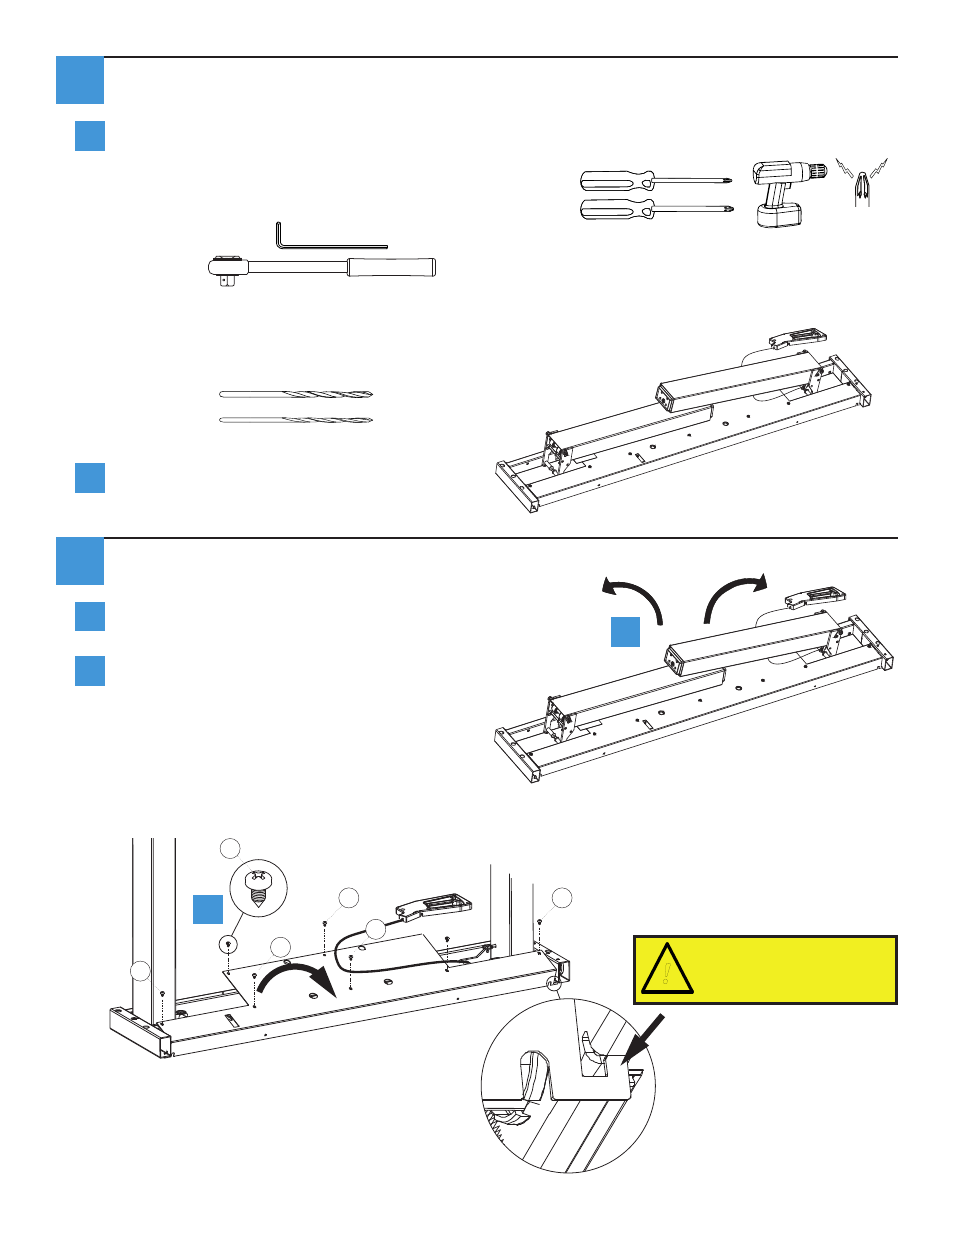
Verify that you have all the hardware and tools needed for the assembly.
Check your cartons against the list on page 2 to verify that you have all the parts needed. You will
also need the following tools:
#2 tip Phillips screwdriver or drill/driver with magnetic-bit
#3 tip Phillips screwdriver or drill/driver with magnetic-bit
5 mm Allen wrench
⅜” ratchet
If you do not have a Workrite worksurface, you will also need a:
Reversible drill/driver with magnetic-bit
⅛” drill bit
3
⁄
32
” drill bit
Lay Base Assembly (B) on the floor. Remove
tape and protective wrapping on both legs.
Unfold Legs and remove the Cover Plate
Legs are hinged and will fold up to a vertical
position to allow removal of the cover plate.
Using the #3 Phillips screwdriver remove
the eight M8×30 screws (E) to access the
inside of the Base Assembly.
Note: Careful not to bend the corner tabs.
You will need to lift the assembly slightly
to avoid bending the tabs. Take caution
that the legs don’t fall down while doing
performing this step.
2
1
a
b
E
E
E
E
E
Caution must be taken to
assure the tabs located at the
far sides of the cover plate are
not bent during removal!
!
a
a
b
b
E