Lamp replacement – Welch Allyn LS135 and LS150 Exam Light, Lamp Replacement Instructions - Quick Reference Guide User Manual
Page 2
Lamp Replacement
1.
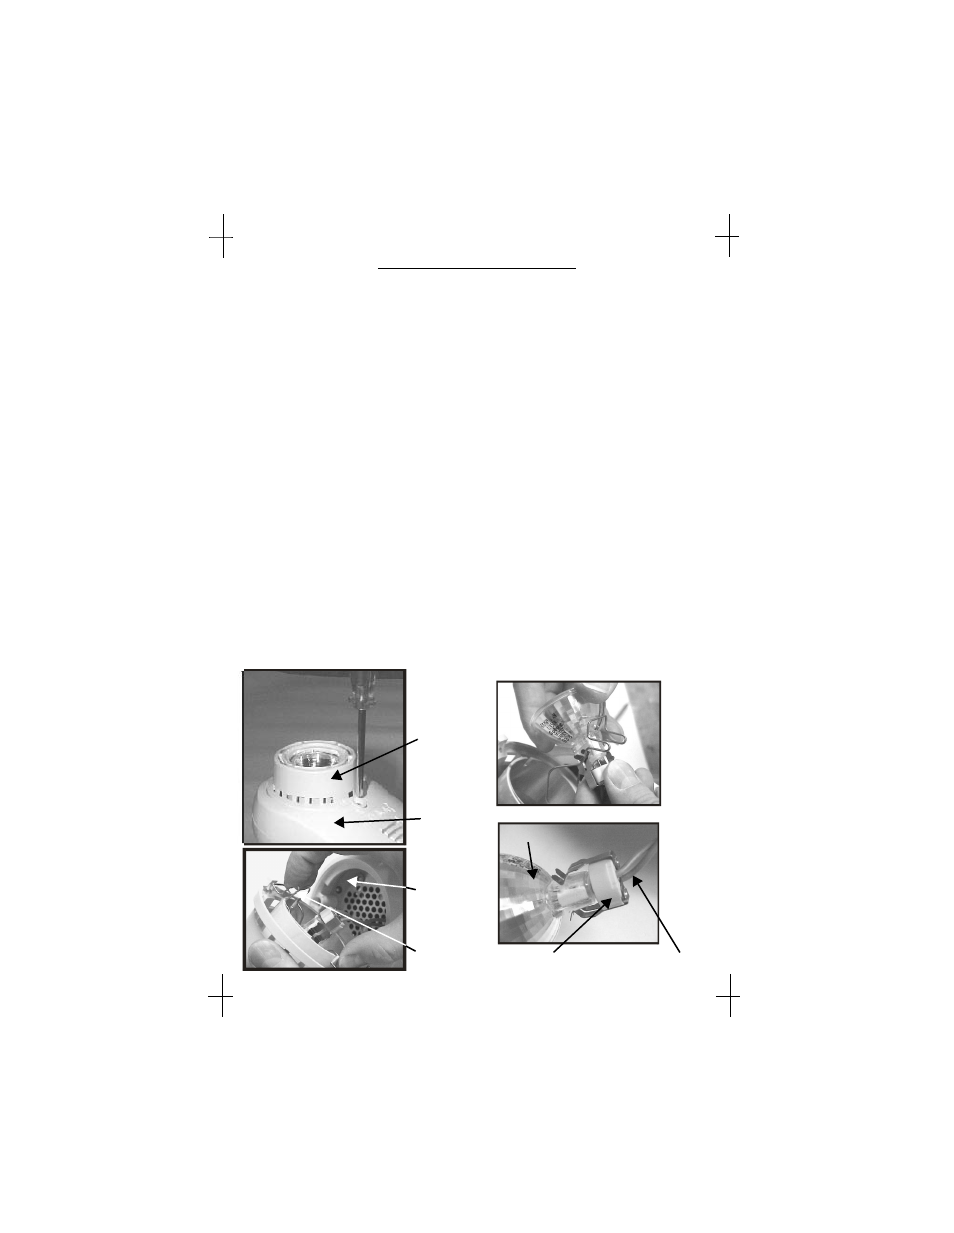
Exposing the Lamp (See Figure #1)
•
Turn power switch to the off (“0”) position and unplug power cord from
outlet.
•
Rotate Light Assembly so that the lamp points up (towards ceiling).
•
Completely loosen screw in Lamp Housing and lift Lamp Housing to expose
lamp.
2.
Freeing the Lamp and Lamp Socket (See Figure #2)
•
Unclip the Lamp Retaining Wire from the Lamp Housing by pushing on wire
“ears” towards center and swing out as shown to free the Lamp and Lamp
Socket.
3.
Removing the Lamp Socket (See Figures #3 and 4)
•
Hold the Lamp reflector by its outer rim. Grasp the white sides of the lamp
Socket as shown (Figures 3 and 4) pulling on the Lamp Socket while rocking
it slightly to remove it from the Lamp. Do not pull on Lamp Socket Wires.
4.
Install the new Lamp
•
Verify that the lamp number located on the metal plate inside the Light
Assembly (Figure 2) matches the replacement lamp number.
•
Replace Lamp and reattach Lamp Retaining Wire to Lamp Housing.
•
Align Lamp pins to Lamp Socket holes and reconnect Lamp Socket.
•
Reinstall Lamp Housing onto Light Assembly by first engaging Lamp
Housing tab (opposite screw) into Light Assembly. Fully tighten screw.
•
Reconnect Power cord and verify Lamp operation.
Lamp Socket Wires
Lamp
Lamp Socket
Replacement
Lamp # on this
Plate
Light
Assembly
Lamp Housing
Lamp
Retaining
Wire
Figure 1
Figure 2
Figure 3
Figure 4