Welch Allyn iExaminer - Quick Reference Guide User Manual
Recommended settings
Before using the iExaminer application,
confirm that you have completed the
following:
• Attach the Welch Allyn iExaminer
to the PanOptic ophthalmoscope.
• Download the iExaminer
application from www.welchallyn.
com/iExaminer.
• Slide the iPhone into the iExaminer
adapter.
Note Screens in this Quick Reference
are from the iExaminer Pro version.
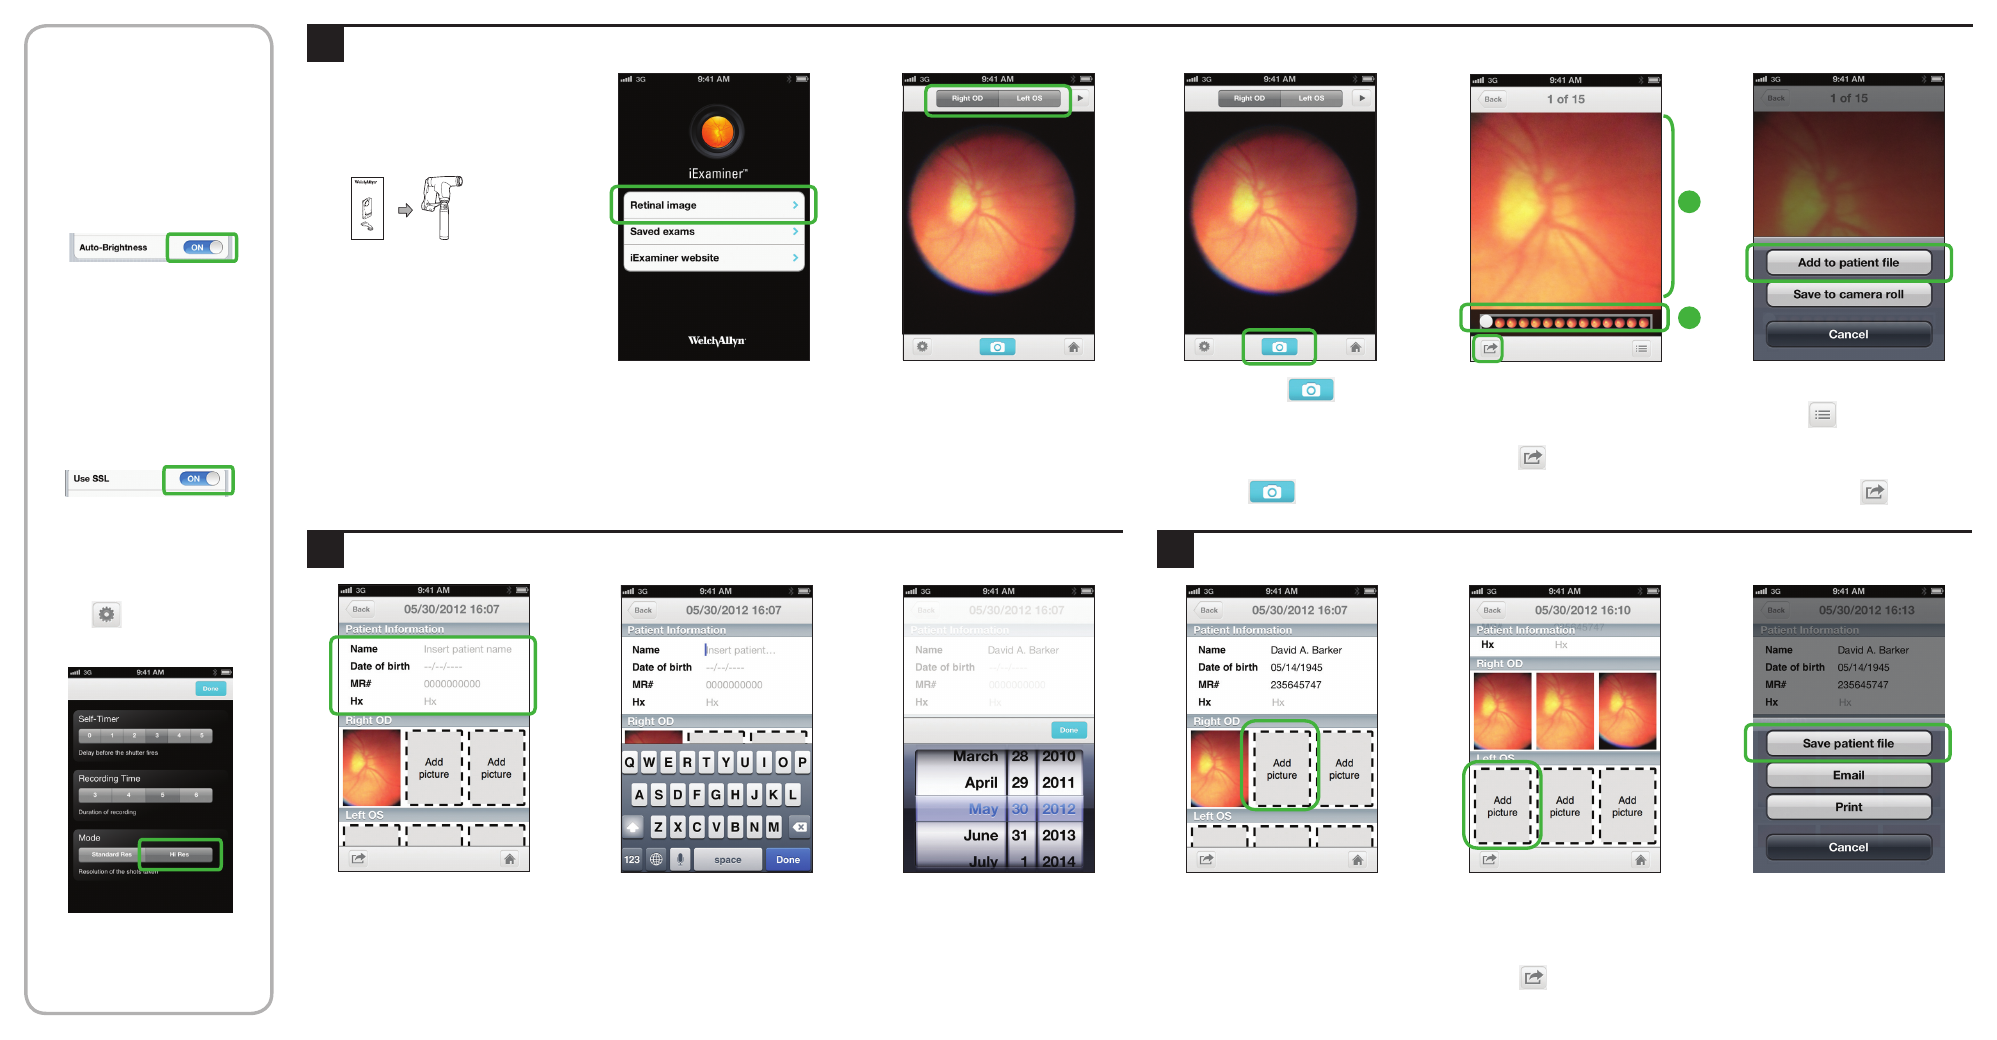
7. Use the slider to select a frame.
8. Pan and pinch to adjust the
image as desired.
9. Touch
.
1. Open the iExaminer application.
2. Touch Retinal image.
3. Choose Right OD or Left OS.
(Right OD is the default.)
4. Press and hold
.
5. Position the PanOptic and
iExaminer in front of the
selected eye to capture the
desired image in multiple frames.
6. Release
.
10. Touch Add to patient file.
11. Touch
.
12. Proceed to section 2.
Note To save an image to the
camera roll, touch
, and
then touch Save to camera roll.
Capture a retinal image and add to patient file
Edit and save a patient file
Enter patient information
7
8
1. To add additional images for
the Right OD, touch Add picture,
then repeat steps 7-11 in
section 1 above.
Note You can save up to 3 frames
for each eye.
2. To capture a retinal image of
the Left OS, touch Add picture,
then repeat steps 4-11 in
section 1 above.
3. Touch
.
2. Use the keyboard (shown above)
to enter Name, MR#, and Hx.
3. Touch Done after each entry.
1. To enter patient information,
touch the active area of each
field you want to change.
4. Use the picker (shown above)
to enter date of birth.
5. Touch Done.
4. When patient file is complete,
touch
Save patient file to save.
1
3
2
iExaminer
Assembly Instructions
(See the iExaminer
Assembly Instruction)
Recommended Settings
To optimize your iExaminer application,
adjust the following iPhone and
iExaminer settings.
Brightness
1. On the Home screen, touch Settings.
2. Touch Brightness.
3. Enable Auto-Brightness.
SSL encryption for email
1. Touch Settings.
2. Touch Mail, Contacts, Calendars.
3. Touch your established email account.
4. Touch Account.
5. Touch Advanced.
6. Enable Use SSL.
Mode (Resolution)
1. Launch the iExaminer application.
2. Touch Retinal image.
3. Touch
.
4. Touch Hi Res.
5. Touch Done.