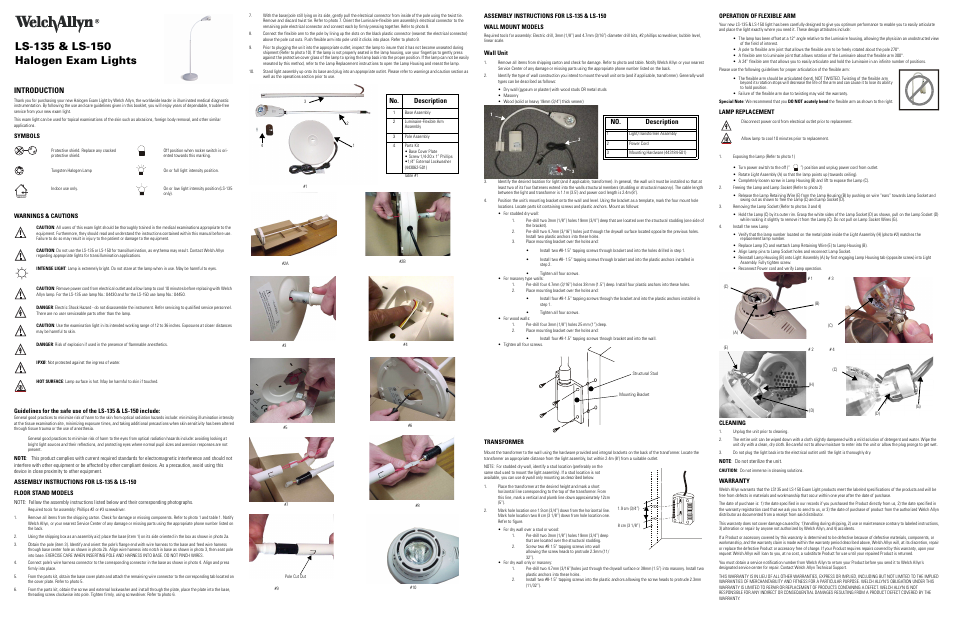
Welch Allyn LS-150 Halogen Exam Lights - User Manual User Manual
Introduction, No. description
This manual is related to the following products:
Table of contents
Document Outline
- INTRODUCTION
- LS-135 & LS-150 Halogen Exam Lights
- SYMBOLS
- Protective shield. Replace any cracked protective shield.
- Off position when rocker switch is oriented towards this marking.
- Tungsten Halogen Lamp
- On or full light intensity position.
- Indoor use only.
- On or low light intensity position (LS-135 only).
- CAUTION: All users of this exam light should be thoroughly trained in the medical examinations appropriate to the equipment. Fur...
- CAUTION: Do not use the LS-135 or LS-150 for transillumination, as erythema may result. Contact Welch Allyn regarding appropriate lights for transillumination applications.
- INTENSE LIGHT: Lamp is extremely bright. Do not stare at the lamp when in use. May be harmful to eyes.
- CAUTION: Remove power cord from electrical outlet and allow lamp to cool 10 minutes before replacing with Welch Allyn lamp. For the LS-135 use lamp No.: 04430 and for the LS-150 use lamp No.: 04450.
- DANGER: Electric Shock Hazard - do not disassemble the instrument. Refer servicing to qualified service personnel. There are no user serviceable parts other than the lamp.
- CAUTION: Use the examination light in its intended working range of 12 to 36 inches. Exposures at closer distances may be harmful to skin.
- DANGER: Risk of explosion if used in the presence of flammable anesthetics.
- IPXØ: Not protected against the ingress of water.
- HOT SURFACE: Lamp surface is hot. May be harmful to skin if touched.
- Guidelines for the safe use of the LS-135 & LS-150 include:
- ASSEMBLY INSTRUCTIONS FOR LS-135 & LS-150
- FLOOR STAND MODELS
- 1. Remove all items from the shipping carton. Check for damage or missing components. Refer to photo 1 and table 1. Notify Welch Allyn, or your nearest Service Center of any damage or missing parts using the appropriate phone number listed on the back.
- 2. Using the shipping box as an assembly aid; place the base (item 1) on its side oriented in the box as shown in photo 2a.
- 3. Obtain the pole (item 3). Identify and orient the pole’s flange end with wire harness to the base and feed wire harness throu...
- 4. Connect pole’s wire harness connector to the corresponding connector in the base as shown in photo 4. Align and press firmly into place.
- 5. From the parts kit, obtain the base cover plate and attach the remaining wire connector to the corresponding tab located on the cover plate. Refer to photo 5.
- 6. From the parts kit, obtain the screw and external lockwasher and install through the plate, place the plate into the base, threading screw clockwise into pole. Tighten firmly, using screwdriver. Refer to photo 6.
- 7. With the base/pole still lying on its side, gently pull the electrical connector from inside of the pole using the twist tie....
- 8. Connect the flexible arm to the pole by lining up the slots on the black plastic connector (nearest the electrical connector) above the pole cut outs. Push flexible arm into pole until it clicks into place. Refer to photo 9.
- 9. Prior to plugging the unit into the appropriate outlet, inspect the lamp to insure that it has not become unseated during shi...
- 10. Stand light assembly up onto its base and plug into an appropriate outlet. Please refer to warnings and caution section as well as the operations section prior to use.
- ASSEMBLY INSTRUCTIONS FOR LS-135 & LS-150
- WALL MOUNT MODELS
- Wall Unit
- 1. Remove all items from shipping carton and check for damage. Refer to photo and table. Notify Welch Allyn or your nearest Service Center of any damage or missing parts using the appropriate phone number listed on the back.
- 2. Identify the type of wall construction you intend to mount the wall unit onto (and if applicable, transformer). Generally wall types can be described as follows:
- Wall Unit
- 1
- Light/Transformer Assembly
- 2
- Power Cord
- 3
- Mounting Hardware (443184-501)
- 3. Identify the desired location for light (and if applicable, transformer). In general, the wall unit must be installed so that...
- 4. Position the unit’s mounting bracket onto the wall and level. Using the bracket as a template, mark the four mount hole locations. Locate parts kit containing screws and plastic anchors. Mount as follows:
- 1. Pre-drill two 3mm (1/8”) holes 19mm (3/4”) deep that are located over the structural studding (one side of the bracket).
- 2. Pre-drill two 4.7mm (3/16”) holes just through the drywall surface located opposite the previous holes. Install two plastic anchors into these holes.
- 3. Place mounting bracket over the holes and:
- 1. Pre-drill four 4.7mm (3/16”) holes 38 mm (1.5”) deep. Install four plastic anchors into these holes.
- 2. Place mounting bracket over the holes and:
- 1. Pre-drill four 3mm (1/8”) holes 25 mm (1”) deep.
- 2. Place mounting bracket over the holes and:
- TRANSFORMER
- 1. Place the transformer at the desired height and mark a short horizontal line corresponding to the top of the transformer. From this line, mark a vertical and plumb line down approximately 12cm (5”).
- 2. Mark hole location one 1.9 cm (3/4”) down from the horizontal line. Mark hole location two 8 cm (3 1/8”) down from hole location one. Refer to figure.
- 1. Pre-drill two 3mm (1/8”) holes 19mm (3/4”) deep that are located over the structural studding.
- 2. Screw two #8 1.5” tapping screws into wall allowing the screw heads to protrude 2.3mm (11/ 32”).
- 1. Pre-drill two 4.7mm (3/16”)holes just through the drywall surface or 38mm (1.5”) into masonry. Install two plastic anchors into these holes.
- 2. Install two #8-1.5” tapping screws into the plastic anchors allowing the screw heads to protrude 2.3mm (11/32”).
- OPERATION OF FLEXIBLE ARM
- LAMP REPLACEMENT
- CLEANING
- 1. Unplug the unit prior to cleaning.
- 2. The entire unit can be wiped down with a cloth slightly dampened with a mild solution of detergent and water. Wipe the unit dry with a clean, dry cloth. Be careful not to allow moisture to enter into the unit or allow the plug prongs to get wet.
- 3. Do not plug the light back into the electrical outlet until the light is thoroughly dry.
- WARRANTY
- CASTER BASE ACCESSORY ASSEMBLY INSTRUCTIONS
- When ordering replacement parts for your Caster Base Accessory, please use the following numbers:
- TABLE CLAMP ACCESSORY ASSEMBLY
- SPECIFICATIONS Approximate Physical Dimensions
- SERVICE INFORMATION
- ORDERING INFORMATION
- 04450
- Halogen replacement lamp for LS-150 Halogen Exam Light
- 04430
- Halogen replacement lamp for LS-135 Halogen Exam Light
- 44350
- Caster base accessory, LS-135 & LS-150 Halogen Exam Light
- (Floor Stand Models Only)
- 44101
- Table Clamp Accessories (Wall mount Models Only)
- 44301
- Rail Mount Accessory (Wall mount Models Only)
- DISASSEMBLY INSTRUCTIONS
- 1. Turn the power switch to the OFF position ( ) and unplug the cord from the outlet.
- 2. Using a small flat head screwdriver, CAREFULLY pull back the tabs at the top of the pole slightly - just enough to disengage them from the black plastic insert in the pole.
- 3. Pull up on the bottom end of the flexible arm. Unplug the electrical connector and remove Luminaire-Flexible Arm assembly from the pole.
- 4. Tilt the pole/base onto its side and unscrew the large phillips head screw located on the bottom center of the base.
- 5. Remove the metal base cover plate and disconnect the connector attached to it.
- 6. Disconnect the remaining electrical connector from the base and pull the pole out of the base.
- 7. Securely wrap the three components (base, pole, and Luminaire assembly) and loose parts in suitable protective packaging for shipment to your authorized service center.
- 1. Turn the power switch to the OFF position ( ) and unplug the cord from the outlet.
- 2. Pull up on transformer to remove it from its mounting screws.
- 3. Unscrew the four screws mounting the unit to the wall. For units fitted with the table clamp accessory, simply remove clamp from the table.
- 4. Securely wrap the components (lamp assembly and transformer) in suitable protective packaging for shipment to your authorized service center.
- DISASSEMBLY INSTRUCTIONS
- 44300
- 120v~60Hz, 400mA
- 12v~2.9A
- 250v, 500mA
- 35w
- 525fc (1)
- 29 cm
- (11.4”)
- 30.5 cm min
- (12” min) (2)
- 3000K
- 5,000 hrs (4)
- 7.8 kg
- (17.3 lbs)
- 2.9 M
- (9.5’)
- 44302
- 230v~50Hz, 250mA
- 12v~2.9A
- 250v, 315mA
- 35w
- 525fc (1)
- 29 cm
- (11.4”)
- 30.5 cm min
- (12” min) (2)
- 3000K
- 5,000 hrs (4)
- 7.8 kg
- (17.3 lbs)
- 2.9 M
- (9.5’)
- 44303
- 100v~50/60Hz,
- 500mA
- 12v~2.9A
- 250v, 630mA
- 35w
- 525fc (1)
- 29 cm
- (11.4”)
- 30.5 cm min
- (12” min) (2)
- 3000K
- 5,000 hrs (4)
- 7.8 kg
- (17.3 lbs)
- 2.9 M
- (9.5’)
- 44304
- 230/240v~50Hz, 250mA
- 12v~2.9A
- 250v, 315mA
- 35w
- 525fc (1)
- 29 cm
- (11.4”)
- 30.5 cm min
- (12” min) (2)
- 3000K
- 5,000 hrs (4)
- 7.8 kg
- (17.3 lbs)
- 2.9 M
- (9.5’)
- 44306
- 240v~50Hz, 250mA
- 12v~2.9A
- 250v, 315mA
- 35w
- 525fc (1)
- 29 cm
- (11.4”)
- 30.5 cm min
- (12” min) (2)
- 3000K
- 5,000 hrs (4)
- 7.8 kg
- (17.3 lbs)
- 2.9 M
- (9.5’)
- 44310
- 120v~60Hz, 400mA
- 12v~2.9A
- 250v, 500mA
- 35w
- 525fc (1)
- 29 cm
- (11.4”)
- 30.5 cm min
- (12” min) (2)
- 3000K
- 5,000 hrs (4)
- 3.3 kg (7.3lbs)
- 2.4M (8’)
- 44312
- 230v~50Hz, 250mA
- 12v~2.9A
- 250v, 315mA
- 35w
- 525fc (1)
- 29 cm
- (11.4”)
- 30.5 cm min
- (12” min) (2)
- 3000K
- 5,000 hrs (4)
- 3.3 kg (7.3lbs)
- 2.4M (8’)
- 44313
- 100v~50/60Hz, 250mA
- 12v~2.9A
- 250v, 630mA
- 35w
- 525fc (1)
- 29 cm
- (11.4”)
- 30.5 cm min
- (12” min) (2)
- 3000K
- 5,000 hrs (4)
- 3.3 kg (7.3lbs)
- 2.4M (8’)
- 44314
- 230/240v ~50Hz, 500mA
- 12v~2.9A
- 250v, 315mA
- 35w
- 525fc (1)
- 29 cm
- (11.4”)
- 30.5 cm min
- (12” min) (2)
- 3000K
- 5,000 hrs (4)
- 3.3 kg (7.3lbs)
- 2.4M (8’)
- 44316
- 240v~50Hz, 250mA
- 12v~2.9A
- 250v, 315mA
- 35w
- 525fc (1)
- 29 cm
- (11.4”)
- 30.5 cm min
- (12” min) (2)
- 3000K
- 5,000 hrs (4)
- 3.3 kg (7.3lbs)
- 2.4M (8’)
- 44500
- 120v~60Hz, 600mA
- 12v~4.2A
- 350v, 800mA
- 50w
- 576fc
- 33 cm
- (13”)
- 30.5 cm min
- (12” min) (2)
- 4700K
- 3,000 hrs (4)
- 7.9 kg
- (17.4 lbs)
- 2.9 M
- (9.5’)
- 44502
- 230v~50Hz, 350mA
- 12v~4.2A
- 250v, 500mA
- 50w
- 576fc
- 33 cm
- (13”)
- 30.5 cm min
- (12” min) (2)
- 4700K
- 3,000 hrs (4)
- 7.9 kg
- (17.4 lbs)
- 2.9 M
- (9.5’)
- 44503
- 100v~50/60Hz, 750mA
- 12v~4.2A
- 250v, 1000mA
- 50w
- 576fc
- 33 cm
- (13”)
- 30.5 cm min
- (12” min) (2)
- 4700K
- 3,000 hrs (4)
- 7.9 kg
- (17.4 lbs)
- 2.9 M
- (9.5’)
- 44504
- 230/240v~50Hz, 350mA
- 12v~4.2A
- 250v, 500mA
- 50w
- 576fc
- 33 cm
- (13”)
- 30.5 cm min
- (12” min) (2)
- 4700K
- 3,000 hrs (4)
- 7.9 kg
- (17.4 lbs)
- 2.9 M
- (9.5’)
- 44506
- 240v~50Hz, 350mA
- 12v~4.2A
- 250v, 500mA
- 50w
- 576fc
- 33 cm
- (13”)
- 30.5 cm min
- (12” min) (2)
- 4700K
- 3,000 hrs (4)
- 7.9 kg
- (17.4 lbs)
- 2.9 M
- (9.5’)
- 44510
- 120v~60Hz, 600mA
- 12v~4.2A
- 250v, 800mA
- 50w
- 576fc
- 33 cm
- (13”)
- 30.5 cm min
- (12” min) (2)
- 4700K
- 3,000 hrs (4)
- 3.4kg
- (7.4 lbs)
- 2.4M (8’)
- 44512
- 230v~50Hz, 350mA
- 12v~4.2A
- 250v, 500mA
- 50w
- 576fc
- 33 cm
- (13”)
- 30.5 cm min
- (12” min) (2)
- 4700K
- 3,000 hrs (4)
- 3.4kg
- (7.4 lbs)
- 2.4M (8’)
- 44513
- 1000v~50/ 60Hz,750mA
- 12v~4.2A
- 250v, 1000mA
- 50w
- 576fc
- 33 cm
- (13”)
- 30.5 cm min
- (12” min) (2)
- 4700K
- 3,000 hrs (4)
- 3.4kg
- (7.4 lbs)
- 2.4M (8’)
- 44514
- 230/240v ~50Hz, 350mA
- 12v~4.2A
- 250v, 500mA
- 50w
- 576fc
- 33 cm
- (13”)
- 30.5 cm min
- (12” min) (2)
- 4700K
- 3,000 hrs (4)
- 3.4kg
- (7.4 lbs)
- 2.4M (8’)
- 44516
- 240v~50Hz, 350mA
- 12v~4.2A
- 250v, 500mA
- 50w
- 576fc
- 33 cm
- (13”)
- 30.5 cm min
- (12” min) (2)
- 4700K
- 3,000 hrs (4)
- 3.4kg
- (7.4 lbs)
- 2.4M (8’)