Threading the machine, Paso 2, Paso 3 – SINGER 2866 User Manual
Page 30: Paso 4, Pas 3, Pas 4, Pas 2
65
28
Threading the
machine
P
reparing
the
machine
4
1
2
3
6
5
Boutonniére et boutons
Ojales y botones
Boutonniére et boutons
Ojales y botones
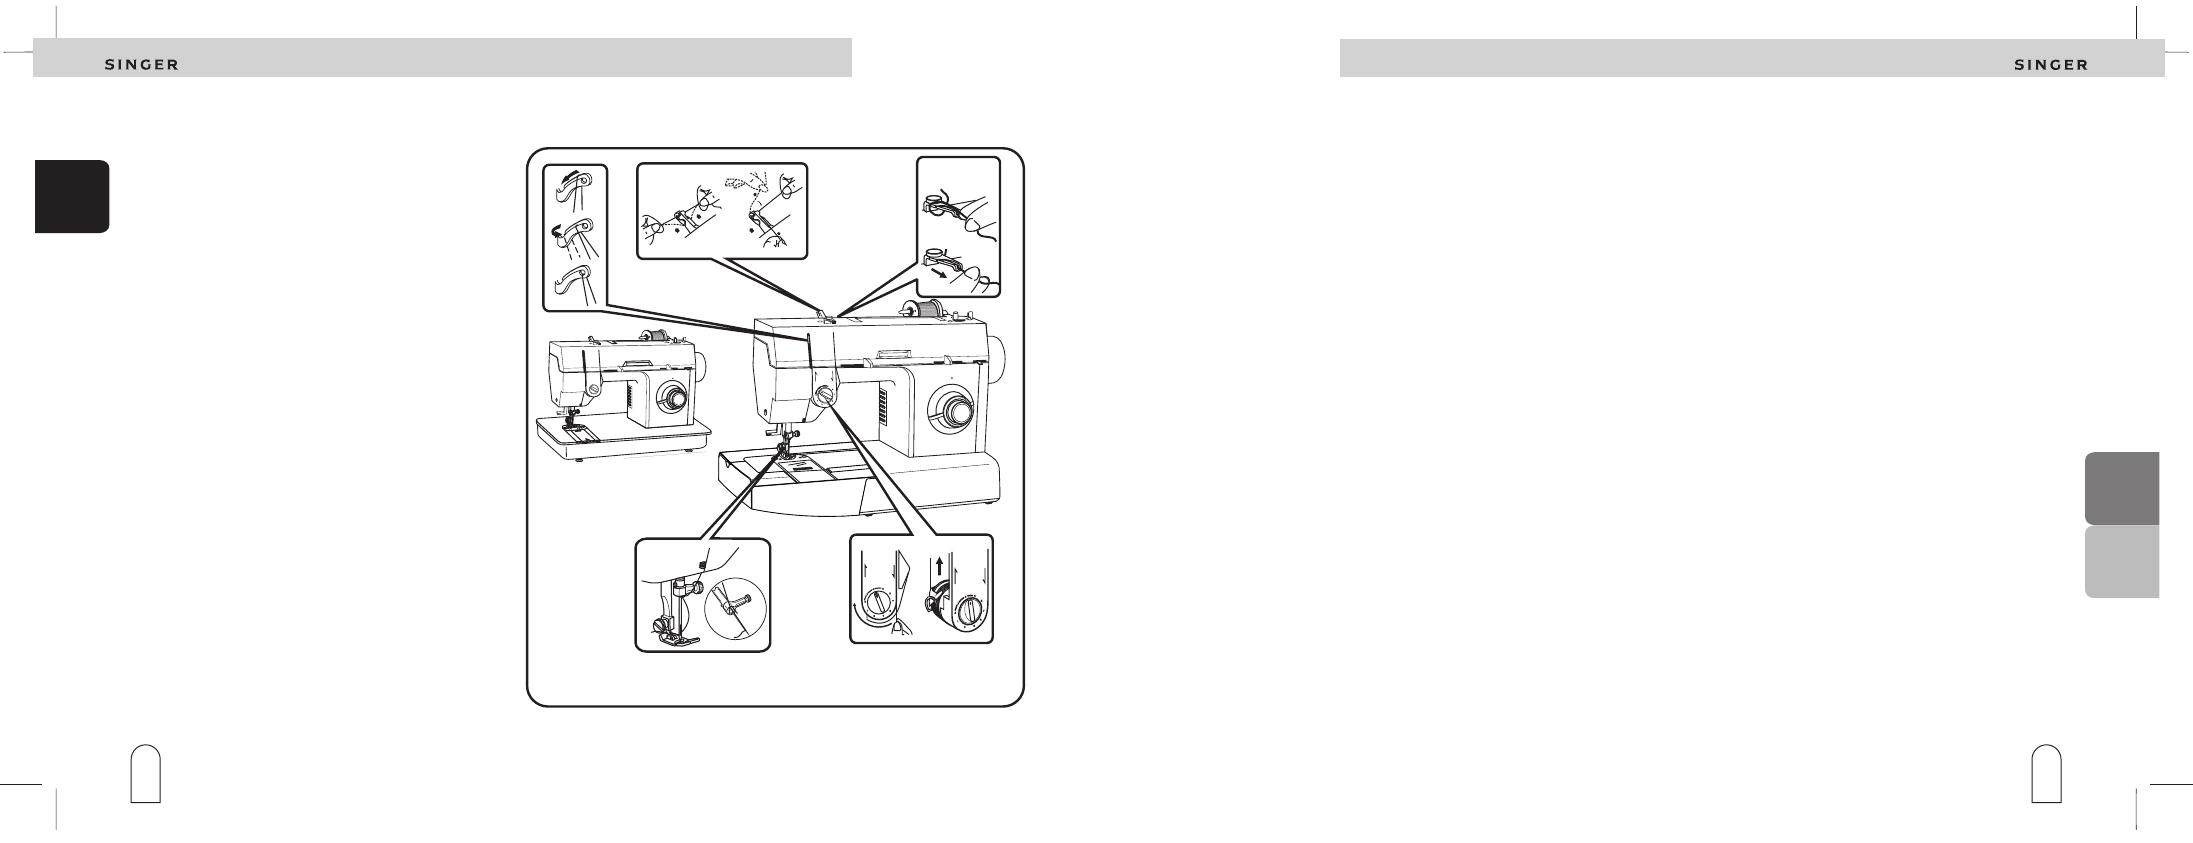
1. Place spool or spun on spool pin. Use adequate
clamp to firmly fix it.
2. Lift the presser foot, and turn the hand wheel
towards your direction until the take-up lever
reaches its highest position.
3. Lead thread passing it first through the lower
slot of the thread guide.
Next through the upper slot, leading the
thread to the right and around (illustra-tion
1).
4. Pass the thread through the other thread
guide, by inserting it from the botton to the
top (illustration 2).
5. Pass the thread round the tensor, so that they
remain between the tensor discs (illustration
3).
6. Pull the thread slightly up, by raising the
spring (illustration 4) and allowing that the
t h r e a d t o s l i d e i n s i d e t h e p r o t e c t o r
(illustration 5).
7. Pass the thread through the thread guide, as
shown in the illustration 6.
1
. Tournez le volant vers vous jusqu'à ce que
l'aiguille soit hors du tissu.
2. Tournez le sélecteur de largeur de point
automatique vers la pas 2.
3. Faites au moins quatre points de couture,
finissant à gauche (point 4).
Paso 2
1
.
Gire el volante en su dirección hasta que la aguja
se encuentre afuera de la tela.
2. Gire el selector automático de la ojaladora en el
paso 2.
3. Haga por lo menos cuatro puntadas de costura,
terminando a la izquierda (punto 4).
Paso 3
.
Gire el volante en su dirección hasta que la aguja se
encuentre afuera de la tela.
2. Gire el selector automático de la ojaladora en el
paso 3.
3. Cosa hasta el comienzo de la primera lateral (punto
5).
1
Paso 4
.
Gire el volante en su dirección hasta que la aguja se
encuentre afuera de la tela.
2. Gire el selector automático de la ojaladora en el
paso 4.
3. Haga por lo menos cuatro puntos, terminando en el
punto 6.
4. Levante el pie calzador y retire la tela de la
máquina.
5. Con una tijera de punta fina o abridor de ojales,
corte cuidadosamente la abertura del ojal.
1
Pas 3
. Tournez le volant vers vous, jusqu'à ce que
l'aiguille soit hors du tissu.
2. Tournez le sélecteur de largeur de point
automatique vers le pas 3.
3. Cousez jusqu'au début de la première latérale
(point 5).
Pas 4
. Tournez le volant vers vous, jusqu'à ce que
l'aiguille soit hors du tissu.
2. Tournez le sélecteur de largeur de point
automatique vers le pas 4.
3. Faites au moins quatre points, finissant sur le
point 6.
4. Levez le pied presseur et enlevez le tissu de la
machine.
5. A l'aide de ciseaux fins ou d'un découseur, coupez
soigneusement l'ouverture de la boutonnière.
1
1
Pas 2