Assembling and disassembling the appliance – Gastroback 40986 Vital Mixer Pro User Manual
Page 10
50
51
assEmBliNg aND DisassEmBliNg thE aPPliaNCE
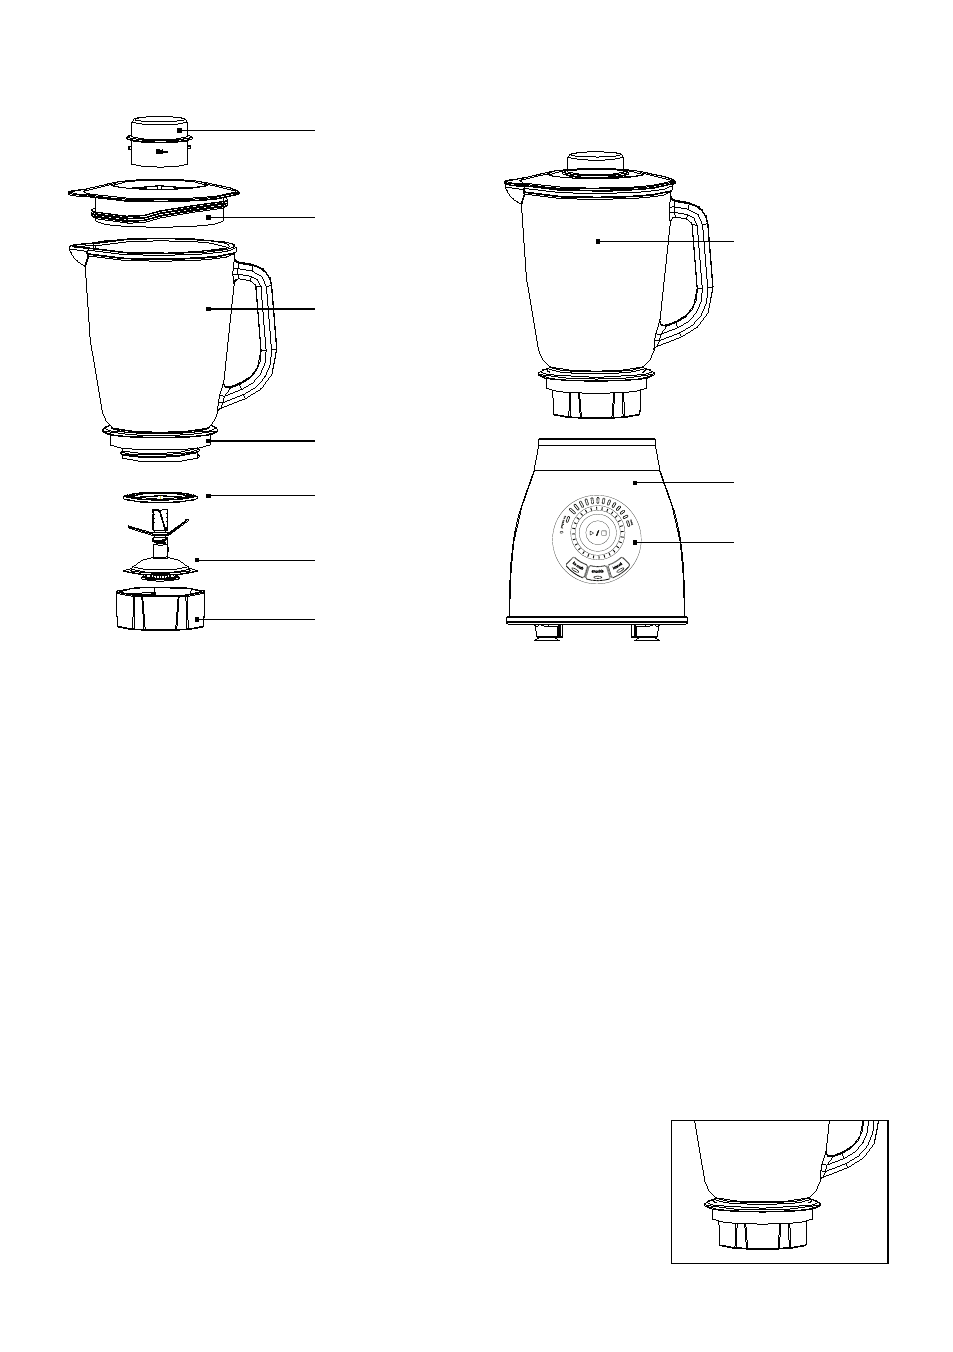
assembling the blender jug
Make sure that the blender jug and all parts are clean before you assemble the blender.
CautioN: Make sure that the appliance is turned off.
1.
Place the silicone seal (5) under the inner edge of the knife unit (6).
Note: The kinve unit is provided with a silicone seal which rests loosely on the version of the
knife unit. Make sure that the silicone seal is positioned properly on the socket of the blade
unit. The silicone seal must be clean and without deposits, cracks and wrinkles.
2.
Insert the knife unit (6) with silicone seal (5) onto the socket (7).
3.
Screw the socket (7) with knife unit (6) and silicone seal (5) on the glass blender jug (3)
firmly. Place blender jug upside down and turn the plastic socket with knife and silicone seal
on the blender jug by turning it clockwise to lock the jug bottom.
4.
Now place the blender jug on the motor block. CautioN: Make sure that the mixer
is switched off (rotary switch setting ›0‹). The measuring scale should face forward and
the handle shuld point to the right (see pic. 1). The appliance can only operate when the
Start-/Stop-button or a program is activated and the power cord is plugged in.
5.
After inserting all the ingredients in the blender jug, place the lid
(2) (with the tongue from the lid into the drain of the blender jug)
onto the blender jug by pushing it down.
Barlot
(inner lid)
Lid
Blender jug
with handle
Jug socket
Silicone seal
6-fold stainless
steel knive unit
Socket of
the knives unit
Pic. 1
Mixing jug
mounted
Motor base
Control Panel
Rotary Switch with
operating menu