Drip rail, Vertical glazing, Caulking – Coral Industries 7000 Swing Door/ILP - 600 User Manual
Page 6
600 7/09
Clean bottom channel of door before mounting drip
rail. After mounting, do not remove or reposition.
Allow 72 hours curing time for maximum bond.
P
G
Drip
Rail
INSIDE OF SHOWER
Drip Rail Plug
1/2"
1/4" drop from
Opening Side
to Hinge Side
for drainage
Door
Panel
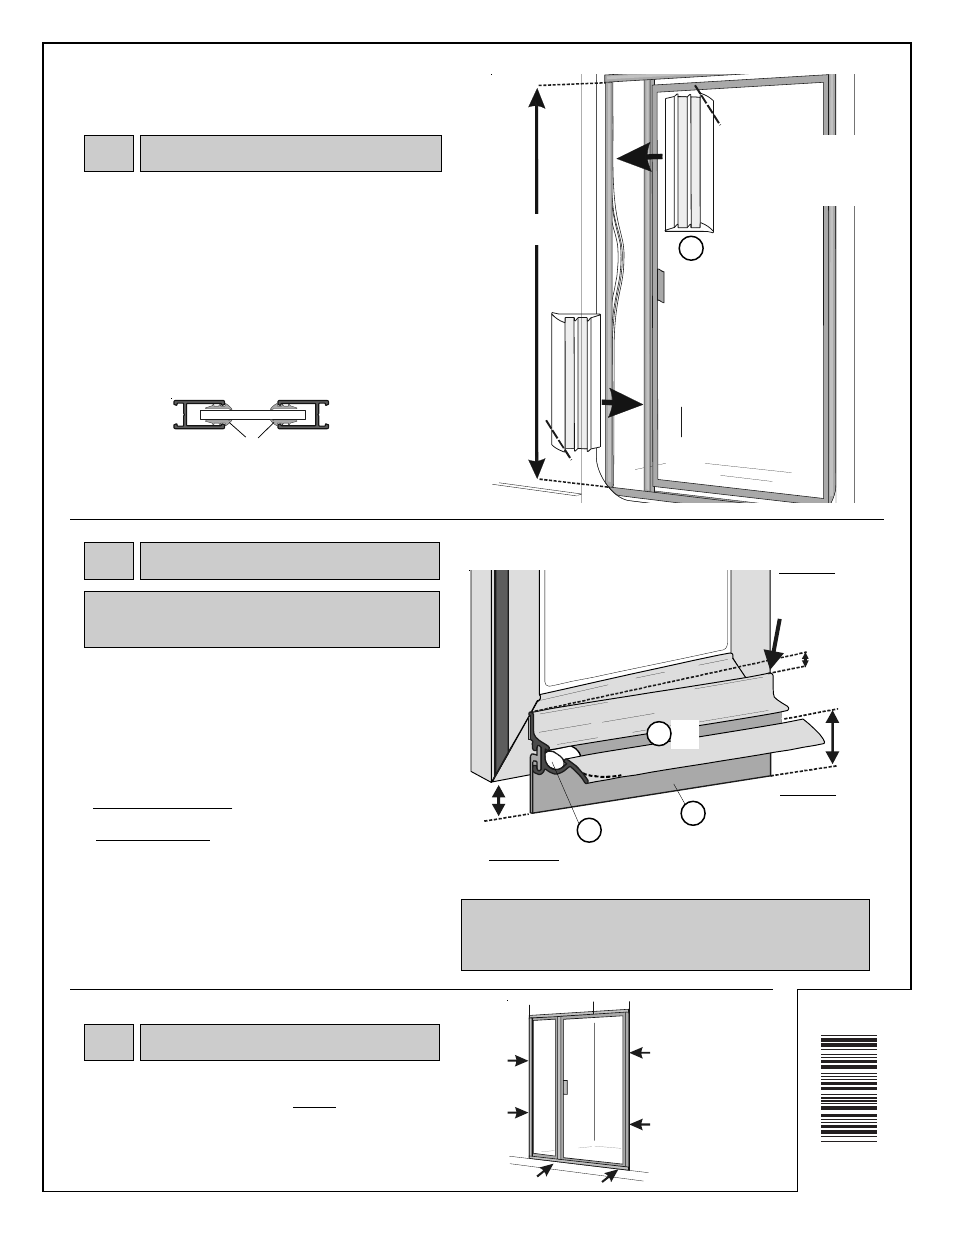
From inside shower, measure width of door panel at bottom.
Drip rail (G) should be 1/2" shorter than door panel width. If
longer, cut to proper length. Slide vinyl sweep (G) into slot on
back of drip rail. Trim ends even with edges of drip rail.
Smooth cut end of drip cap fin with a file to remove sharp point.
Position drip rail on inside surface of door panel as described
below:
• Side-to-side placement: Edge of drip rail should be flush with
edge of door panel on hinge side of door.
• Vertical placement: Vinyl sweep should extend 1/2" below
bottom of door panel on opening side. Angle drip rail so that
vinyl sweep extends 3/4" below bottom of door panel on hinge
side. This will create an 1/4" slope from opening to hinge side
for water drainage.
Mark position. Remove drip rail from door. Peel protective
cover from tape, and press into place. Insert drip rail plug (P)
into groove of drip rail on opening side of door.
13
Drip Rail
(G)
Opening Side
Hinge Side
Drip rail flush
with edge of
Door Panel
G
Vinyl Sweep
3/4"
Hinge Side
Drip rail may be additionally secured using 8A x 3/8" truss
head screws. When drilling in door panel, make certain drill
does not hit glass. Glass is seated approximately 1/2" into
channel.
The use of a caulking compound will assure a water-tight seal
of your enclosure. Apply caulk along outside edge of enclosure
where metal and shower meet, especially where sill (bottom of
enclosure) meets base. If desired, caulk inside of enclosure
where jambs meet walls.
Z
Glazing =
Measurement + 1/4"
Vertical
Glazing
OUTSIDE OF
SHOWER
Measure length of panel glass from header to sill and
add 1/4”. Cut two pieces of vertical glazing (Z) and apply
on inside and outside of panel between glass and jambs.
Repeat for opposite side of panel glass.
For a smoother fit in corners where horizontal and vertical
glazings meet, the ends of vertical glazing may be trimmed
at a 45
0
angle. Trim only the exterior ridge of glazing. Do
not trim glazing that fits inside metal once installed.
12
Vertical Glazing
(Z)
Ends of vertical glazing may
be trimmed at a 45° (on exterior
ridge only) for a smoother fit in
corners where vertical and
horizontal glazing meet.
14
Caulking
VERTICAL CROSS SECTION
Vertical
Glazing
Jamb
Jamb
Caulk
Caulk
600