Permanent mounting, Warning – Code 3 DashLaser User Manual
Page 5
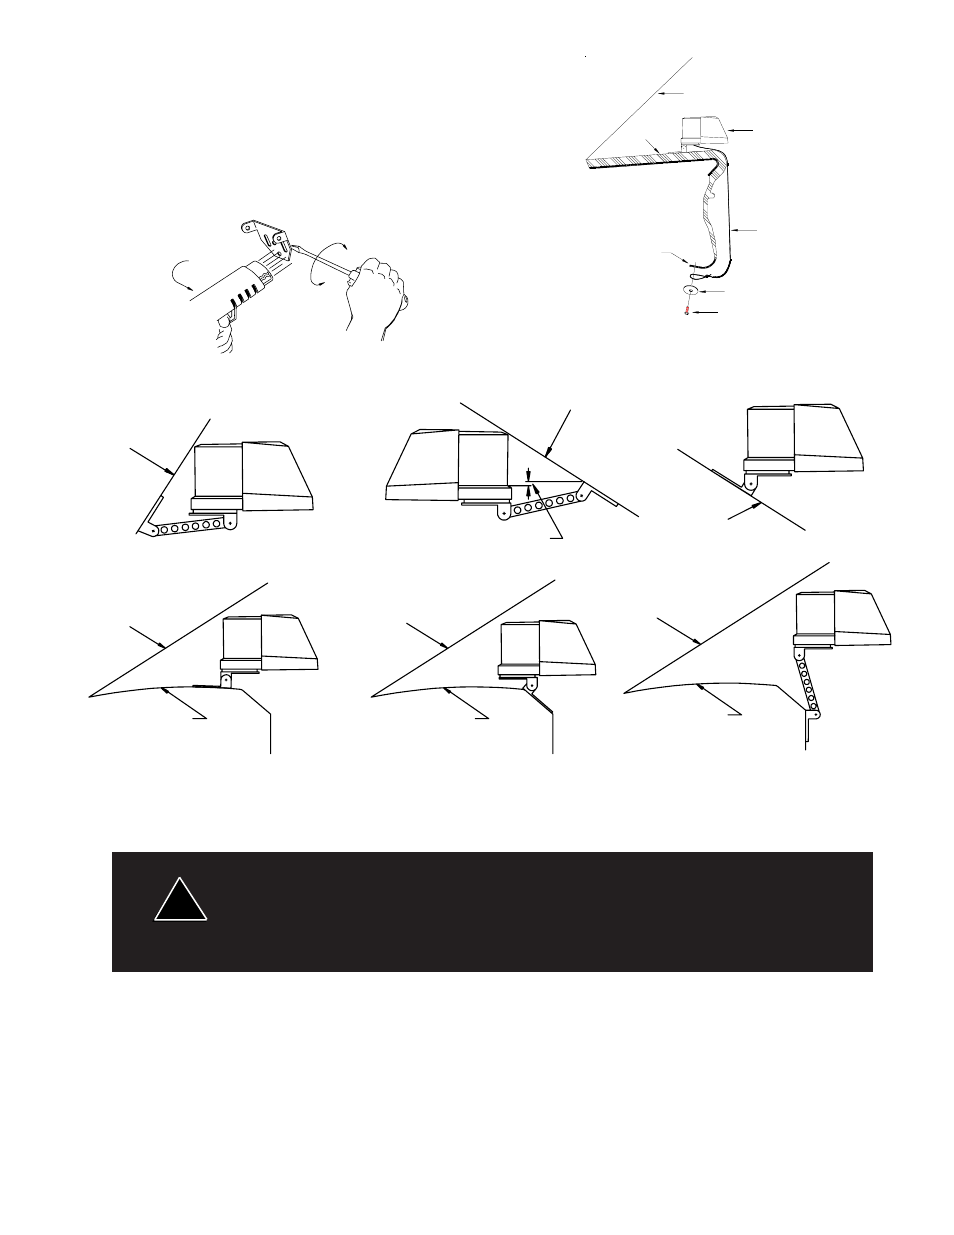
Permanent Mounting
BE CAREFUL NOT TO BLOCK
LIGHT WITH MOUNTING BKT.
VEHICLE
WINDSHIELD
!
WARNING!
Using non-factory specified screws and/or mounting brackets and/or the improper
number of screws may result in failure of mounting system and severe damage to
persons or the vehicle as well as loss of warranty coverage on the equipment.
1. Assemble and set up the bracket similar to the way described on page 4, using a level to keep it square.
Attach the bracket with a sheet-metal screw or through-bolt to the permanent mounting surface (the adhesive pad
may be used as a gasket).
2. If necessary, remove the section of the bracket that the DashLaser
®
will be mounted to.
3. Remove the screw holding the DashLaser's magnet in place. Align the holes in the bracket, magnet, and
dash light bottom plate, and replace with the supplied #8 x 7/8" screw, as shown.
4. Reassemble the bracket, level the light, and tighten the acorn nuts. You're ready to go.
Note: DO NOT externally mount the DashLaser upside down on the vehicle, to avoid excessive water leakage.
ROTATE
SCREWDRIVER
Removing the Adhesive Pad
1. Heat the adhesive area from the opposite side with a hot air
paint stripper or high-power hair dryer.
2. Carefully pry off with a wide flat head screwdriver or stiff
putty knife.
TETHER CORD
DASHLASER
WINDSHIELD
SCREW (SUPPLIED)
DASH
WASHER (SUPPLIED)
HEAT GUN
FIGURE 6
FIGURE 7
SHEET METAL
MOUNTING
SURFACE
MOUNTING
SURFACE
VEHICLE
WINDSHIELD
MOUNTING
SURFACE
VEHICLE
WINDSHIELD
VEHICLE
DASH
VEHICLE
DASH
VEHICLE
DASH
FIGURE 8
5