Warning, Interior mounting roof mounting – Code 3 DashLaser User Manual
Page 4
Your DashLaser comes with a multipurpose mounting kit. For interior use the bracket can be mounted to clean
glass or flat painted metal surfaces with the adhesive pad provided. The adhesive bonds quickly and requires the
installer to read and understand this section before mounting.
1. Study the various mounting configurations in the illustrations on page 5 and assemble your bracket in the
manner you think works best for your application.
2. Wash the window with a non-filming glass cleaner.
3. Place the magnet on the bracket assembly with tether cord as
illustrated on page 6 and hold it in the desired position. Use a small
level on the upper surface to square it up.
4. Once it is level and positioned to your liking, use a crayon or
laundry marker to indicate the position. Do not mark in the area
where adhesive will be applied.
5. Clean the mounting bracket face and let dry. Remove one
adhesive pad liner and stick it to the bracket, rubbing down hard.
6. Remove the second liner from the pad. With the DashLaser off
of the bracket, and placing your level horizontally on the bracket to
keep it squared up right to left, press the bracket onto the window
in the pre-marked position. Press firmly to assure good adhesion
- you can look from the outside of a window to see if the surface is
making good contact with no bubbles. Never attempt to make an
adhesive bond when the surface or air temperature is below 50°F.
It will not hold. Once a good bond is made, it is not sensitive to
temperatures from -20° to +180°F. We do not recommend mount-
ing to plastic dashboards with the adhesive pad since it will not
form an adequate bond with some plastics. Two additional screws
are included for attaching the bracket to surfaces where the self-
adhesive pad cannot be used. See page 5 for "Permanent
Mounting".
7. Once unit is attached, locate a place on or under the dash that is sheet metal for mounting the tether cord. Hold
the free end of the cord in position and make sure the Dashlaser cannot reach the passenger or driver. Then attach
tether cord to this section of sheet metal (not to plastic or rubber) as shown in figure 7.
See illustrations on page 4, 5 and 6 for proper installation of the tether cord when mounting inside vehicle.
!
WARNING!
Using non-factory specified screws and/or mounting brackets and/or the improper number of
screws may result in failure of mounting system and severe damage to vehicle as well as
loss of warranty coverage on the equipment.
This product is supplied with a tether cord for added user safety. DO NOT use this product
without the tether cord properly installed.
Interior Mounting
Roof Mounting
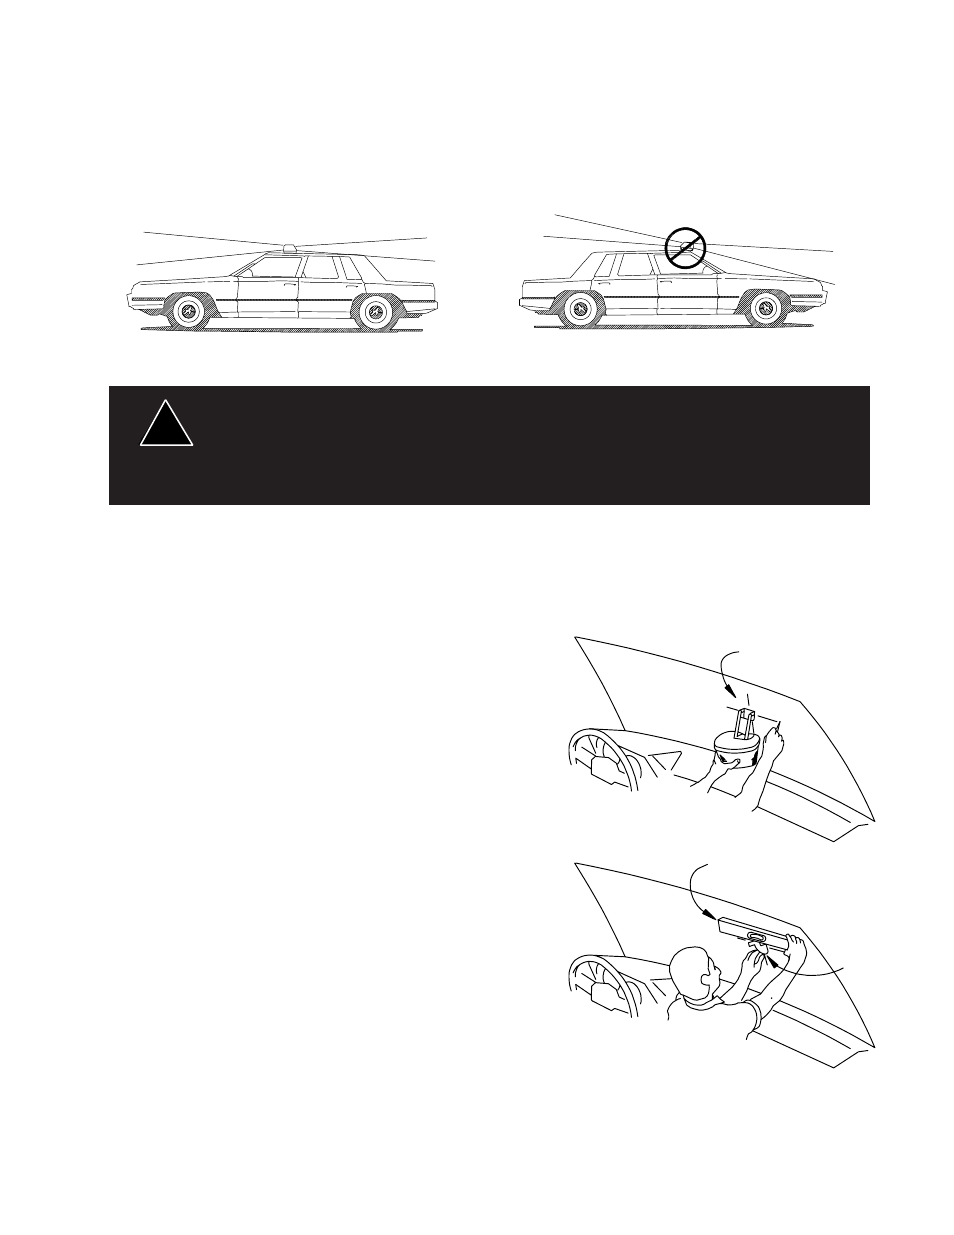
1. Park the vehicle on level ground. Use a carpenter's spirit level to be sure.
2. Place your DashLaser
®
, without the blinder, in the center of the roof.
3. Using a spirit level on the top of the dome, carefully move the device to where it is level (do not slide as it could
scratch the paint). This is the best location for maximum warning power. For future convenience, a small dot of
tape could be left on the roof to allow rapid accurate placement.
Be sure that the magnet is to the front of the vehicle and the slanted (motor) side is to the rear. The standard
DashLaser magnet is very reliable, but IS NOT SUITABLE for in-motion use on vinyl or convertible tops.
CORRECT MOUNTING
INCORRECT MOUNTING
LEVEL
CROSS HAIR
MARKS
MOUNTING
BRACKET
FIGURE 5
FIGURE 4
4