Dimensions, Standard mounting procedure – Code 3 Arch Beacon User Manual
Page 5
5
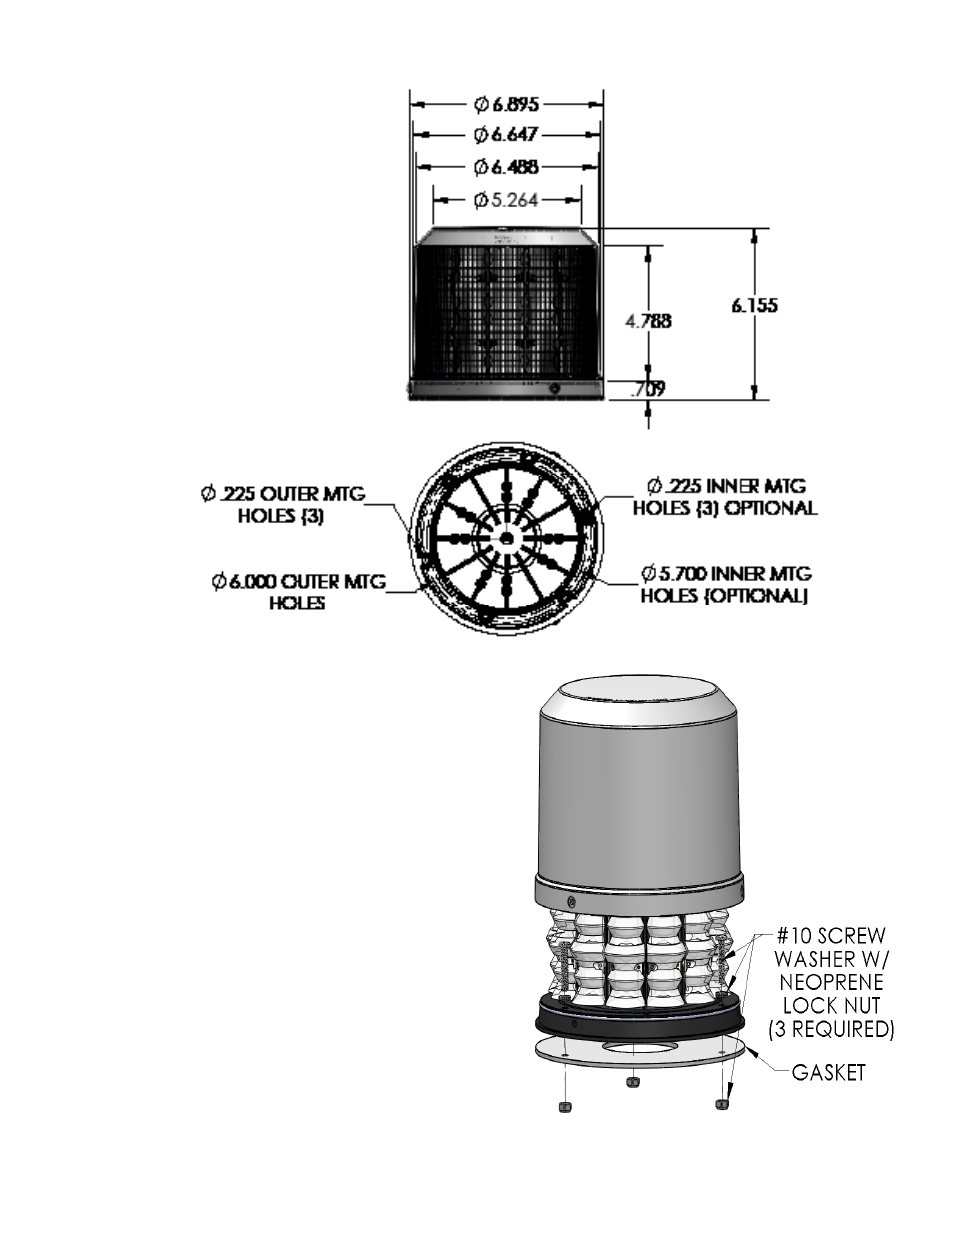
Dimensions:
(Basic dimensions are as shown)
1. Remove beacon outer lens.
Note: Two hole patterns are provided for the user. The stan
dard 6 inch dia pattern and optional 5.7 inch
dia pattern. Only three #10 fasteners are
required to securely mount the beacon assembly.
2. Choose hole pattern (6" dia or 5.7" dia). Identify the 3 holes
chosen as indicated on the base's label and punch out with a sharp
object.
3. Use the beacon base to locate holes on mounting surface. Holes
should accomodate a #10 fastener. A hole should be provided for
wiring access at the center of the mounting area. The hole should
be grommeted and sealed with RTV around the wiring.
4. Align the gasket and and perimeter of the beacon base and
punch out the 3 chosen mounting holes with a sharp object. Place
gasket and beacon assembly on mounting surface being careful
to align the mounting holes. Care should be taken to not pinch the
wiring when placing the beacon assembly.
5. Install three #10 fasteners, flat washers with neoprene backing,
and lock nuts (included) as shown to attach the assembly. Apply
RTV to the fastener holes during the installation.
6. Reinstall beacon outer lens.
Standard Mounting Procedure: