Assembly, Mounting saw to leg stand, Attaching elevating handwheel – Craftsman 315.220380 User Manual
Page 23
Attention! The text in this document has been recognized automatically. To view the original document, you can use the "Original mode".
ASSEMBLY
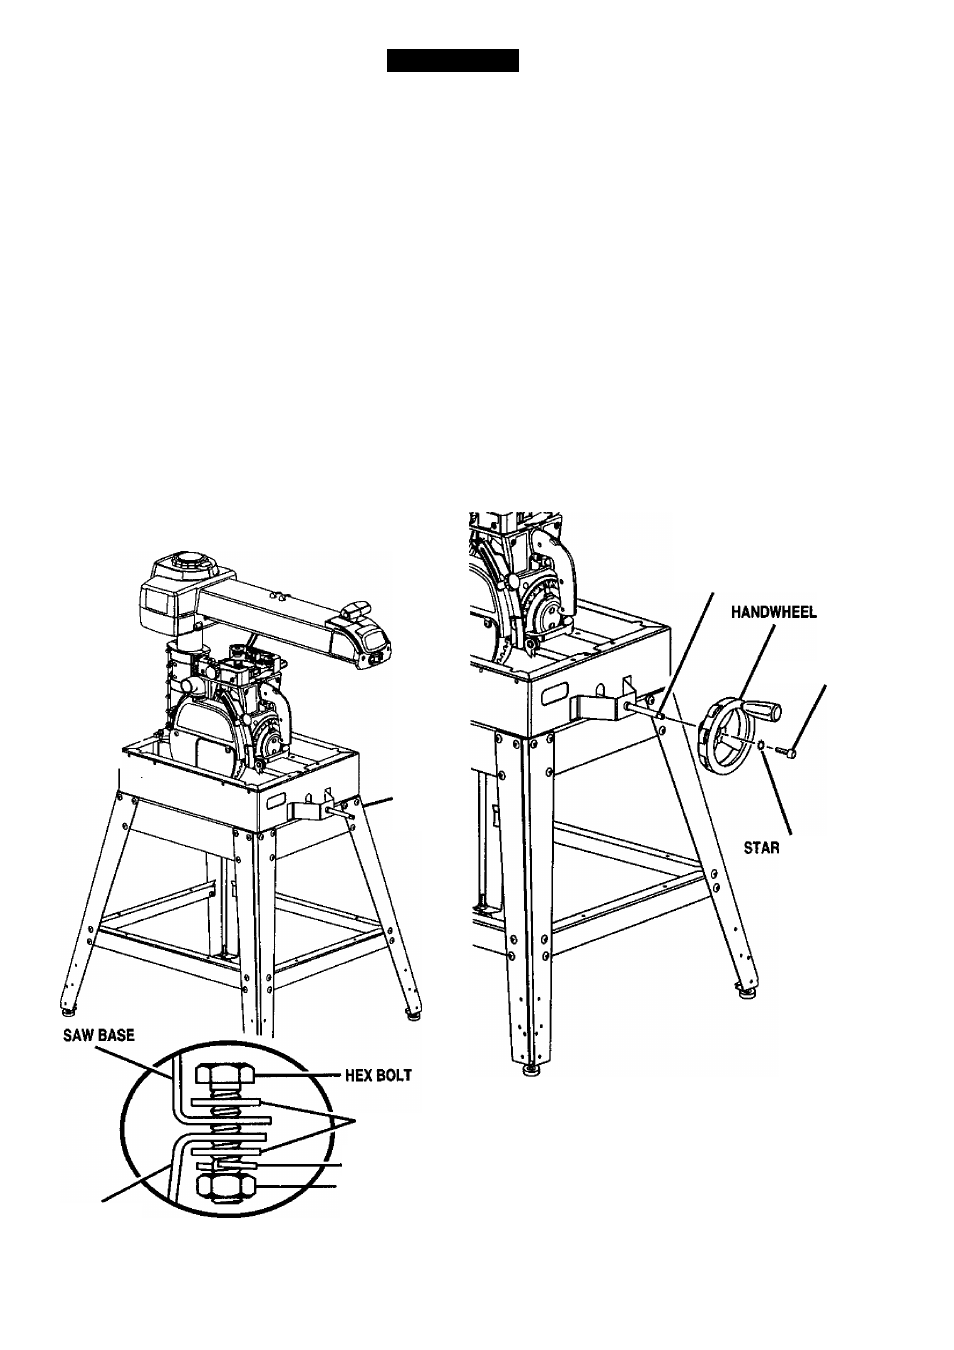
MOUNTING SAW TO LEG STAND
See
Figure 11.
A WARNING:
Firmly bolt the saw to the leg stand
to keep the saw from tipping, walking, or sliding.
■ Locate the following hardware from a small hard
ware bag:
4 hex bolts {5/16-18 x 5/8 in.)
4 iockwashers (5/16 in.)
8 flat washers (11/32 in.)
4 hex nuts (5/16-18)
■ Place the saw on top of the leg stand so the holes
in the saw base line up with the holes on top of the
teg stand braces.
■ Put a washer on a screw, and put the screw and
washer into the hole in the saw base. Cap with
another washer, then a lockwasher and a hex nut.
Hand tighten the set.
■ install the other three sets and securely tighten all
four sets with a 1/2 in. wrench.
SAW_
BASE
LEG
STAND
FLAT
WASHER
LOCKWASHER
HEX NUT
A WARNING:
Be sure the main power cord of
your saw is unplugged. Ignoring this precaution
could result in serious injury. Do not perform the
following steps unless the saw is unplugged.
The elevating handwheel adjusts the height of the
radial arm and the blade.
■ Take the handwheel, star washer, and screw
(10-24 X 5/8 in. Soc. Hd.) from the hardware bag.
■ Place the handwheel on the end of the elevating
shaft, which extends from the front of the saw base.
■ Place the star washer on the screw and thread
screw into the end of the shaft.
■ Securely tighten the screw with a 5/32 in. hex key.
■ Raise or lower the arm by turning the handwheel.
ATTACHING ELEVATING HANDWHEEL
See Figure 12.
ELEVATING
SHAFT
SCREW
WASHER
Fig. 12
LEG STAND
Fig. 11
23
CRDFTSMIIN’ RADIAL SAW 315.220380