To install chute assembly to chute flange, Assembly – Craftsman 536.885020 User Manual
Page 10
Attention! The text in this document has been recognized automatically. To view the original document, you can use the "Original mode".
ASSEMBLY
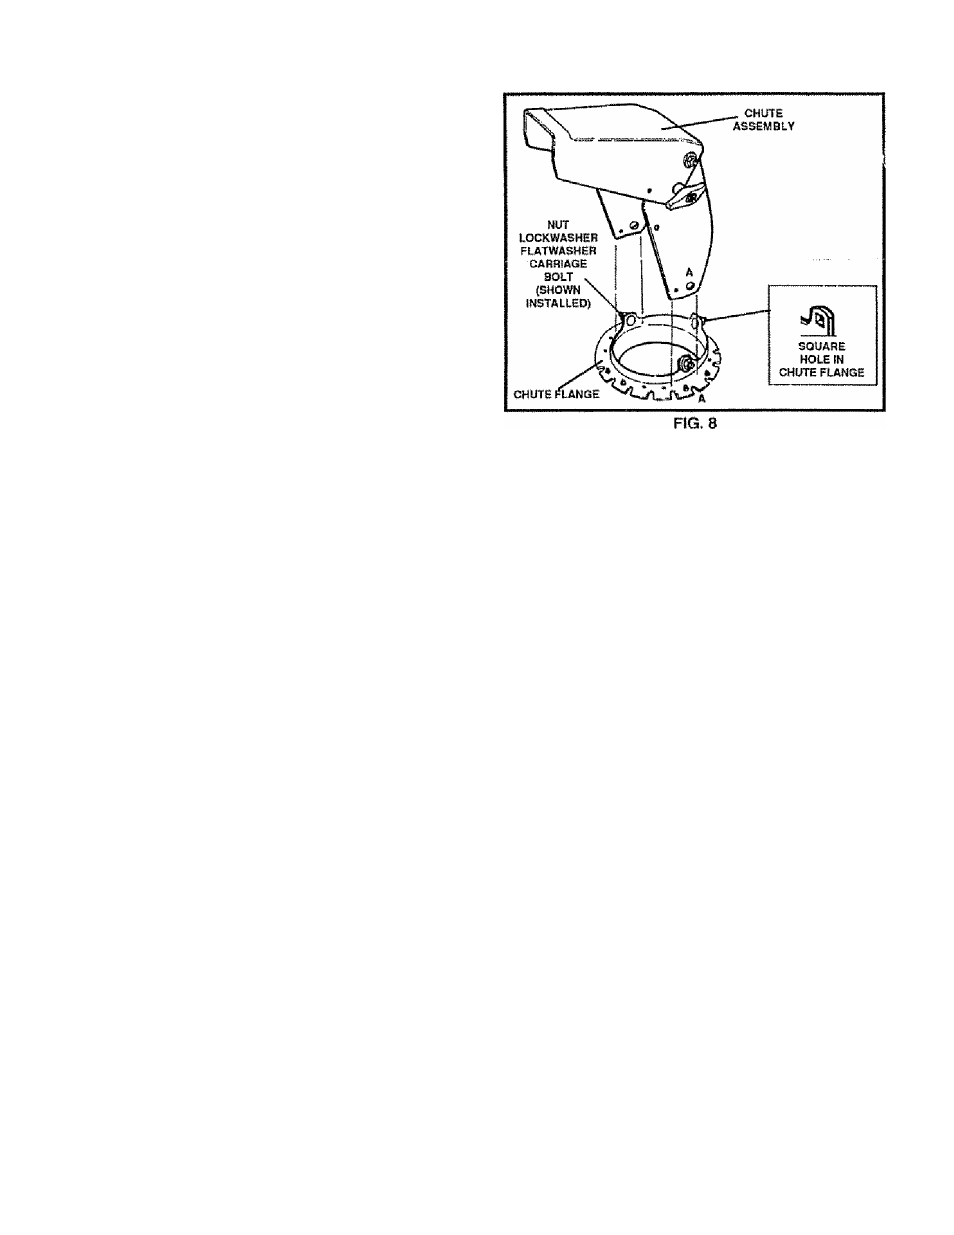
TO INSTALL CHUTE ASSEMBLY TO
CHUTE FLANGE
%
Remove the chute assembly from the carton
*
® psing a 1/2 inch wrench or adjustable wrench, re*
move the three (3} nuts, lockwashers, flafwashers
and carriage bolts from the chute flange.
• "pface the chute assembly over the outside of the
vchute ftange so that the "A" on the chute assembly
is next to the “A" on the chute flange This will align
all three holes correctly.
® From the inside of the chute flange, insert the three
/(3) carriage bolts {removed earlier) through the
^three sguare holes The sguare part of the carriage
bolls should fit into the square holes in the chute
jlange.
® Install the three (3) flatwashers, lockwashers and
nuts (removed earlier) on the carriage bolts.
’
CAUTION: IF ALL THE THREE {3) CARRIAGE
BOLTS CANNOT BE MOUNTED, THE HOLES
ARE NOT ALIGNED CORRECTLY. CHECK THE
. POSITION OF THE LETTER "A's*' ON THE
CHCITE
assembly
AND CHUTE FLANGE. THEY MUST
BE
EACH OTHEFI IF LESS THAN THREE (3)
H
o
L
e
S
line
up
, YOU HAVE MOUNTED THE CHUTE AS
SEMBLY INCORRECTLY AND SNOW COULD BE DiS-
CHf RQED TOWARD THE OPERATOR. REINSTALL THE
CHUTE ASSEMBLY IF NECESSARY.
10