To stop recording, To select the desired tracks beforehand, To cancel time edit – Sony LBT-D270 User Manual
Page 15: Recording from the radio, Recording from another tape (dubbing), To stop dubbing
Attention! The text in this document has been recognized automatically. To view the original document, you can use the "Original mode".
When you want to reduce the hiss noise
in iow-ievei high-frequency signais,
press DOLBY NR button so that
"DOLBY NR B" appears in the display.
Press EDIT on the remote twice.
"TIME EDIT" then "SELECT TIME"
appear in the display.
Press CSC or [S3 on the remote to
designate the tape length.
As you press the button, the indication
changes as follows;
• HALF — C-46 —- C-54 ^
/
(23 00)
(27.00)
\
» C-90
- C-74
C-60 -
(45 00)
(37 00)
(30,00)
PHOGWAM [
:
y A ▲ i
1
i-
1 : 1
4
is
_i ^
T n n r
I n I" L
^ ▼ ▼ ▼ T <
Choose "HALF" if you wanf fhe CD
player to half of the total playing time of
the CD. You connot select "HALF" when
recording CDs with more than 20 tracks.
Press EDIT.
The player determines the tracks to be
recorded on side A automatically. The
total time to be recorded on side A
appears in the display.
To record on both sides, press F.DIT
agiain. The CD plaver determines the
tracks to be recorded on side B.
Tracks to be recorded on side A
I
Total time to be recorded on side A
8
Press CHECK on the remote repeatedly
to check the tracks to be recorded on
each side.
"STEP" appears with each track number
you programmed in the display.
"P" appears with the first track to be
recorded on side B, and "CHECK End"
appears with the last track to be
recorded on side B.
Tracks to be recorded on both sides
2'T3
TTs
^ 3? ¿? ¿?
i_6
=H0GHAW "'1
'•6
/ 8
<2p3
9 ¡10
14 ¡15
19[20
L If f " ,C U.
. J
L' C
j
Last track Total playing time
on side B
9
Press O REC.
Be sure to press the button firmly and
swiftly.
"REC" appears in the display.
Recording starts.
1 0
Press CD O (or CD O on the remote).
The CD player plays the tracks to be
recorded on side A and then pauses.
11
Set the tape to the begining of side B,
then press O REC.
Be sure to press the button firmly and
swiffly.
12
Press CD O (or CD O on fhe remofe).
The CD player sfarts playing fhe tracks
to be recorded on side B.
To stop recording
Press □/=.
To select the desired tracks
beforehand
You can place priority on some tracks to be
recorded by selecting them before
programming them up to 20 tracks. (See
"Playing Tracks in the Desired Order
(program play)").
If you have programmed a frack number
which exceeds 20, you cannof use fhis
feature.
To cancel time edit
Press CONTINUE on the unit.
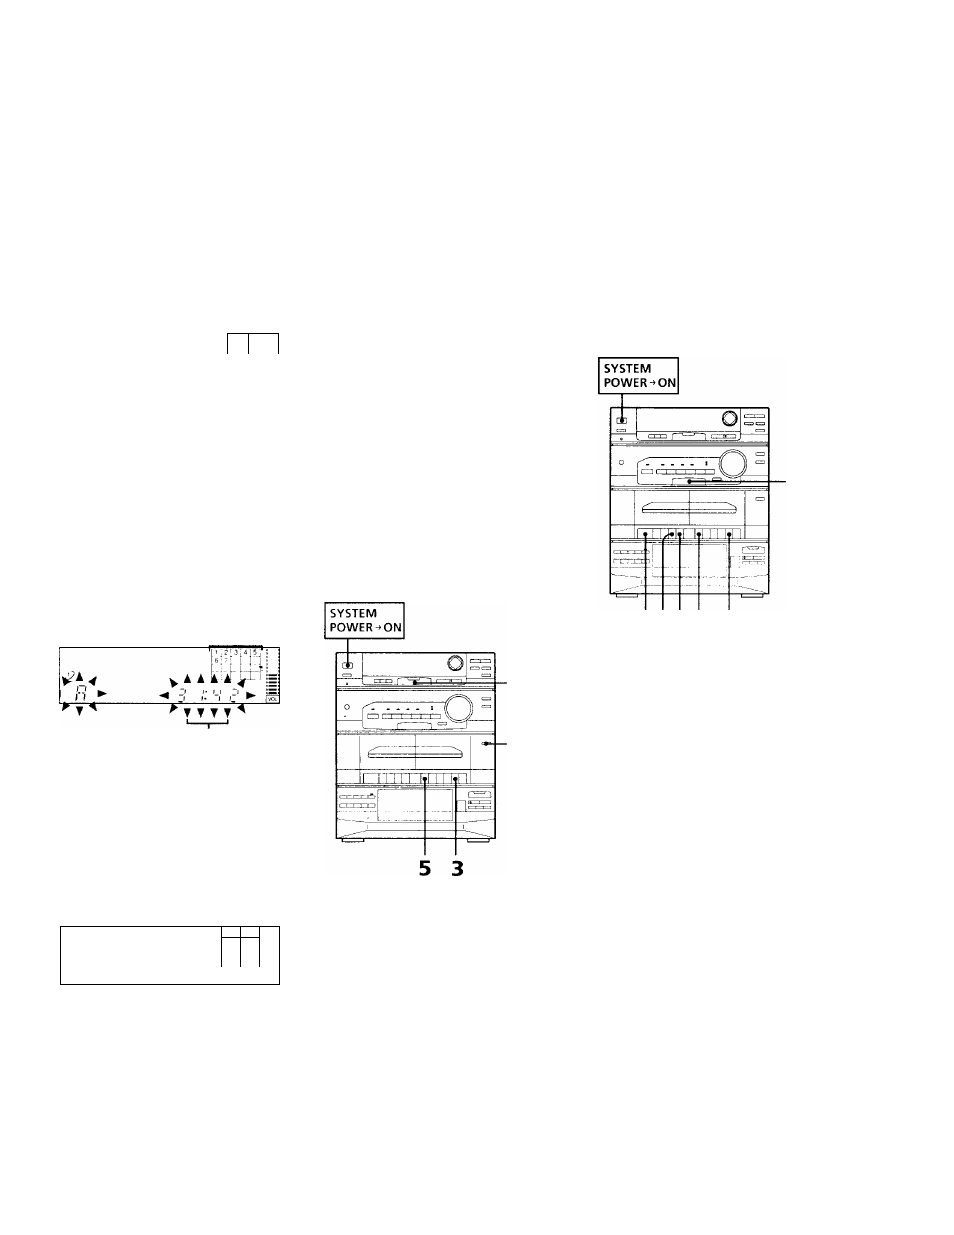
Recording From the
Radio
You can record from the tuner onto a tape.
Use TYPE 1 (normal) or TYPE II (CrCh) tape.
1
4
1
Press TUNER/BAND several times
until the desired radio band appears.
2 Tune in the radio station you want to
record. (See "Listening to the Radio", or
"Playing Preset Radicr Stations" for
defails.)
3
Press □/= and insert a blank tape into
deck B with the side you want to record
on facing forward.
Make sure the tabs on the cassette have
not been removed.
4
When you want to reduce the hiss noise
in low-level high-frequency signaLs,
press DOLBY NR button so that
"DOLBY NR B" appears in the display.
5
Press O REC.
Be sure to press the button firmly and
swiftly.
Recording starts.
To stop recording
Press □/=.
Recording From
Another Tape
(dubbing)
You can record an entire tape onto another.
Use the buttons on the unit and TYPE I
(normal) or TYPE II (CrCfe) tape for dubbing.
3234 2
Press FUNCTION repeatedly until
"TAPE" appears in the display.
TAPE is selected.
Press □/=, and insert a recorded tape
in deck A with the side you want to play
facing forward.
Also, insert a blank tape in deck B with
the side you want to record on facing
forw'a rd.
Make sure the labs on the cassette in
deck B have not been removed.
Press DD and O on deck A.
Deck A pauses for playing.
Press O REC on deck B.
Be sure to press the button firmly and
swiftly.
"DUB" and "REC" appear in the display.
Deck A releases playing pause and deck
B starts recording simultaneously.
To
Stop
dubbing
Press □/= on deck A, then press □/= on
deck B.
Note
Do not change the sound source while
dubbing
You do not have to activate DOLBY NR
The tape in deck B is automatically
recorded in the same state as the tape in
deck A.
3
4
Chapter 4: the Tape Player
15