V.a.l.e, Ninja 250r, 2008 kawasaki – Two Brothers Racing Kawasaki Ninja 250R User Manual
Page 2
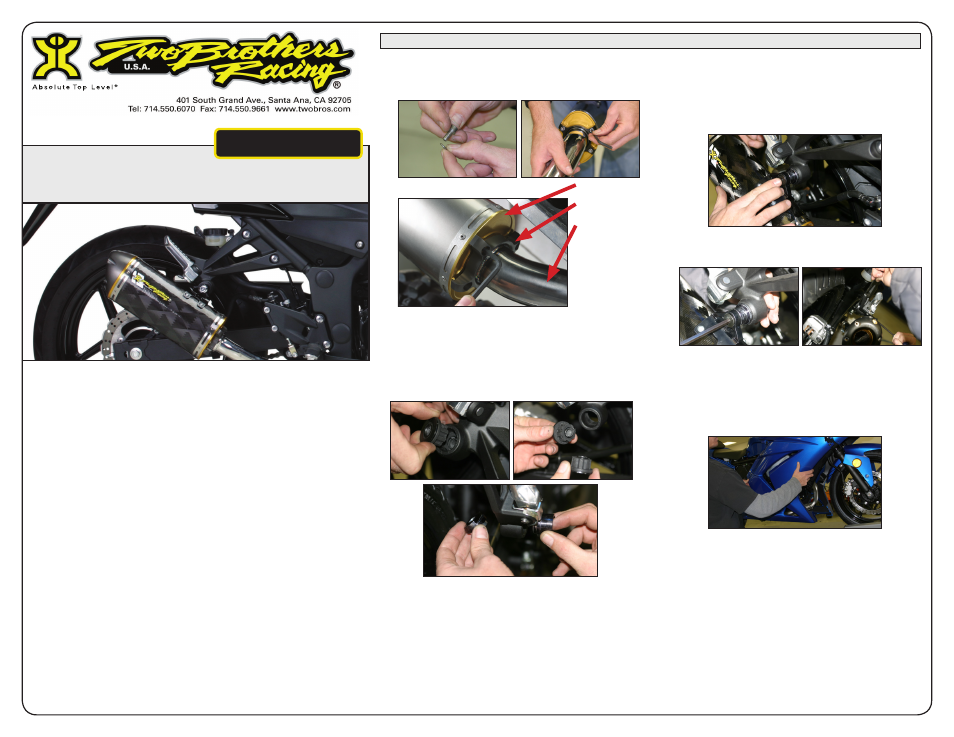
16. Install the TBR muffler assembly to the motorcycle
using the supplied 10x60mm black socket head flat
bolt and 10mm flange nut.
*You may need to rotate the slip-on tube to get the
best fitment.
17. Tighten the 10mm nut/spacer to securely attach the
canister to the frame.
18. Check muffler position and alignment. When it is
correct, tighten the 4 6x14mm socket head cap screws
and the barrel clamp.
19. Re-install the right side fairing and make sure there is
clearance from all body work.
20. Double check your work.
21. Before you run the bike, clean off all fingerprints
and dirt, as any oily residue will etch the metal and
become somewhat permanent when the system
gets hot. Run the bike and enjoy. It is normal for
some white smoke to appear the first time you start
the bike. This is packing/manufacturing oil from
inside the pipe burning off. Check for gaps or leaks.
If you find a leak, a little high temperature silicon
sealant should fix it. After 50 to 100 miles, recheck all
fasteners for tightness.
V.A.L.E.
V a r i a b l e a x i s l o c k i n g e x h a u s t
TM
Installation Instructions
2008 Kawasaki
NINJA 250R
V.A.L.E.™ Complete Exhaust System with M-2 Canister
Part # 005-2080106V, 005-2080107V, 005-2080108V
13. Attach the TBR slip-on tube to muffler using the 4
6x14mm socket head cap screws and 6mm split
washers provided. Leave loose for now.
14. Slide barrel clamp on the end of the slip-on tube.
15. Remove OEM rubber grommets from muffler mount
and install TBR solid mount spacers. The threaded
one will go on the inside.
Muffler Inlet
X-Lite™ Ring
Slip Tube
V.A.L.E.™ Assembly Detail
(Continued on page 3)