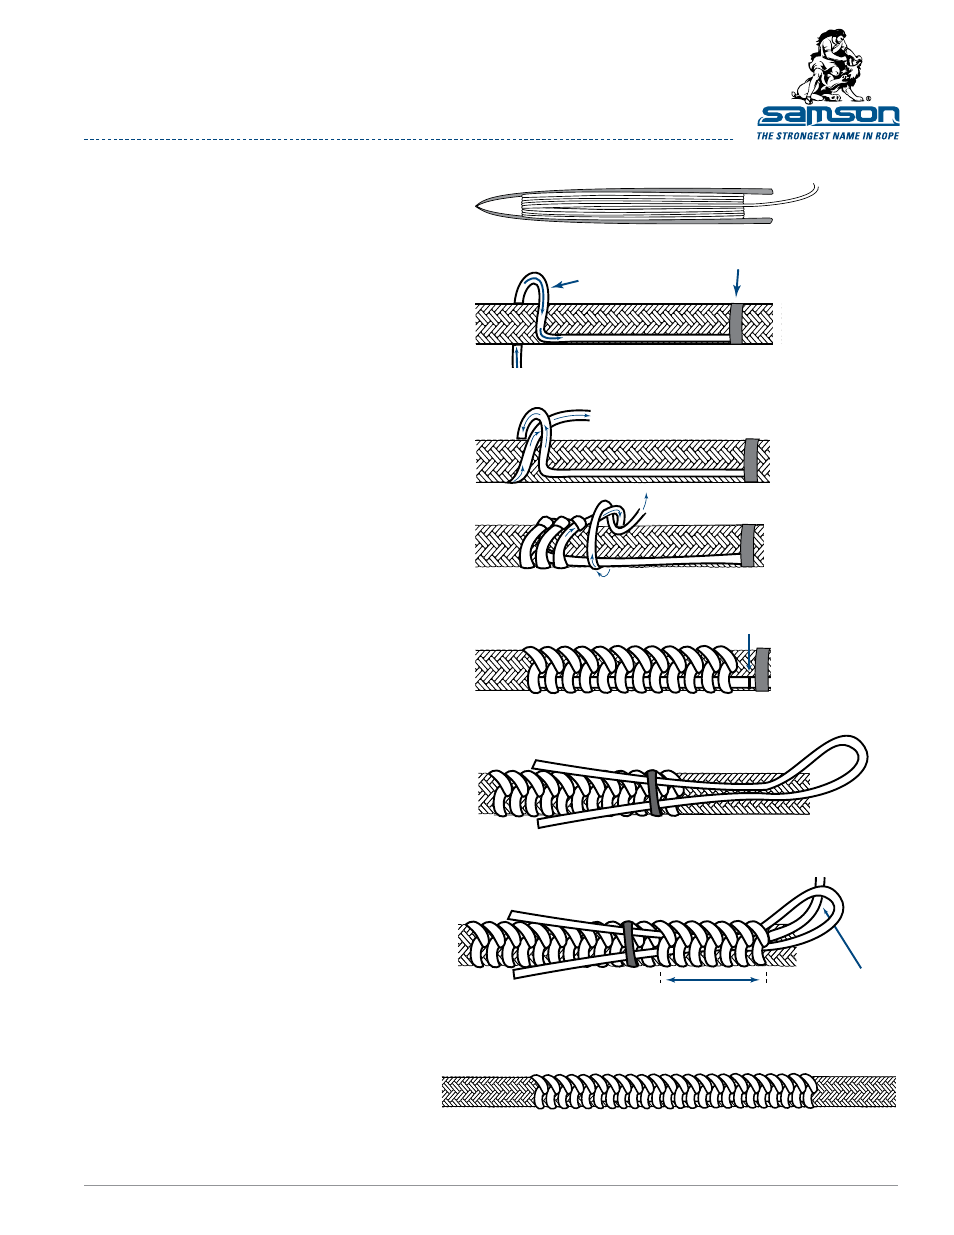
Seizing finished splice – Samson DOUBLE BRAID Class II Eye Splice Modified for TS-II Turbo User Manual
Page 8
© 2012 Samson Rope Technologies, Inc. All rights reserved.
S/WD #108188 7/2012
PAGE 8 OF 8
SamsonRope.com
| Tel
+1.360.384.4669
seizing finished splice
s a M s o n s p l I C I n g I n s t r u C t I o n s
S T E p 1
Attach twine to netting needle.
S T E p 4
Continue with this procedure until the
whipped area is approximately 1/2 of the
desired length, then cut off the taped end
near the last wrap.
S T E p 3
Start seizing. Wrap the needle around
the circumference of the rope 1 complete
turn. Pass the netting needle under the
complete wrap left to right. Pull the loop
tight. Pull the needle up maintaining ten-
sion on the completed half hitch and then
quickly pull back down to lock the half
hitch in place.
S T E p 2
Tape the free end of the twine to the opposite
side of the area to be whipped.
twine
tape
Cut taped end off
1 2 3 4 5 6 7 8 9 10 11 12
S T E p 5
Using some spare twine, tape a loop
that covers the length of the intended
whipping distance, letting the 2 free ends
of the looped twine lay over the completed
whipping. Tape the free ends of the loop
past the already whipped area.
S T E p 6
Continue whipping for the desired total
length over the top of the looped twine.
After whipping is complete, pass the
exposed whipping twine through the loop.
Remove the tape on the looped twine and
pull the ends to draw the loop under the
whipping. Cut off any excess twine.
S T E p 7
Pull the loop through the whipped area.
This should place the remaining whipping
twine under the whipped area.
Continue whipping
over top of loop
Pass exposed twine
through loop
DOCUMENT Double_Braid_C2_Eye_Splice_TS-II_Turbo.pdf