Samson 3-STRAND Class I Long Splice User Manual
Strand class i long splice
© 2012 Samson Rope Technologies, Inc. All rights reserved.
S/WD #108294 7/2012
PAGE 1 OF 2
SamsonRope.com
| Tel
+1.360.384.4669
3-Strand Class I Long Splice
S A M S O N S P L I C I N G I N S T R U C T I O N S
2
step
1
step
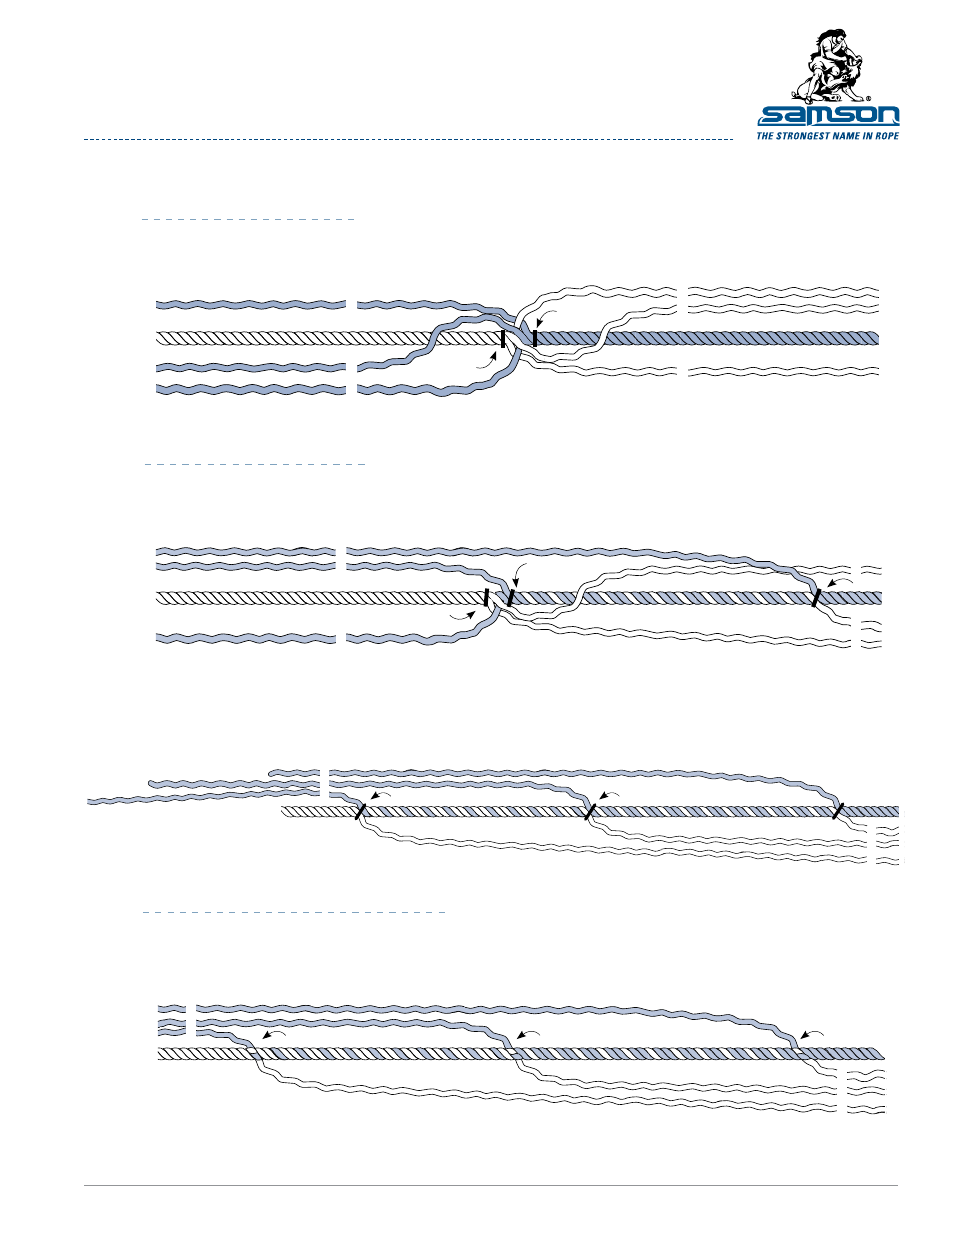
Unlay the end of each rope a minimum of 36 picks. Lash securely with twine as shown to prevent
ropes from coming apart further. Place ropes together, alternating the strands from each. Note
how strands are numbered to show their relative positions throughout the long splice procedure.
m a r ry i n g t h e r o p e s
Take lashing off one side. Unlay Strand 2 a minimum of 25 picks and replace it with a strand from
the other side, Strand 5, as it is being unlaid. Lash securely as shown to hold strands in place. Be
sure to place lashing at the “marriage point” to hold strands securely.
r e p l a c i n g s t r a n d s
Step 3 is like Step 2, except in the opposite direction.
Strand 6 is replaced with Strand 3. Each point
is securely lashed as you go along. This leaves
Strands 1 and 4 at the “marriage point.”
Remove all lashings and tie each pair of opposing
strands (2 and 5, 6 and 3,1 and 4) with an overhand
knot. Be sure knot is tied in the direction of strand twist.
3
step
Class I ropes are made from any or all of the following fibers: olefin, polyester, or nylon.
2
3
1
5
4
6
3
2
1
5
4
6
twine
twine
Remove twine
Lash at marriage point
Lash
4
step
2
1
3
2
1
3
5
4
6
5
4
6
t y i n g o f f o p p o s i n g s t r a n d s
Marriage point
Remove twine
Remove twine
Remove twine
Lash