Changing copy settings – Dell 942 All In One Inkjet Printer User Manual
Page 39
Using the Printer
39
4
Click Preview Now.
5
In the Creative Tasks section, select Enlarge or reduce an image.
6
Follow the instructions on the screen to select the size of your new image.
7
When you finish customizing your image, click Print Now.
Changing Copy Settings
1
Click Start
→
Programs or All Programs
→
Dell Printers
→
Dell Photo AIO Printer
942
→
Dell All-In-One Center.
The Dell All-In-One Center appears.
2
Select a copy quantity and color.
3
Click See More Copy Settings to:
•
Choose a copy quality.
•
Select the blank paper size.
•
Select the original document size.
•
Lighten or darken your document.
•
Reduce or enlarge your document.
4
Click the Advanced button to change options such as paper size and quality.
5
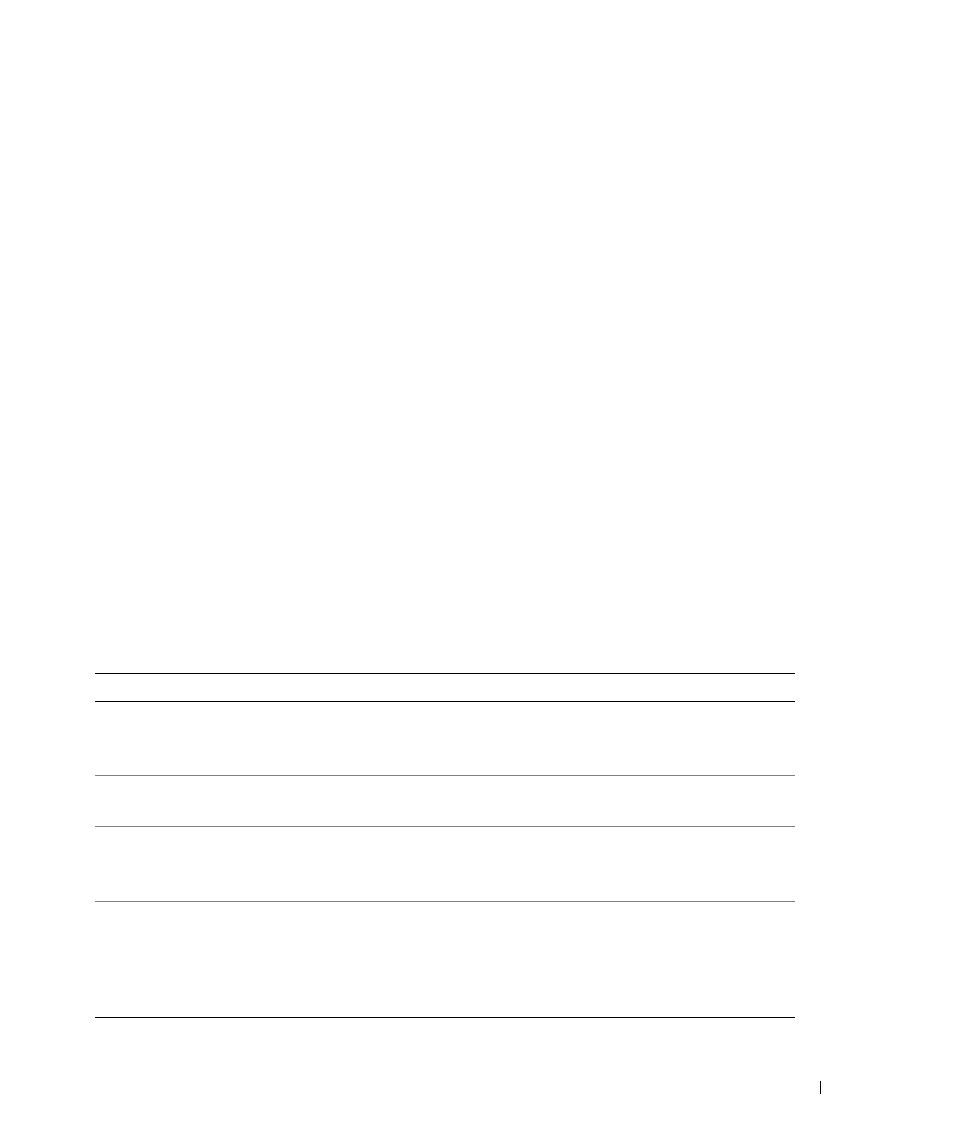
To make any changes, click the following tabs.
Click this tab:
To:
• Select the paper size and type.
• Select borderless printing options.
• Select the print quality.
Scan
• Select the color depth and scan resolution.
• Auto-crop the scanned image.
Image Enhancements
• Sharpen your blurry images.
• Adjust the brightness of your image.
• Adjust the color correction curve (gamma) of your image.
Image Patterns
• Smooth the conversion of a gray image to a black and white dot pattern
(dither).
• Remove image patterns from magazines or newspapers (descreen).
– Select whether to process with Best quality or Best speed.
• Reduce the background noise on your color document.