Intrepid ii woodburning stove, How to adjust the door latch, Tighten the damper handle as needed – Vermont Casting 1990 User Manual
Page 29: Damper adjustment
29
Intrepid II Woodburning Stove
2000966
ST532
damper adj
11/00
Thermostat Cover
D-plate
Damper Actuator
Rod
Handle
Damper
Locking Nut
Allen Head Ad-
justment Screw
ST532
Fig. 45 Tighten the damper adjustment screw for a snug
seal.
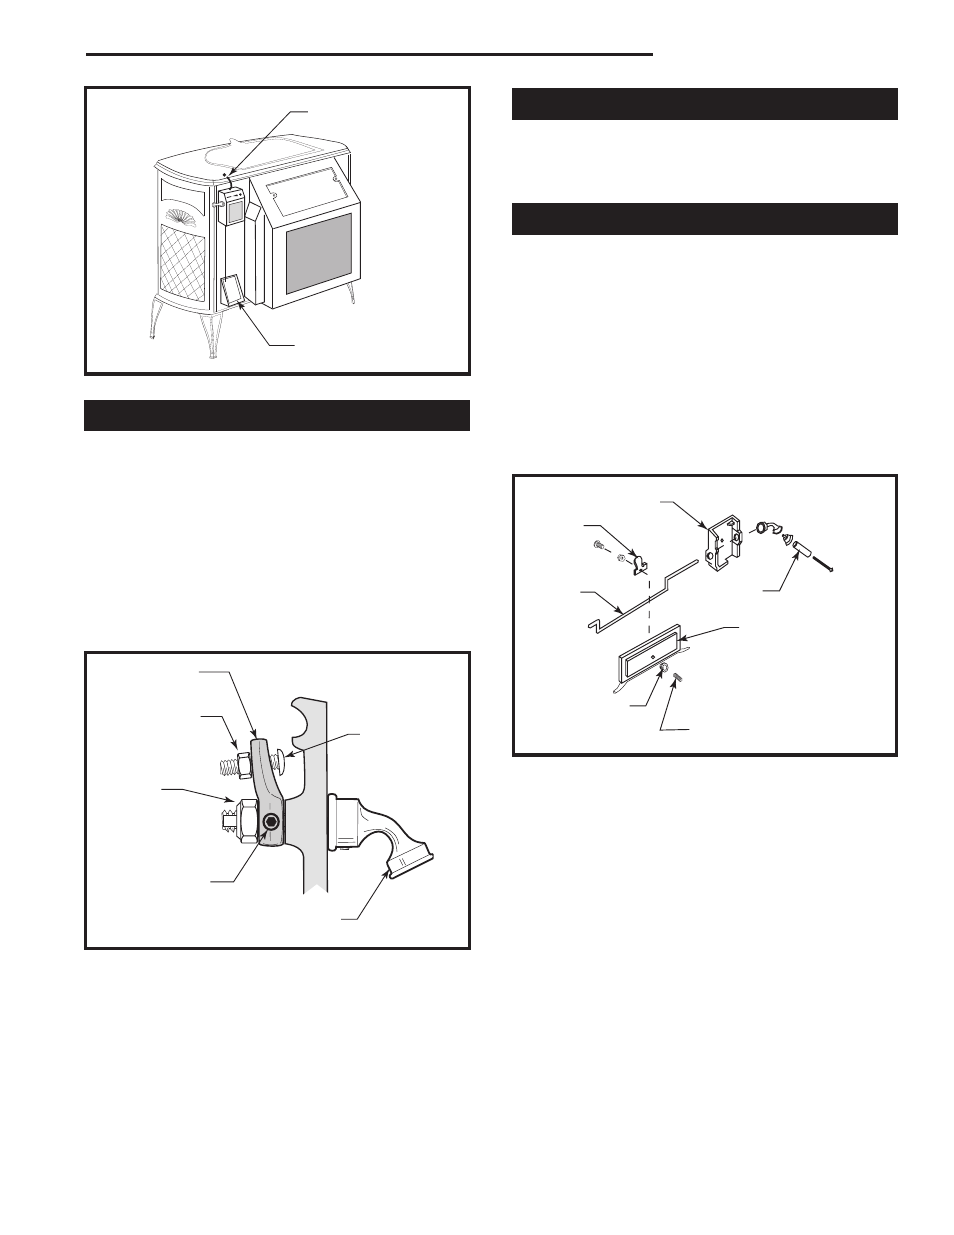
How to Adjust the Door Latch
Over time, the gasketing around the doors will com-
press, and the latch may need adjustment. To adjust
the latch, loosen the small locking nut, extend the
striker screw one turn while keeping the striker screw
from turning. (Fig. 44) Keep making adjustments a little
at a time until the setting is right.
The front doors of the stove should close securely and
tightly, when the handle is in the closed position. When
the latch is properly adjusted there should be a slight
resistance as the doors are moved to the completely
closed position.
INTR
EPID II
ST524
Intrepid II
primary air shutter
11/22/00 djt
Thermostat Lever
Primary Air Shutter
ST524
Fig. 43 The primary air shutter must move freely.
ST531
Door Pawl
11/00
Pawl
Small Lock-
ing Nut
Large Lock-
ing Nut
Set Screw
Striker Screw
Handle Stub
ST531
Fig. 44 Turn the door latch striker screw in or out to tighten or
loosen the door latch.
Tighten the Damper Handle as Needed
The damper handle is attached to the damper rod
with a set screw bearing against a flat spot on the rod.
Check the set screw periodically for tightness; tighten
as needed.
Damper Adjustment
When the stove damper is closed, the pressure of the
rod against the damper plate assures a good seal be-
tween the damper and the damper housing. Adjustment
may be needed after a period of time to retain adequate
pressure.
To make this adjustment, start with the damper in the
closed and locked position. (Fig. 45) Loosen the 7/16”
locking nut in the center of the damper. Use a 1/8” Allen
wrench to turn the Allen screw a full turn clockwise. Test
the damper for snugness, and continue adjusting the
Allen screw as needed. Tighten the 7/16” locking nut
when the damper operates smoothly but firmly.