Replacing the microprocessor, Step 12 – Dell Dimension 2200 User Manual
Page 21
9.
10.
.
11.
Plug your computer and devices into their electrical outlets, and turn them on.
12.
Access the
system setup program
and restore the settings you recorded in
.
Replacing the Microprocessor
1.
2.
Turn off any attached devices and disconnect them from their electrical outlets.
3.
Disconnect the computer power cable from the wall outlet, and then press the power button to ground the system board.
4.
.
5.
6.
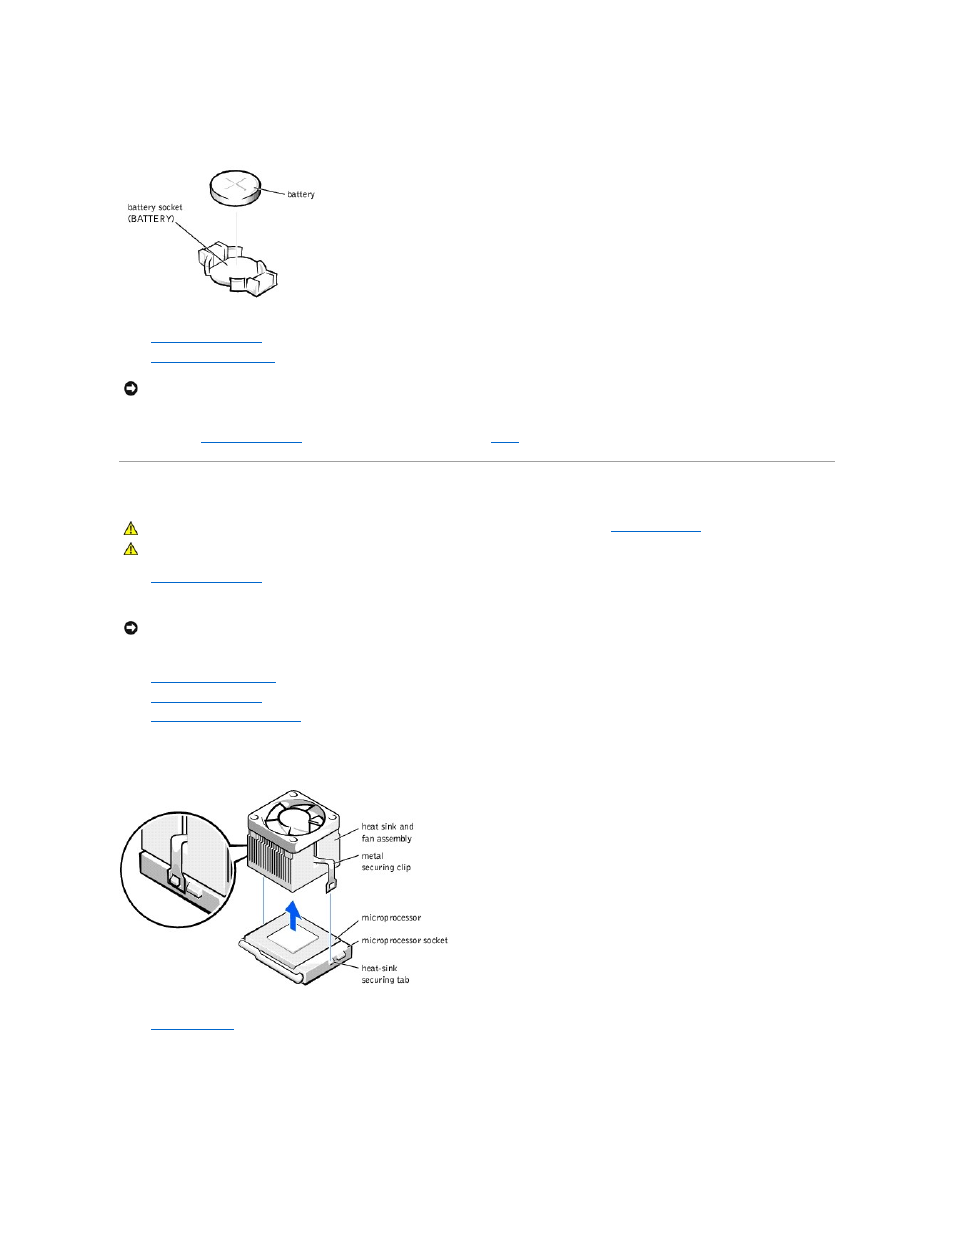
Locate the microprocessor socket
on the system board.
7.
Release the metal clip that secures the heat sink and fan assembly to the microprocessor socket. Then remove the heat sink and fan assembly from the
microprocessor chip.
8.
Disconnect the fan
from the system board.
9.
Your microprocessor socket is a zero insertion force (ZIF) socket with a lever handle that secures the chip in (or releases it from) the socket. To remove
the chip, pull the microprocessor-socket release lever out to unlock it and then straight up until the chip is released.
NOTICE:
To connect a network cable, first plug the cable in to the network wall jack and then plug it in to the computer.
CAUTION:
Before you begin any of the procedures in this section, follow the safety instructions in "
CAUTION:
To guard against electrical shock, always unplug your computer from the electrical outlet before opening the cover.
NOTICE:
To disconnect a network cable, first unplug the cable from your computer and then unplug it from the network wall jack.