Adding or removing cards, Install it in a connector slot, Adding cards – Dell Dimension 2200 User Manual
Page 17
3.
Disconnect the computer power cable from the wall outlet, and then press the power button to ground the system board.
4.
.
5.
.
6.
Disconnect the control panel cable from the
FRONT PANEL connector
on the system board.
7.
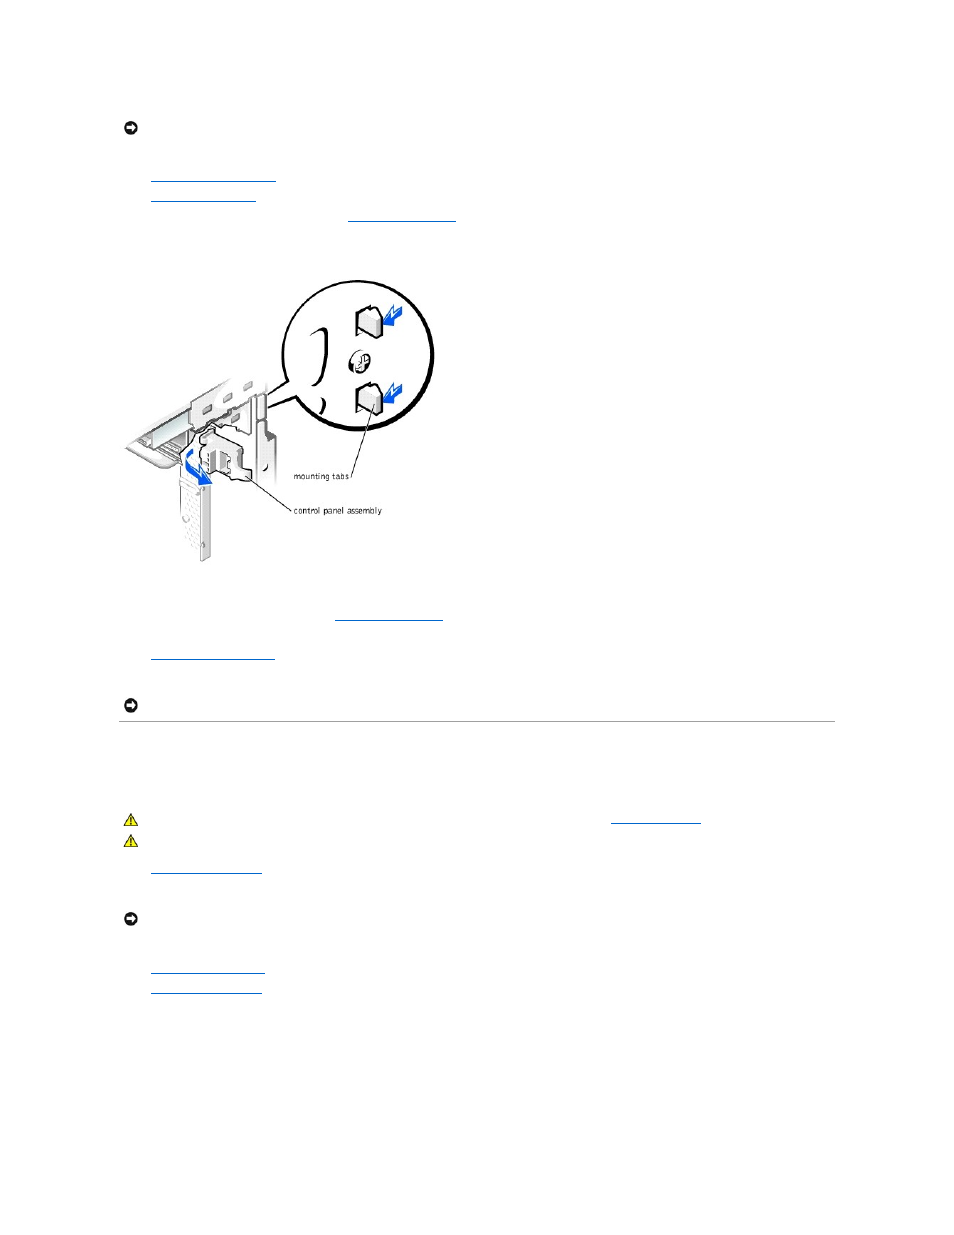
Press the mounting tabs to release the control panel and remove the control panel assembly.
8.
Install the replacement control panel by inserting its mounting tabs into the mounting-tab slots.
9.
Reconnect the control panel cable to the
FRONT PANEL connector
on the system board.
10.
Replace the front panel.
11.
.
12.
Plug your computer and devices into their electrical outlets, and turn them on.
Adding or Removing Cards
Adding Cards
1.
2.
Turn off any attached devices and disconnect them from their electrical outlets.
3.
Disconnect the computer power cable from the wall outlet, and then press the power button to ground the system board.
4.
5.
6.
Unscrew and remove the filler bracket for the card slot you want to use.
NOTICE:
To disconnect a network cable, first unplug the cable from your computer and then unplug it from the network wall jack.
NOTICE:
To connect a network cable, first plug the cable in to the network wall jack and then plug it in to the computer.
CAUTION:
Before you begin any of the procedures in this section, follow the safety instructions in "
CAUTION:
To guard against electrical shock, always unplug your computer from the electrical outlet before opening the cover.
NOTICE:
To disconnect a network cable, first unplug the cable from your computer and then unplug it from the network wall jack.