Installing the processor airflow shroud – Dell XPS 710 User Manual
Page 56
Removing and Installing Parts: Dell XPS 700 Service Manual
parts.htm[4/11/2014 11:32:11 AM]
CAUTION:
The processor heat sink can get very hot during normal operation. Be sure that the heat sink has
had sufficient time to cool before you touch it.
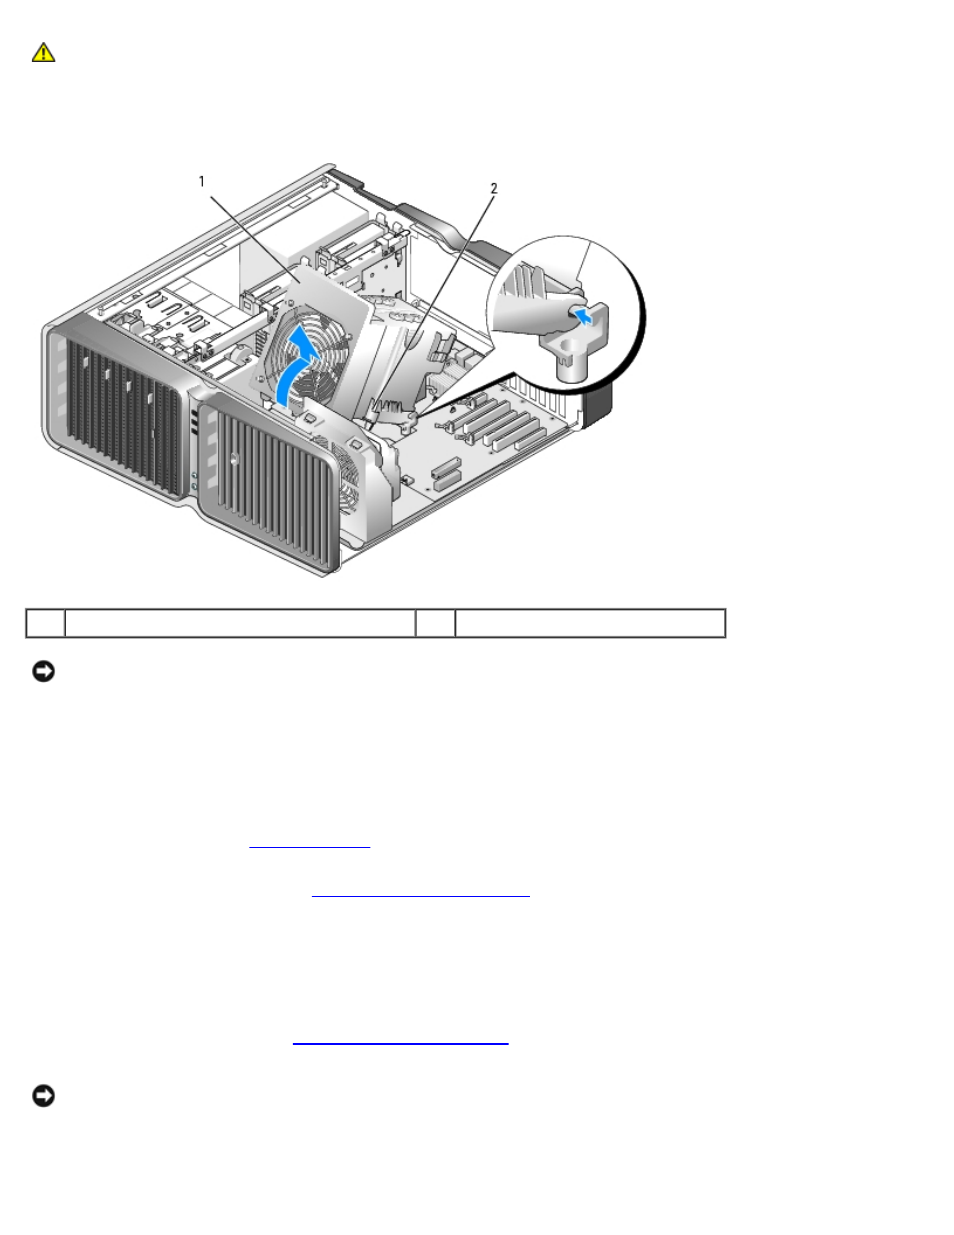
3. Loose the two captive screws on the processor airflow shroud, and then rotate the shroud back, away from the fan.
1
processor airflow shroud
2
captive screws (2)
NOTICE:
The processor heat sink is attached to the processor airflow shroud. When you remove the airflow shroud, lay
it upside down or on its side to avoid damaging the heatsink thermal interface.
4. Lift the processor airflow shroud out of the computer, and then set it aside.
Installing the Processor Airflow Shroud
.
2. Remove the computer cover (see
3. Align the hinge slots on the processor airflow shroud with the hinge guides on the system board.
4. Gently rotate the processor airflow shroud towards the fan, and then tighten the two captive screws.
5. Close the computer cover (see
).
NOTICE:
To connect a network cable, first plug the cable into the network port or device and then plug it into the
computer.
6. Connect your computer and devices to electrical outlets, and turn them on.