Microprocessor/heat sink assembly – Dell OptiPlex GX100 User Manual
Page 36
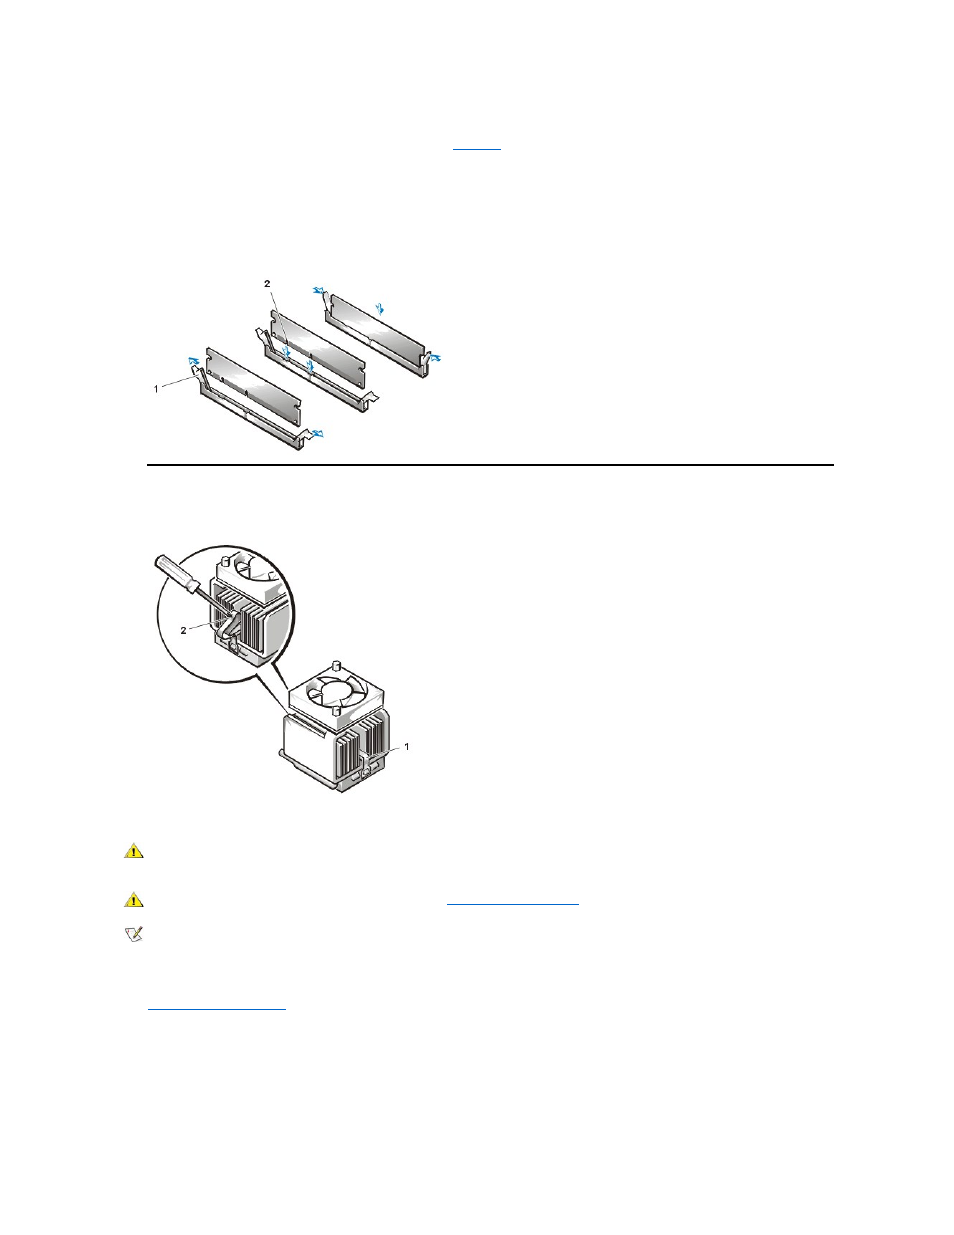
To remove a DIMM, perform the following steps:
1. Unlatch and rotate the power supply up until it locks (see
2. Push outward on the two DIMM socket ejectors simultaneously until the DIMM is released from its socket.
3. Lift the DIMM away from the socket.
To install a DIMM, press the DIMM fully into the socket while closing the ejectors to lock the DIMM into the socket (see Figure 30).
Figure 30. DIMM Installation
Microprocessor/Heat Sink Assembly
Figure 31. Microprocessor/Heat Sink Removal
To replace a microprocessor, perform the following steps:
1.
.
2. Locate the microprocessor socket on the system board.
3. Remove the fan power cable from its connector on the system board. Then, remove two screws securing the fan to the heat sink assembly,
and remove the fan.
4. Remove the metal clip that secures the heat sink to the microprocessor socket. Then remove the heat sink from the microprocessor chip.
1 Ejectors (2)
2 Notches (2)
1 Securing clip
2
Press here to release
securing clip
CAUTION: The microprocessor SEC cartridge/heat sink assembly can get extremely hot. Be sure that the assembly has had
sufficient time to cool before you touch it.
CAUTION: Use a wrist grounding strap as explained in
NOTE: Dell recommends that only a technically knowledgeable person perform this procedure.