Wireless switch assembly, Removing the wireless switch assembly, Replacing the wireless switch assembly – Dell Inspiron 1318 (Mid 2008) User Manual
Page 42
Back to Contents Page
Wireless Switch Assembly
Dell™ Inspiron™ 1318 Service Manual
Removing the Wireless Switch Assembly
Replacing the Wireless Switch Assembly
Removing the Wireless Switch Assembly
1.
Follow the instructions in
Before You Begin
.
2.
Remove the system board (see
System Board
).
3.
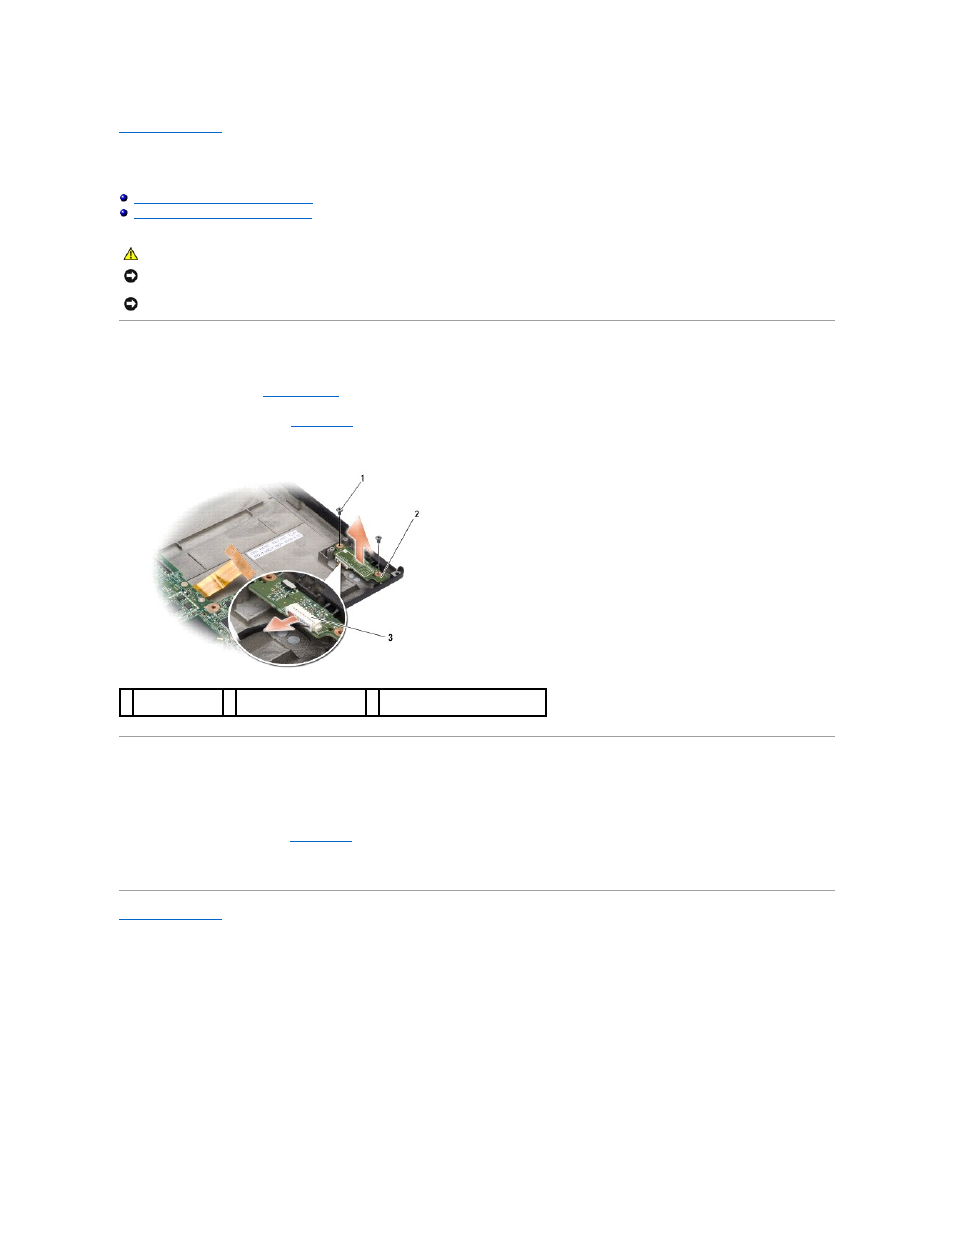
Remove the two M2 x 3-mm screws from either side of the wireless switch assembly board and lift it away from the computer base.
Replacing the Wireless Switch Assembly
1.
Secure the wireless switch assembly board to the computer base by replacing the two M2 x 3-mm screws.
2.
Replace the system board (see
System Board
).
3.
Slide the battery into the battery bay, until it clicks into place.
Back to Contents Page
CAUTION:
Before you begin any of the procedures in this section, follow the safety instructions shipped with your computer.
NOTICE:
To avoid electrostatic discharge, ground yourself by using a wrist grounding strap or by periodically touching an unpainted metal surface (such
as the back panel) on the computer.
NOTICE:
Handle components and cards by their edges, and avoid touching pins and contacts.
1 M2 x3-mm screws
(2)
2 wireless switch assembly
board
3 wireless switch assembly cable
connector