6restoring the calibrated zero, 7reading the high/low values, 8clearing the high/low values – Cooper Instruments & Systems DPG 100 Digital Pressure Test Gage User Manual
Page 11: Chapter 4calibration, 1calibration considerations, Restoring the calibrated zero, Reading the high/low values, Clearing the high/low values, Chapter 4 calibration, Calibration considerations

3.6
Restoring the Calibrated Zero
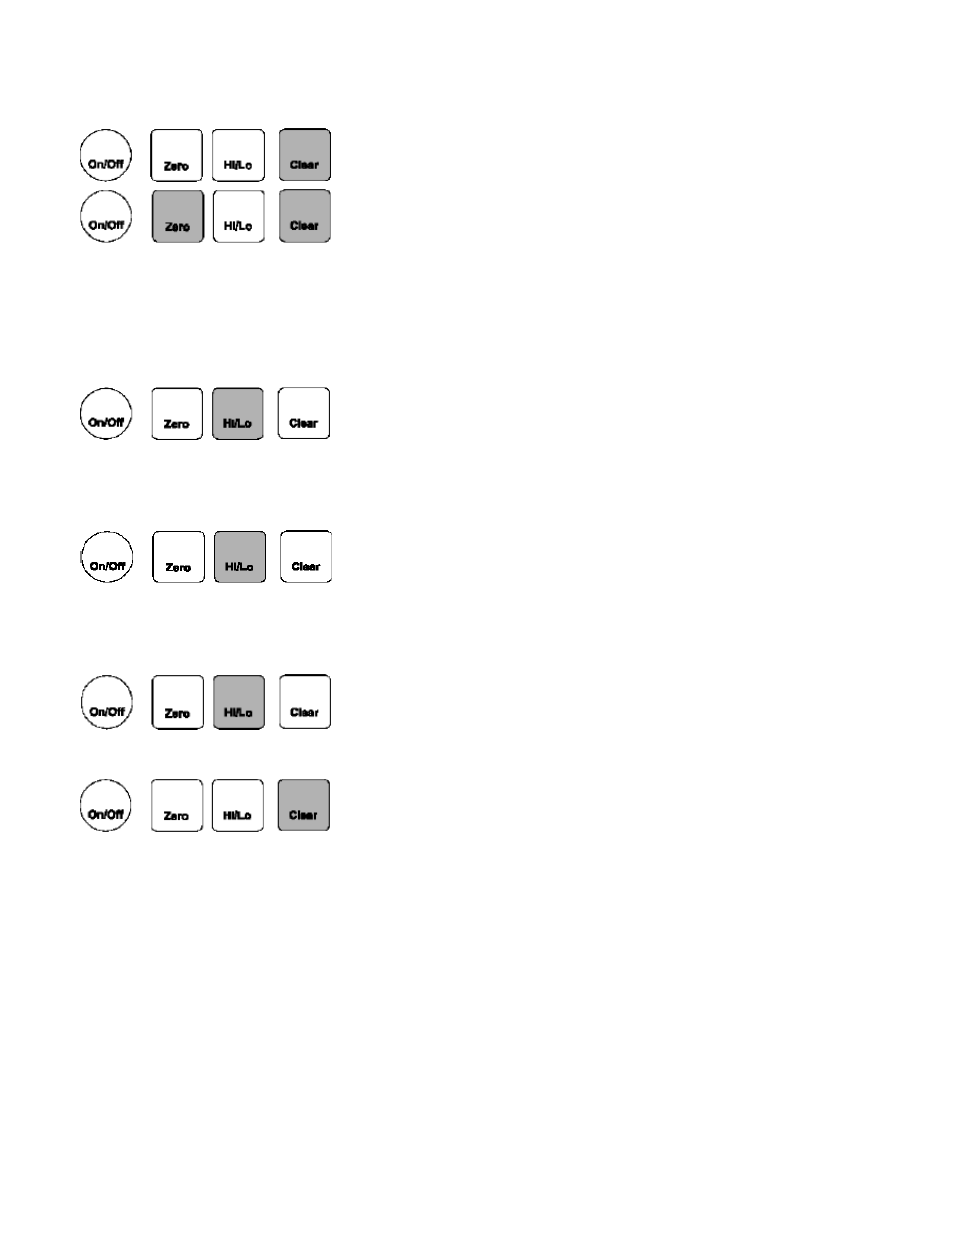
To restore the zero, first press and hold the [Clear] button, and while holding
...press the [Zero] button. Hold both buttons until the display shows "-PO-",
then release.
The "calibrated zero" is the zero value of the instrument at the time it was last calibrated. Restoring the calibrated
zero can be used to "undo" an inadvertent press of the [Zero] button.
3.7
Reading the High/low Values
The high and low values are updated at the same rate as the tracking value.
Press the [Hi/lo] button once to read the highest value since the last time the
data was cleared.
The word "HI' and the corresponding value will flash intermittently on the display. This flashing indicates that the
instrument is not displaying the "live" tracking value of the process pressure. However, the instrument is still
monitoring the process pressure and updating the high and low values.
Press the [Hi/lo] button a second time to read the lowest value since the last
time the data was cleared.
The word "LO' and the corresponding value will flash intermittently on the display. This flashing indicates that the
instrument is not displaying the "live" tracking value of the process pressure. However, the instrument is still
monitoring the process pressure and updating the high and low values.
Press the [Hi/lo] button a third time to return to the "live" tracking On/Off
Zero Clear mode. The display will show "--" to indicate that the instrument
has returned to the "live" tracking mode.
3.8
Clearing the High/low Values
Press the [Clear] button to erase the high and low data values.
The high and low data values are also cleared when the instrument is turned off.
CHAPTER 4
CALIBRATION
4.1
Calibration Considerations
In order to obtain optimum performance from the instrument when testing or re-calibrating, obey the following
recommendations:
• Allow a 5-minute warm-up period before testing or calibration.
• The pressure standard you use should be at least 4 times more accurate than the specification of the
instrument.
DPG 100
8
Rev Feb 2001
