Resizing your partitions manually, Start clone – Apricorn EZ Upgrade - Universal Hard Drive Upgrade Kit User Manual
Page 11
20
21
www.apricorn.com
www.apricorn.com
Resizing your partitions manually
To resize your partition manually:
1. Choose the “Manually” radio button on the “Advanced Options”
window.
2. Once this radio button is selected, click the “Apply Changes” button.
The “Adjust Partitions” window (shown left) will pop up.
Positions and sizes of the partitions to be copied to the Destination
drive are displayed graphically in a bar. The original size of the
partition is displayed in dark green, while the additionally assigned
space is displayed in light green. The size of partitions displayed in
black cannot be altered. Free space not yet assigned to any partition
is displayed in white.
3. To resize, click the desired partition’s extended space (light green
portion) and drag with your mouse. You can also use the [+] and [-]
cursor keys to the same effect.
4. Once you have resized the partitions to the desired size, choose “Apply
Adjustment” which will then close the window.
5. Once the “Adjust Partition” window is closed, close the “Advanced
Options” window by clicking the “Close Window” button.
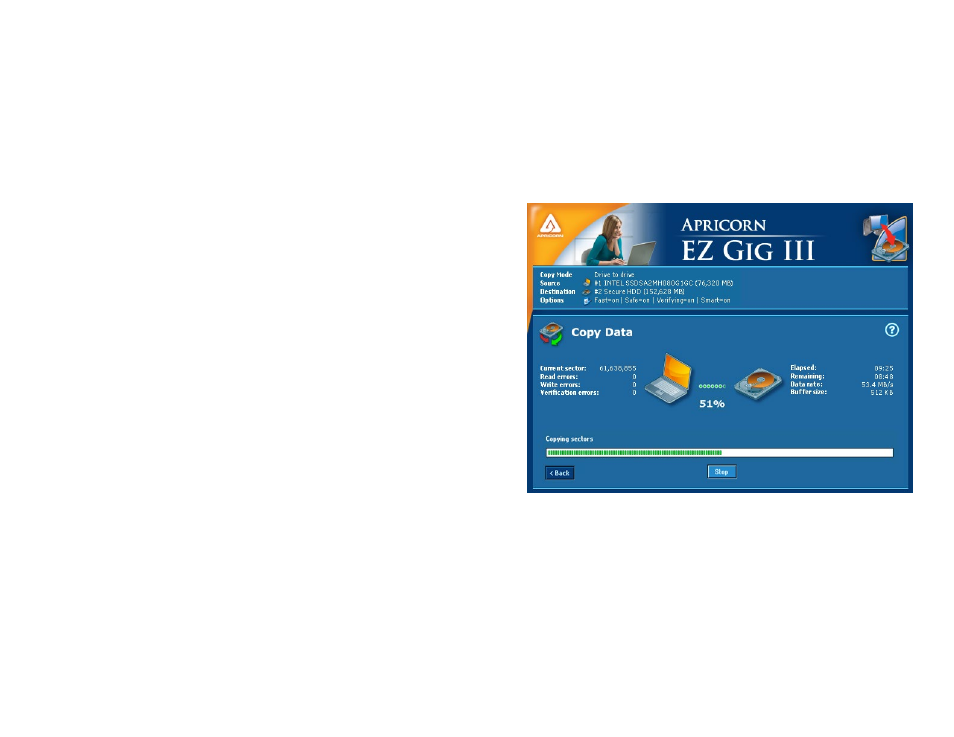
Start Clone
Now you’re ready!
Press the “Start Clone” button to start the cloning process.
EZ Gig III will keep you up-to-date with the status of the clone throughout
the entire process with a progress bar and percentage completed.
Depending on your system size a clone can take anywhere from several
minutes to a couple of hours.