Apricorn Aegis Padlock DT FIPS - USB 3.0 Desktop Drive User Manual
Aegis padlock dt, Quick start guide
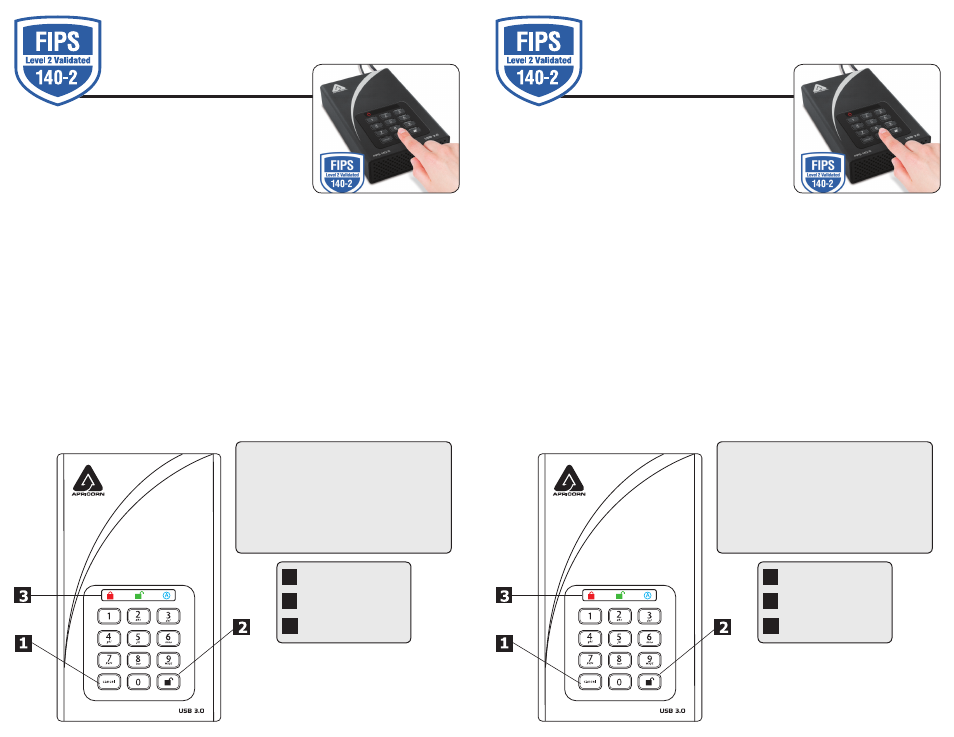
Quick Start Guide
3
1
2
Cancel button
UNLOCK button
LED Indicator light
Remember to save your password in a safe place.
If lost or forgotten, there is no way to access the drive.
If you are having difficulty please refer to the complete
user’s manual which is loaded on your Aegis Padlock
drive and is also available at Apricorn’s website at:
www.apricorn.com/support
Aegis
Padlock
DT
PINs must be a minimum length of 7 digits
with a maximum of 16 digits.
Cannot contain all consecutive numbers
(2345678 or 9876543)
Cannot contain all same number (1111111)
PIN Requirements
1. To access the Aegis Padlock DT connect the drive to a
power outlet via the AC Adapter and a USB port using the
USB 3.0 cable (this cable is also compatible with USB 2.0).
2. Once connected turn the power switch on the back of the
drive to the ON position.
3. The unit will do a self-test to verify all security components
are working properly. The LEDs will go through 3 test stages
RED
,
GREEN
, and
BLUE
.
This will be followed by three
GREEN
flashes on a successful test. Any test failure will
leave the unit in an interoperable state with the
RED
LED flashing.
4. Once the self test is successfully completed, the LED will display Solid
BLUE
and Solid
GREEN
to indicate the Padlock is waiting for a PIN to be set.
5. Press
UNLOCK + 9. The LED will change to Solid
BLUE
and Blinking
GREEN
.
6. Enter the new Admin PIN and press
UNLOCK key. If accepted the
GREEN
LED will flash
for 3 short blinks, then return to Solid
BLUE
and Blinking
GREEN
.
7. Re-enter the Admin PIN and press the
UNLOCK key. If accepted the
GREEN
LED will be
Solid for 3 seconds.
8. LED will then turn
BLUE
and remain in Admin mode for 30 seconds or if the
Cancel key is
pressed, will return the drive to a standby state.
9. The Admin PIN is now set and will allow access to the drive or the Admin features.
10. To
UNLOCK the drive, exit Admin by pressing the Cancel button. Then enter the new PIN
and press
UNLOCK.