Pre-update preparation, Replace pin retainers, Notes on replacing pin retainer bolts – Great Plains Verti-Till Field Update User Manual
Page 2
2
Verti-Till Field Update
Great Plains Manufacturing, Inc.
596-186M
08/06/2007
Pre-Update Preparation
1.
Inventory the contents per “New Parts: Kits 596-
184A and -185A” on page 18.
2.
Hitch the implement to a suitable tractor or hydraulic
power source. Connect all hydraulic circuits.
3.
Fully lift the implement.
4.
Place jack stands or other supports capable of sup-
porting the implement weight under the main frame,
or use a fork-lift at implement rear.
IMPORTANT !
Do not rely on the transport lift cylinder locks to keep
the implement raised. These cylinders are discon-
nected or removed during the upgrade.
Note: The work can also be done with the frame sup-
ported by the rear shanks and front jack stand, but
having it fully raised provides more access.
5.
With the implement on the supports, set all hydraulic
circuits to Float to relieve pressure in the lines and
cylinders.
Replace Pin Retainers
Notes On Replacing Pin Retainer Bolts
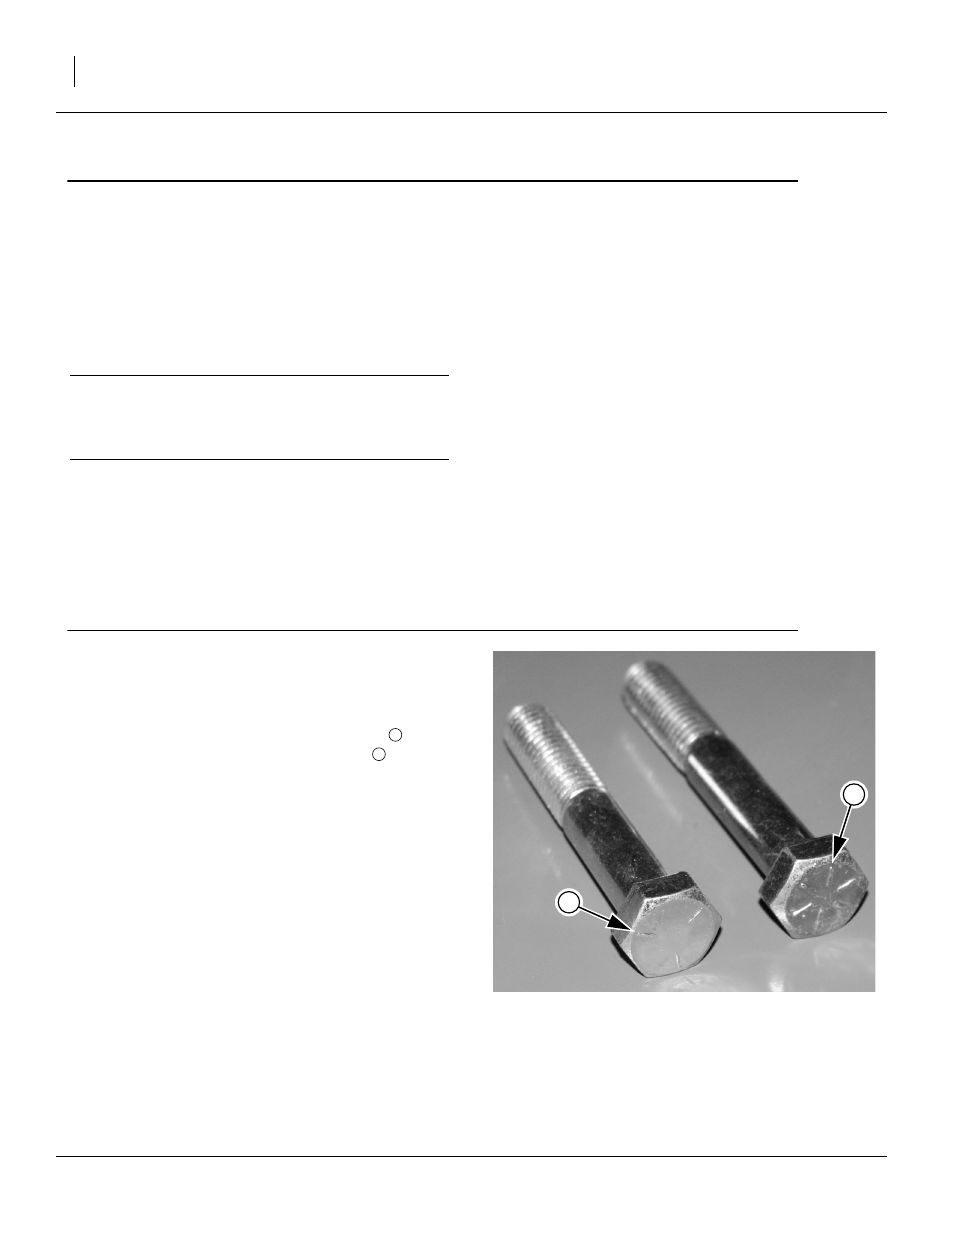
Refer to Figure 2
This kit upgrades Grade 5 pin retaining bolts to Grade 8.
Grade 5 heads have markings with three lines
.
Grade 8 heads have markings with six lines
.
• The implement may already have Grade 8 bolts in
some locations, and require fewer bolts than are in the
kit. If a Grade 8 is already in place, it does not need to
be changed.
• Figures for pin retainer bolt replacement are shown in
exploded view for clarity. Do not remove any compo-
nents other than existing bolts and nuts. In particular
do not remove pins (except where the pin itself is also
being replaced).
• It may be necessary to drive a pin in the direction of
the retaining bolt in order to free the bolt.
• New bolts are the same length or longer than existing
bolts.
Figure 2
Grade 5 vs. Grade 8
27057
3
6
3
6