Loading materials, Hopper operations (s/n b1013r-), Loading seed (1 bu.hoppers) – Great Plains YP825A3P Operator Manual User Manual
Page 28
24
YP4-6-825A3P
Great Plains Manufacturing, Inc.
401-652M
2013-05-28
Loading Materials
Hopper Operations (s/n B1013R-)
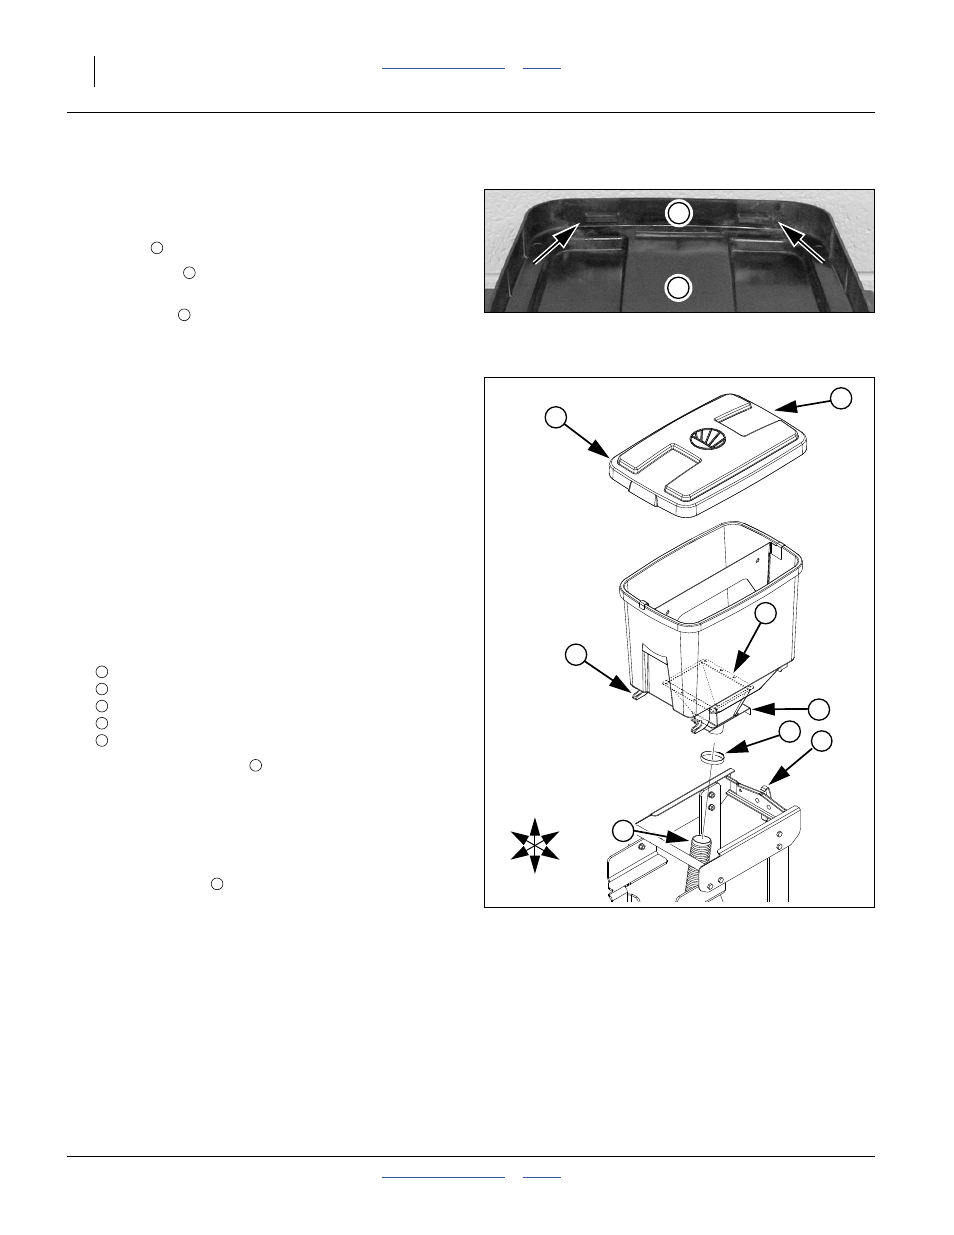
Refer to Figure 15 and Figure 16
Hopper lids
have distinct ends:
• the hinge end
(with two lugs) mates with the front
end of the hopper.
• the latch end
(with a single lug) mates with the rear
end of the hopper.
To open a hopper:
1.
Pull the rear of the lid edge to the rear.
2.
Swing the lid up at rear.
3.
Disengage the lid at the front lugs.
4.
Park the lid on the front lip of the hopper, using the
hook-plate feature inside the lid (see Figure 17 on
page 25).
The seed hoppers themselves are designed to be
removed, but are not removed for routine operations.
Loading Seed (1 bu.hoppers)
5.
Install correct seed disks (page 57).
6.
Close all seed inlet shutters (page 58).
7.
Check that each hopper is correctly seated and
secured:
pivot hooks engage at front,
latch engaged at rear,
seed hose secured to
discharge weldment with
clamp.
8.
The hopper slide gate
may be left open (by pulling
back), and doing so slightly increases seed capacity.
Note: If slide gate is open for seed loading, seed inlet
shutters must be closed unless the planter is
already at the field. Transporting with both gates
and shutters open can plug meters.
9.
Open hopper lid
10. Inspect the hopper for leftover seed and debris.
Clean out anything other than the seed to be
planted. See “Material Clean-Out” on page 75.
Figure 15
Hopper Lid Hinge Lugs
28131
1
3
3
2
Figure 16
Air-Pro
®
Row Hopper
(serial number B1013R-)
29975
4
5
9
2
7
6
8
U
D
F
B
L
R
4
5
6
7
8
9