Appendix c - initial setup, Post-delivery checklist, Seed monitor console installation – Great Plains YP825A3P Operator Manual User Manual
Page 116
401-652M
2013-05-28
112
YP4-6-825A3P
Great Plains Manufacturing, Inc.
Appendix C - Initial Setup
This Appendix covers setup tasks performed only once,
or at infrequent intervals. Routine setup tasks are
covered in “Preparation and Setup” on page 12.
Perform Appendix B tasks first. Some of these items may
already have been done by your Great Plains dealer:
a.
Seed monitor console installation (below)
b.
Marker setup (Option, page 113)
c.
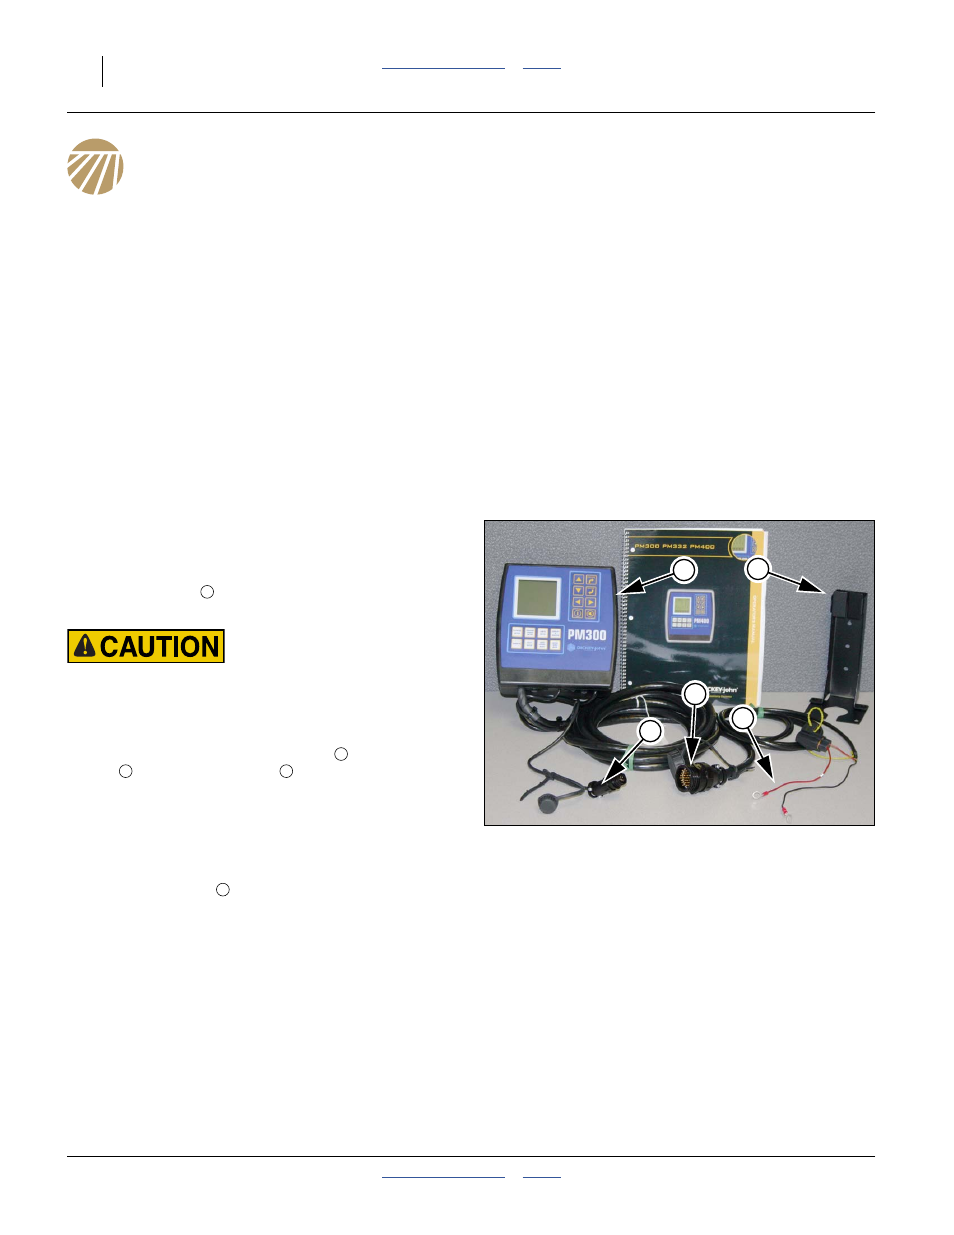
Seed Monitor Console Installation
Refer to Figure 98
The planter’s standard PM300 seed monitor system
includes a console
that needs to be mounted in the
cab of the tractor to be used with the planter.
Transport and Field Safety Risk:
Mount the module so it is easy to monitor during planting, but
does not interfere with safe operation of the tractor in the field
or on public roads.
The monitor includes cables for power
, speed
sensor
and sensor harness
. Installation
instructions are found in the included DICKEY-john
®
manual.
Power color code is:
+ positive: red
- negative: black
The included bracket
requires customer-supplied fasteners.
Post-Delivery Checklist
1.
Read and understand “Important Safety
Information” on page 1.
2.
Check that all working parts are moving freely, bolts
are tight, and cotter pins are spread.
3.
Check that all grease fittings are in place and
lubricated. See “Lubrication” on page 85.
4.
Check that all safety decals and reflectors are
correctly located and legible. Replace if damaged.
See “Safety Decals” on page 6.
5.
Inflate tires to pressure recommended and tighten
wheel bolts as specified. See “Torque Values
Chart” on page 102.
Figure 98
PM300 Tractor Components
28138
1
3
4
2
5
1
2
3
4
5