Swing-down ladder decals, Other assembly items, Install press wheels – Great Plains 3S-4000HDF Predelivery Manual User Manual
Page 14
12 3S-4000HD
195-067Q
12/10/2009
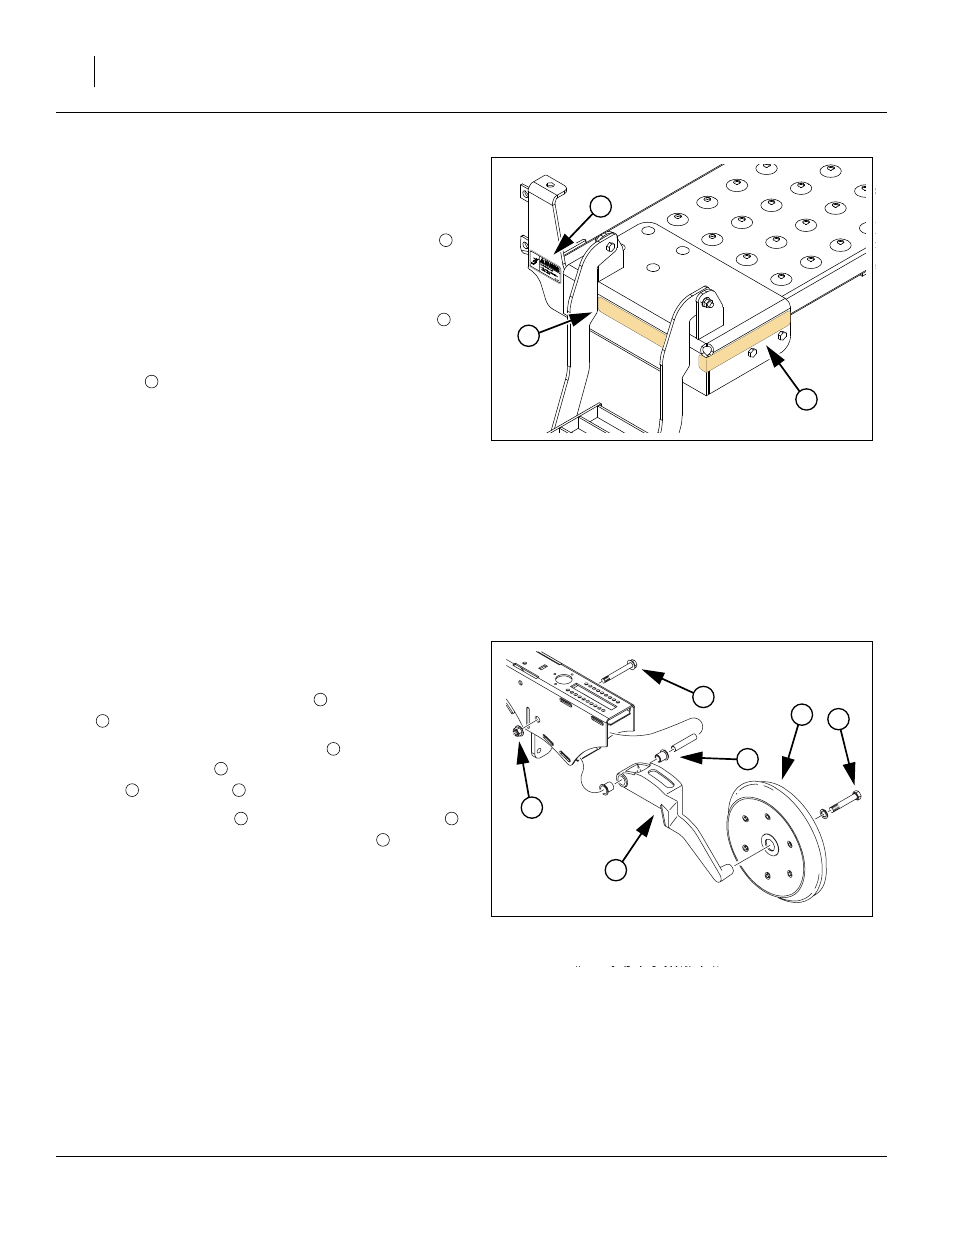
Swing-Down Ladder Decals
Refer to Figure 12
Starting on the left wing walkboard:
1.
Place the 838-102C Danger Falling Hazard decal
forward of and near the top of the ladder, where it is
visible to climbers.
2.
Place one 838-265C Amber decal on the outside of
the ladder mount, between the ladder side plates
(so it won’t be damaged by ladder operation).
3.
Place one 838-265C Amber decal on the rear and
corner
of the ladder mount. This decal is slightly
longer than that side of the mount. Wrap the excess
around the corner.
4.
Repeat for right wing section walkboard ladder.
Other Assembly Items
There are a few additional standard components, and
several possible optional items, that are not factory
installed. Some of these, which follow in this chapter,
need to be installed prior to first hydraulic hookup. Others
are installed after hookup, bleeding and leveling. See
“Install Final Accessories” on page 29.
Install Press Wheels
Remove
1
⁄
2
x3
3
⁄
4
inch flange bolt
and flange lock nut
from each opener body.
2.
Leave pivot bushing components
in place and bolt
press wheel arm
to opener with
1
⁄
2
x3
3
⁄
4
inch flange
bolt
and lock nut
. Repeat for all openers.
3.
Remove
5
⁄
8
inch bolt
from each press wheel arm
and use bolts to assemble press wheels
wheel arms.
Figure 12
Swing-Down Ladder Decals
27016
3
1
2
Figure 13
Press Wheel Assembly
24432
1
2
3
4
5
6
2
6