Marker breakaway protection, Liquid fertilizer option – Great Plains PT1230 AA1080 Operator Manual User Manual
Page 49
47
Section 5 Maintenance and Lubrication
4/12/05
PT1230 Pull-Type Folding Planter 401-069M-B
Great Plains Mfg., Inc.
Refer to Figure 5-14.
3.
With the unit raised, check blade spreader (1) for
wear. Replace spreader if it is 1/2 inch wide or narrow-
er. To replace, remove disk blade. Drive out roll pins
(2) and install a new spreader.
4.
Check disk blades (3) for wear. Replace blades if worn
to a diameter of 14 1/2 inches or less.
5.
When reinstalling disk blades, put two shims between
bearing and shank on one blade. Tighten bolt. On op-
posite side, reinstall blade with two (4) shims between
bearing and shank. Tighten bolt.
6.
Check contact point between disk blades. Place a
piece of paper in top gap between disks blades. Bring
paper down until it stops. In lower gap place another
piece of paper. Bring paper up until it stops. Measure
the distance between two pieces of paper. The dis-
tance must be between 1/2 and 1 3/4 inches. Add or
remove shims as needed to get the correct contact
point.
7.
Check that outside disk scrapers (5) are formed to
disk blades to help remove any mud. Bend and twist
scrapers to fit blades as necessary. After every 200
acres of planter operation, check outside scrapers for
proper adjustment and wear. Replace outside scrap-
ers as necessary.
Figure 5-14
Opener Scrapers
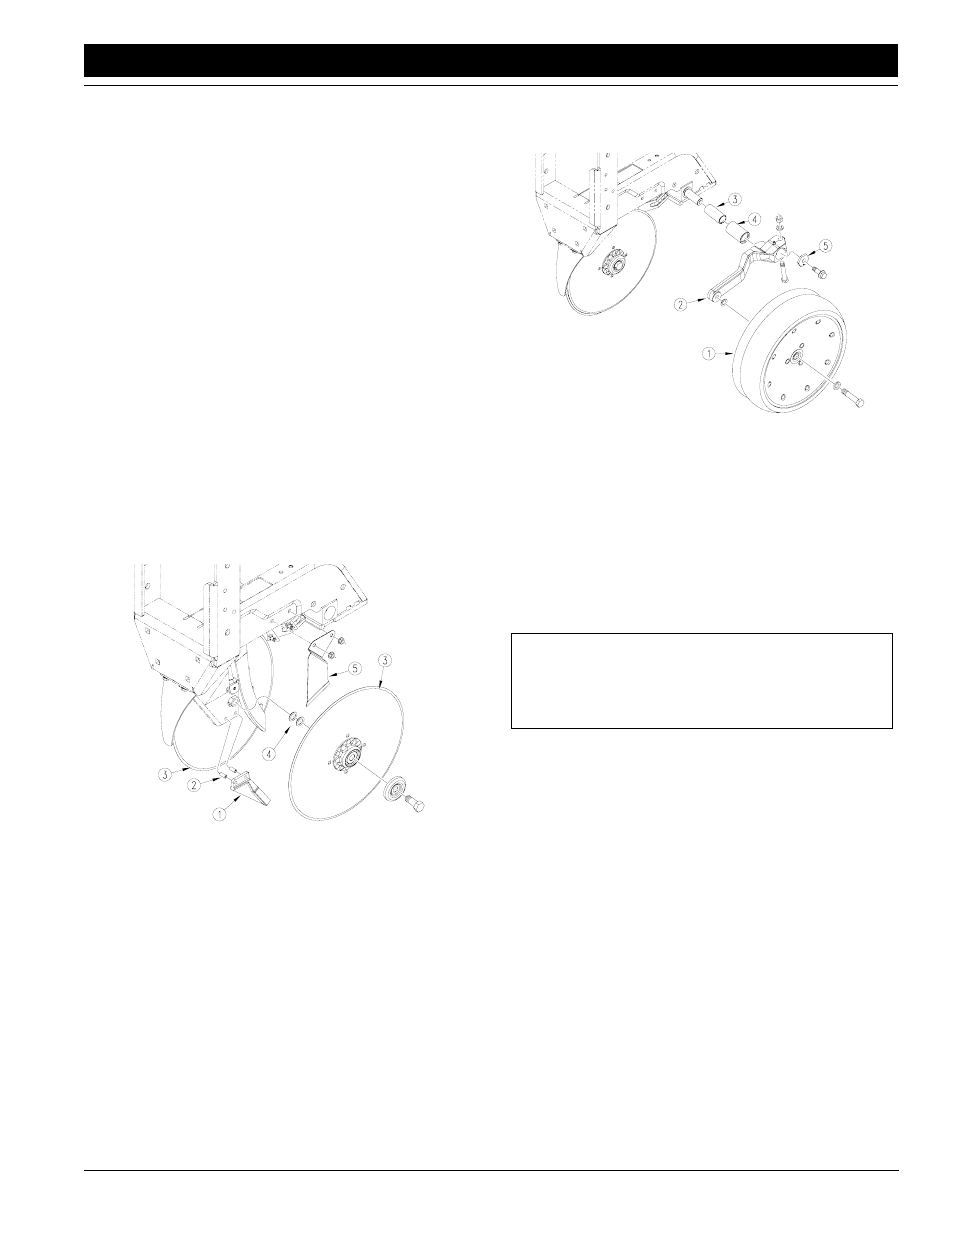
Refer to Figure 5-15.
8.
Check for correct number of shims between side
gauge wheel (1) and wheel arm (2). There must be at
least one shim between wheel bearing and arm.
When installed, wheel should turn freely and not hit
arm at the curve. Do not add any more shims than
necessary.
9.
Disassemble side-gauge-wheel arm from row unit.
Remove bushing (3) from sleeve (4) and check bush-
ing for wear. Replace bushing if necessary.
17766
10. When reinstalling side gauge wheels, align tab on hex
adjustment (5) with notch in bushing. Replace bolt and
tighten to 100 foot-pounds
Figure 5-15
Side Wheels
11. Adjust side gauge wheels. See Side Gauge Wheels,
“Adjustments,” page 33.
Marker Breakaway Protection
The marker arm is attached to the marker body with a
5/16-inch breakaway bolt. If excessive force is put on the
marker during operation, the bolt will break, allowing the
marker arm to swing away rather than causing marker
damage.
Liquid Fertilizer Option
Although the tanks are made of a highly durable, corro-
sion-resistant plastic, proper maintenance is required.
Rinse tanks with water when changing from one solution
to another.
Rinse tanks thoroughly with water after each season or
before any shutdown lasting over one week.
Do not allow sludge to accumulate in the bottom of tank.
Do not leave fertilizer in tanks if temperature is expected to
drop below 40 degrees.
To clean tanks:
1.
Remove lids from tanks.
2.
Turn valve to elbow.
3.
After cleaning tanks, close shut-off valve, replace cap
on metering pump and replace lids on tanks.
17791
IMPORTANT: The breakaway bolt is a 5/16-by-1 1/2-
inch grade 5 (GP 802-012C). If it breaks, replace it
with an equivalent grade 5 bolt to prevent marker
damage.