Pre-assembly preparation, Remove fixed steps, Install ladder mounts – Great Plains Min-Till Ladder Kit Assembly Instructions User Manual
Page 2
2
Ladder Kit
Great Plains Manufacturing, Inc.
195-066M
09/10/2007
Pre-Assembly Preparation
1.
Inventory the contents per “New Parts: Kit 195-
065A” on page 6.
2.
If the drill is unfolded, lower the parking stands, lower
the openers, and lower the drill.
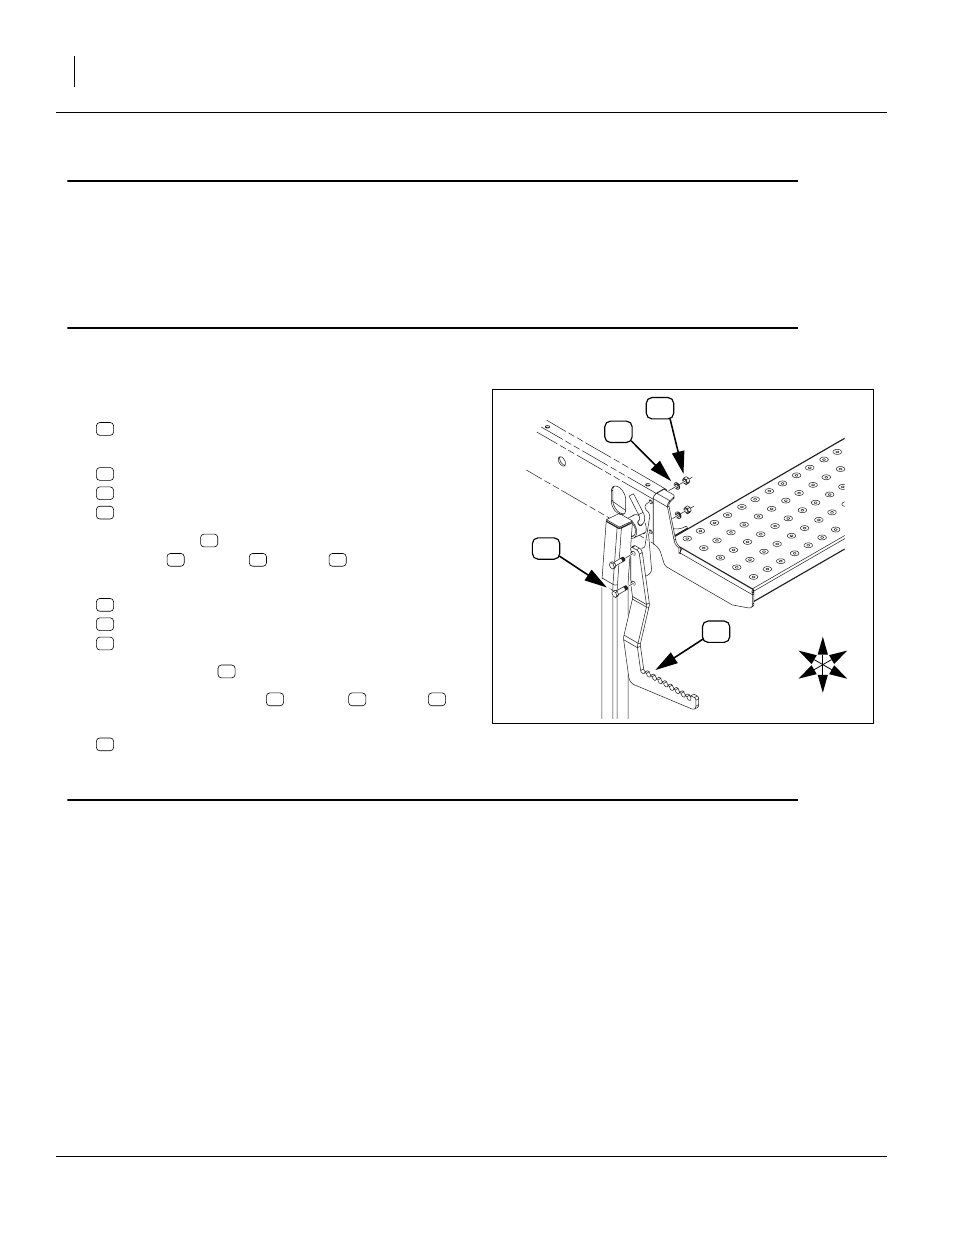
Remove Fixed Steps
Begin with the left step.
Loosen both nuts
4.
On the lower bolt only, remove and save:
NUT HEX 1/2-13 PLT
WASHER LOCK SPRING 1/2 PLT
HHCS 1/2-13X1 3/4 GR5
5.
Swing the step
backward, and re-install the saved
lower bolt
, washer
and nut
6.
Remove and save the upper:
NUT HEX 1/2-13 PLT
WASHER LOCK SPRING 1/2 PLT
HHCS 1/2-13X1 3/4 GR5
7.
Remove the step
8.
Re-install the saved bolt
, washer
and nut
9.
Repeat step 3 through step 8 for the right hand step
(shown in Figure 8 on page 7).
Install Ladder Mounts
Where to place the top ladder mount depends on the drill
configuration.
If the drill has the Small Seeds Box installed (or will be),
the outer rear hole of the mount is the second row from
the rear edge of the walkboard (see Figure 3 on page 3).
If Small Seeds is not installed, the corner mount hole is
the third row from the rear edge (see Figure 4 on
page 3).
Regardless of drill configuration, the outer rear hole of
the top mount the second row in from the end of the
walkboard.
U
D
L
R
B
F
Figure 2
Remove Left Step
27035