Great Plains Min-Till Ladder Kit Assembly Instructions User Manual
General information, Before you start, Warning
Great Plains Manufacturing, Inc.
General Information
1
09/10/2007
195-066M
Min-Till Ladder Kit
Installation Instructions for use with
Two- and Three-Section Folding Drills
General Information
These instructions explain how to install the Min-Till Lad-
der Kit. This kit replaces the single fixed walkboard steps
with 3-step swing-down ladders.
Each kit converts an entire drill.
These instructions apply to:
This kit contains all components necessary for installa-
tion.
If installing this kit as part of Pre-Delivery, install the
walkboards (without any fixed steps) prior to installing
the ladders.
Before You Start
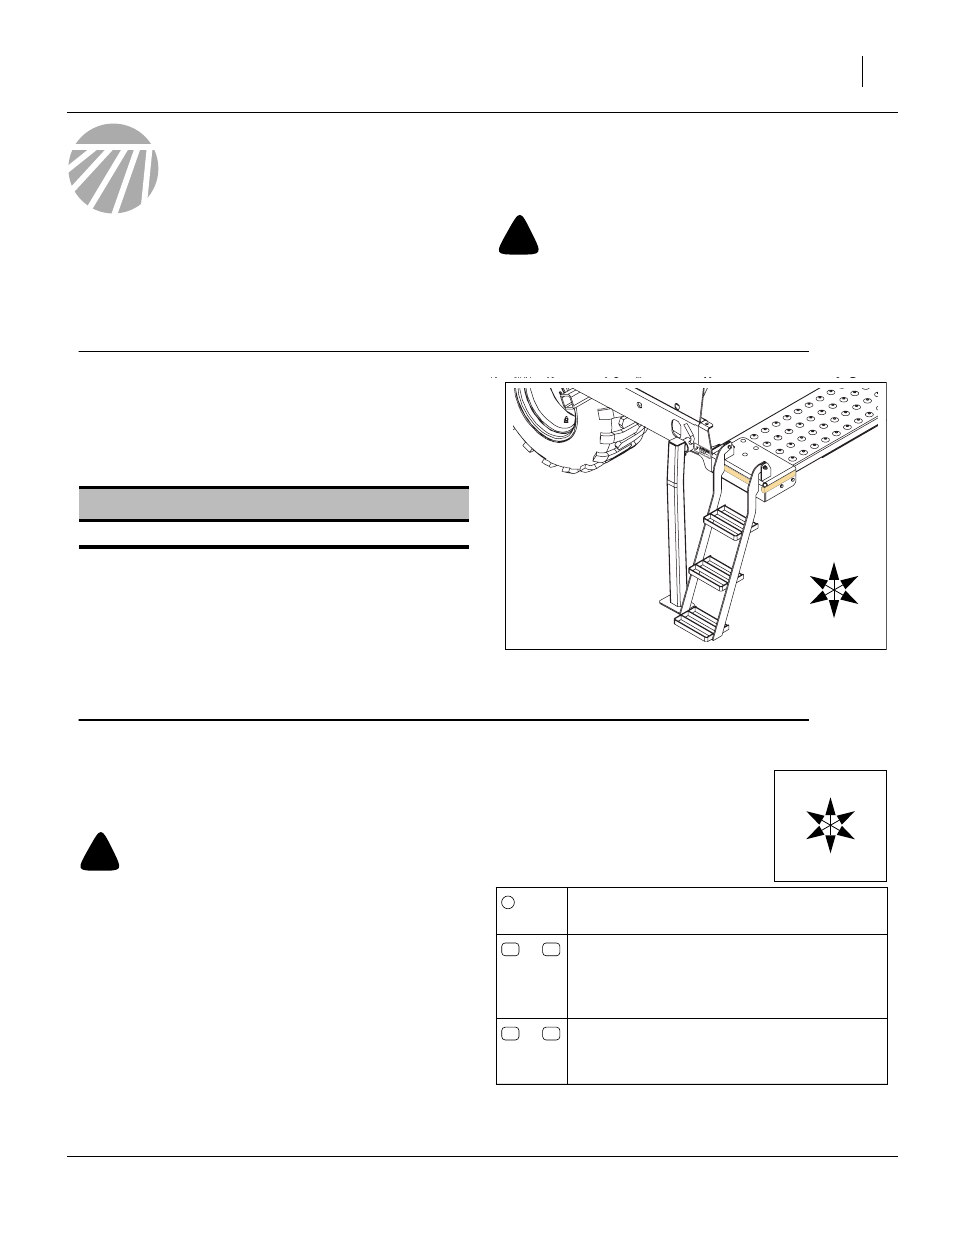
Refer to Figure 1
Review these instructions, and make sure you under-
stand where and how the ladders install, and which exist-
ing parts are removed.
!
WARNING
If unfolded, the drill must be hitched to a tractor during
Opener Lift, to avoid negative tongue weight. Hitch loads can
range between +4000 pounds (folded) and -1000 pounds
(unfolded), depending on drill model and configuration.
Tools Required
• basic hand tools
• if unfolding is desired, a tractor with two hydraulic cir-
cuits and suitable hitch
These instructions presume an existing drill with fixed
steps. The installation may be done with the drill folded
or unfolded.
Notations and Conventions
“Left” and “Right” are facing in the
direction of machine travel. An orienta-
tion rose in the line art illustrations
shows the directions of Left, Right,
Front, Back, Up, Down.
Applies to Models:
• 2S-2600/2610/F/HD/HDF
• 3S-3000/F/HD/HDF
• 3S-4000/F/DH/HDF
When you see this symbol, the subsequent instructions
and warnings are serious - follow without exception.
Your life and the lives of others depend on it!
Kit
Kit Description
195-065A
Min-Till Ladder Kit
!
U
D
L
R
B
F
Figure 1
Ladder Installed
27033
callouts identify components in the currently
referenced Figure or Figures.
to
callouts reference new parts from the list on
page 6. The descriptions match those on the
cartons, bags or item tags, as well as your
updated Parts Manual.
to
callouts reference affected existing parts
from the table on page 7. The descriptions
match those in your Parts Manual.
U
D
L
R
B
F
1