Great Plains CDS-JohnBlue NGP Series Pumps User Manual
Page 11
© 2013 CDS-John Blue Co.
11
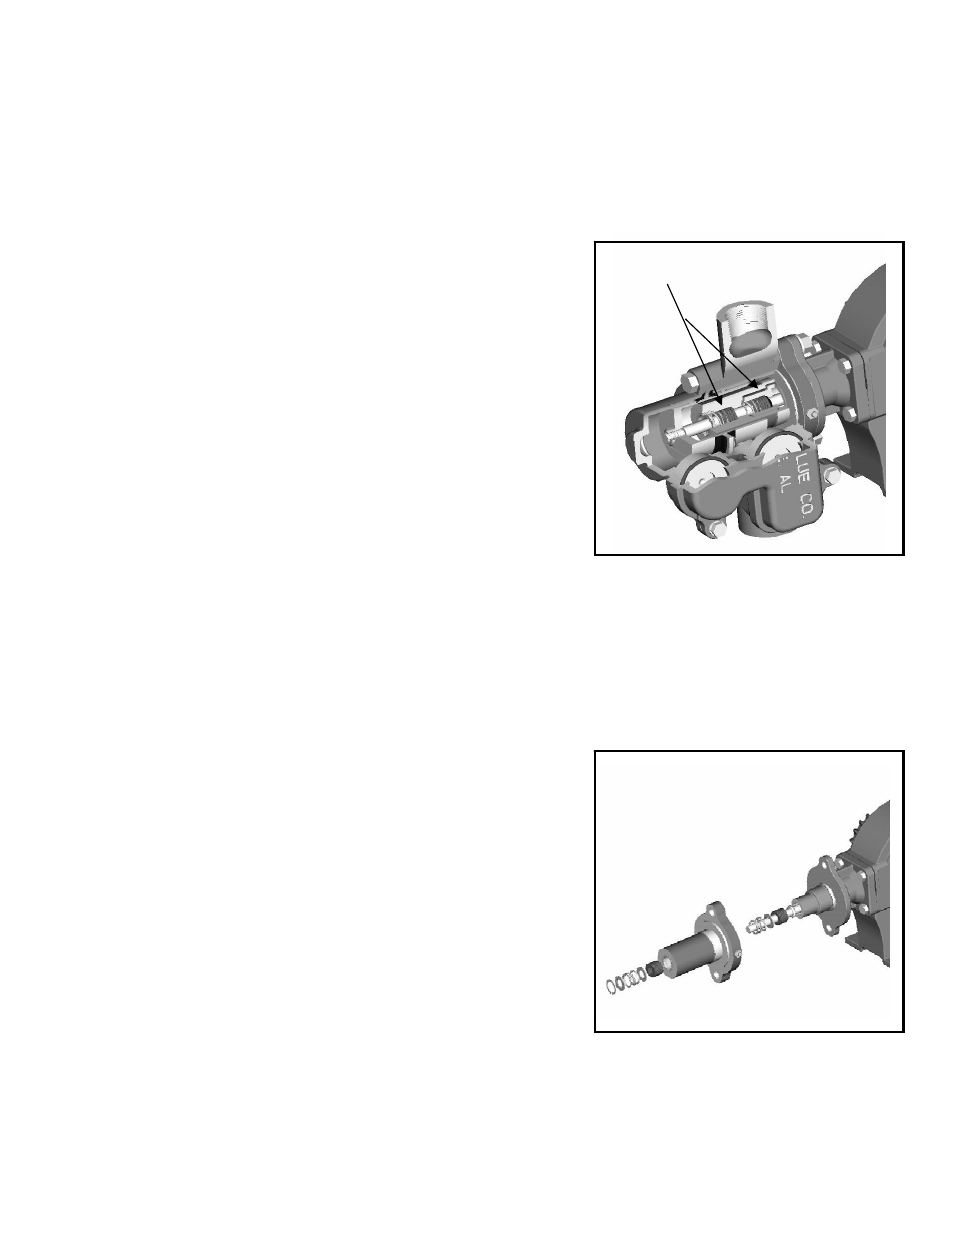
PISTON ROD PACKINGS
The rod packing consists of 2 sets of self-tightening ‘V’ rings which seal around the piston rod to prevent
pumped fluid from leaking and protect the crankcase from contamination. Virtually any leakage of the pumped
fluid through the vent in the side of the stuffing box is an indication that these rod packing need replacement.
However, it is not uncommon for oil to drip form this drain.
Removal of rod packing:
With the valve cap and cylinders removed, remove the piston nut
and piston by rotating piston counter-clockwise, use a belt wrench
or cloth nearest to the nut end to prevent damage to the piston.
Remove the stuffing box and gasket which house the wet-end
piston rod packing.
Remove the snap ring from the end of the stuffing box, allowing
the washer, spring, and washer to slip out. The L-1031-2 insert
should not be removed from the stuffing box. The rod packing set
can be removed with a hook or screwdriver by prying the multi-
piece rod packing set out of the cavity. Once removed it must be
replaced with a new service rod packing set.
There is no snap ring on the second set closest to the crankcase
located in the crosshead guide. This set may be removed in the
same manner as the first set. There is a secondary o-ring rod seal
located at the bottom of the set which also should be replaced.
Inspect the piston rod for any deep scoring and replace if necessary. A polished wear pattern may be
evident and is not detrimental; however, deep grooves indicate the piston rod assembly should be replaced.
The crosshead guide may be removed from crankcase to allow for inspection of the connecting rod bushing.
If damaged or slop is present, this should be replaced.
Re-assembly and replacement of rod packing:
Carefully re-install the crosshead guide and gasket and bolt to
crankcase, if removed.
Lubricate piston rod and install o-ring first, then carefully install the
first ‘V’ ring packing set. The set consists of a bottom adapter, 4
rings, and a top adapter. Each component should be inserted one
at a time and pressed firmly in place. The 4 rings have a ‘V’ shape
and are oriented so as the ‘V’ point is pointed towards the
crankcase, for both sets. Install the washer and spring.
Install second set in the stuffing box in a similar manner, there is
no secondary o-ring required in this set. Install the washer, spring,
then washer and hold in place with snap ring.
Lubricate piston rod and stuffing box, then slide stuffing box carefully back over rod, being extremely careful
to push straight on the piston rod so as the rods threads do not damage the ‘V’ ring set.
Re-assemble piston, inboard, and outboard cylinder in reverse manner. Continue with valves in proper
orientation, valve cover, and secure all bolts evenly.
Finally, lubricate the stuffing box grease zerk until grease seeps out of the stuffing box vent hole.
Piston Rod Packing