Install hydraulic components, Install sequence valve – Great Plains NTA2007HD Installation Instructions User Manual
Page 7
Great Plains Mfg., Inc.
Installation Instructions
7
2013-10-16
113-921M
Install Hydraulic Components
Before working with hydraulic components, review the
connector identification, torque specifications and
sealant recommendations on page 16.
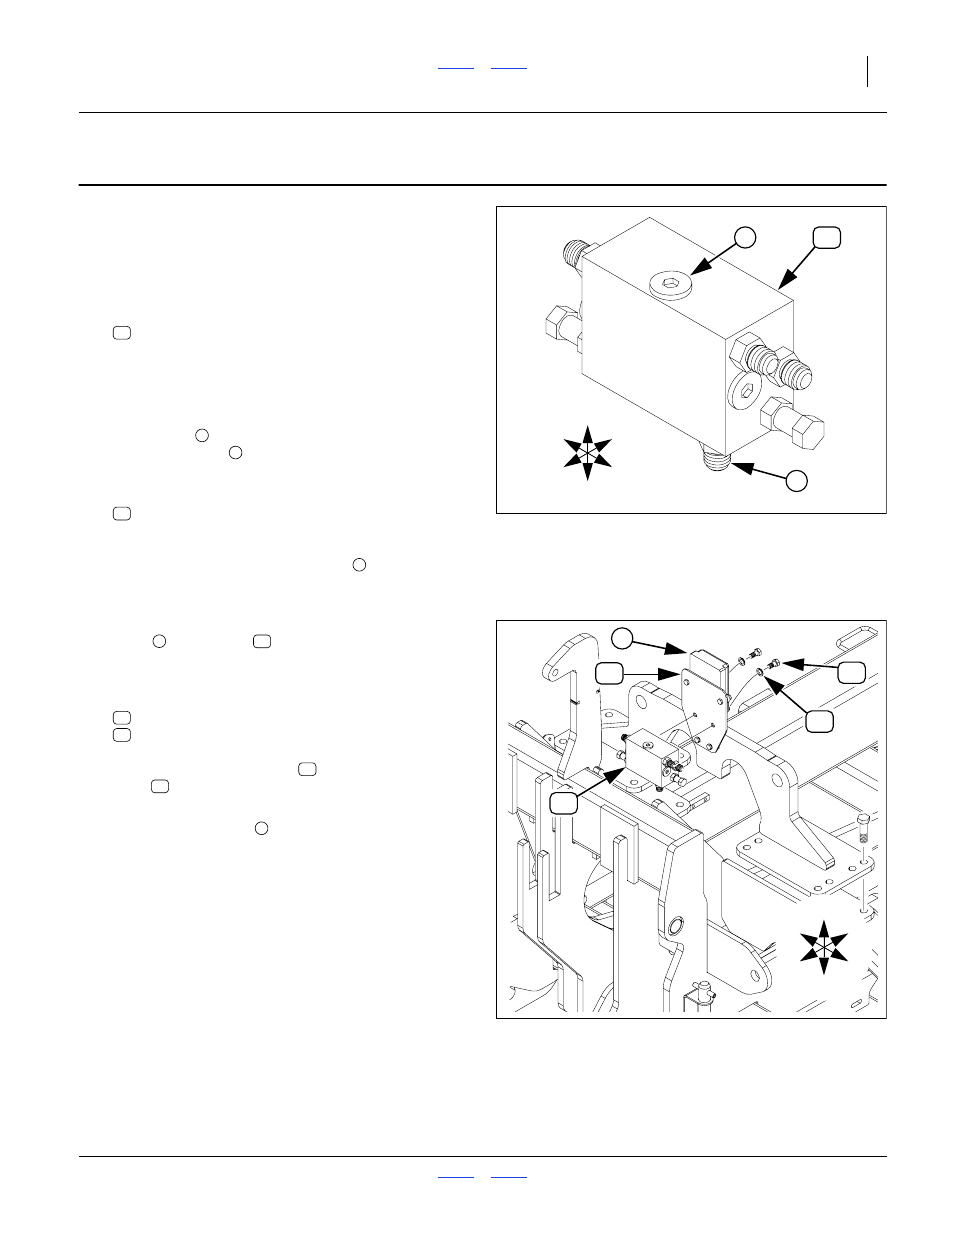
Install Sequence Valve
Refer to Figure 8
29. Select one new:
810-938C VALVE,SEQUENCE SHOEMAKER 4129
Examine the valve body to establish which faces are
front and top. The front face is blank except for
stamped text. The rear face has two
3
⁄
8
-16 threaded
holes (not shown). The top face has a single hex
socket plug
. The bottom face has two MJIC/
MORB adaptors
(the supply/return ports).
Refer to Figure 9
30. On the implement center section, locate the:
160-762D WSMB MODULE MOUNT PLATE
It is pre-installed near the cart-implement hitch, and
has a DICKEY-john
®
WSMB-POM
mounted. The
cables exiting the below the POM slightly interfere
with valve installation, so it is temporarily removed.
31. Remove and save the fasteners securing the
POM
to the plate
. Without disconnecting the
harness connections, carefully move the POM out
of the way.
32. Select two sets new:
802-017C HHCS 3/8-16X1 GR5
804-013C WASHER LOCK SPRING 3/8 PLT
Mount the sequence valve
on the front of the
plate
, with the supply/return ports and elbows on
the bottom.
33. Re-secure the POM
in its original location.
Figure 8
Sequence Valve
31343
74
U
D
F
B
L
R
4
5
74
11
6
Figure 9
Mount Sequence Valve
36054
60
74
47
6
U
D
F
B
L
R
11
6
11
47
60
74
11
6