Install marker disk and guard, Install third stage arm, Install bearing assembly and guard – Great Plains NTA2007HD Installation Instructions User Manual
Page 13
Great Plains Mfg., Inc.
Installation Instructions
13
2013-10-16
113-921M
Install Marker Disk and Guard
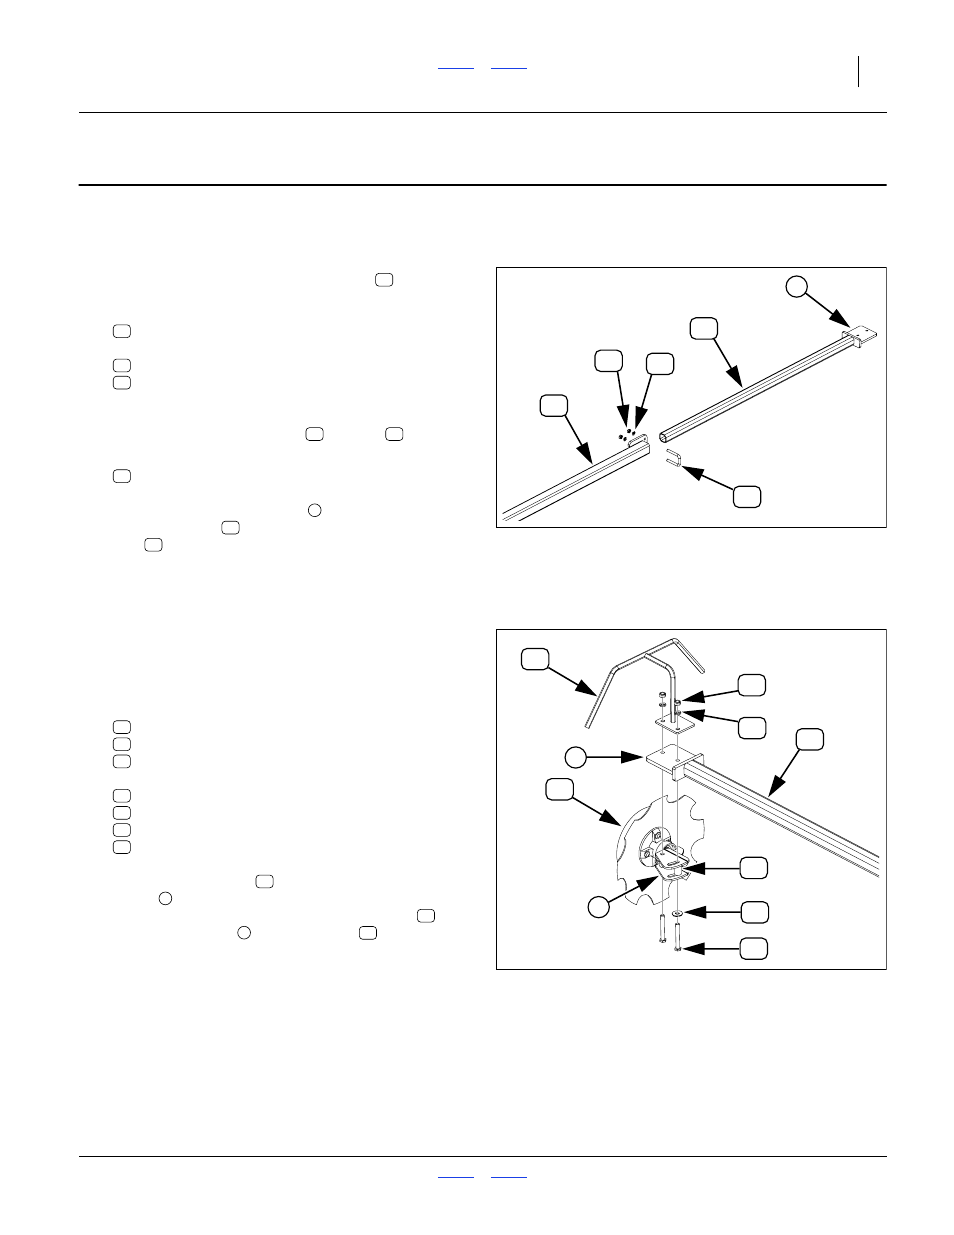
Install Third Stage Arm
Start with the left marker.
Refer to Figure 17
78. If pre-installed, loosen the U-bolt nuts
.
If not pre-installed, select one new:
806-167C U-BOLT 1/2-13 X 2 X 3 1/2 GR 5
and two sets new:
804-015C WASHER LOCK SPRING 1/2 PLT
803-020C NUT HEX 1/2-13 PLT
Insert the U-bolt into the arm plate from the tube
side. Loosely add a washer
and nut
.
79. Select one new:
113-906H THIRD STAGE ARM
Orient the disk mounting lug
horizontal. Insert the
third stage arm
fully into the second stage
arm
.
80. Tighten the nuts to
1
⁄
2
turn beyond finger tight.
(The initial marker extension is set at step 85.)
81. Repeat step 78 through step 80 for the right side.
Install Bearing Assembly and Guard
Start with the left marker.
Refer to Figure 18
82. Select one each new:
113-563S MARKER DISC & HUB ASSEMBLY
113-916H DISC GUARD WELDMENT
804-017C WASHER FLAT 1/2 USS PLT
and two sets new:
113-491D ADJUST MOUNT SPACER TUBE
802-042C HHCS 1/2-13X3 3/4 GR5
804-015C WASHER LOCK SPRING 1/2 PLT
803-020C NUT HEX 1/2-13 PLT
Insert a spacer tube
between the spindle
plates
. With spindle plates toward implement
center, loosely mount the bearing assembly
under the arm lug
, and the guard
on top of the
lug, bent tube facing to implement rear (with arm
folded).
83. Repeat step 82 and step 82 for the right side. Use
the alternate small slotted hole.
Figure 17
Install Third Stage Arm
36057
1
31
56
71
62
30
56
71
62
56
62
56
30
30
31
Figure 18
Install LH Disc Assembly
36058
2
30
25
40
64
49
23
62
56
25
40
64
23
49
62
56
23
25
40