Install transfer link, Install second stage, Install second stage mount – Great Plains YP925TD Assembly Instructions User Manual
Page 16
16
Flat Fold Marker
Great Plains Mfg., Inc.
113-870M
2012-22-03
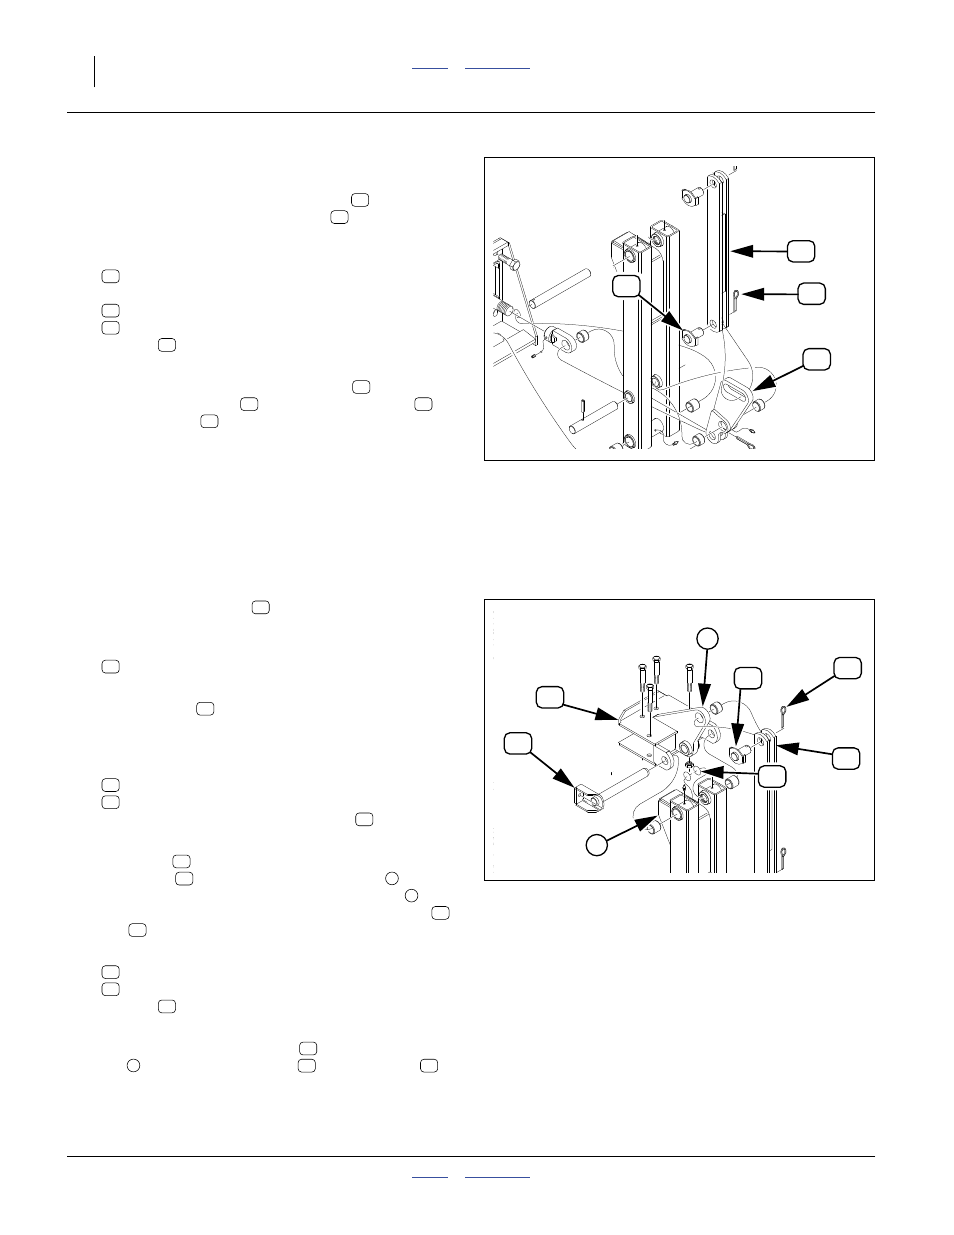
Install Transfer Link
Refer to Figure 20
If the lower/inside end of the transfer link
is already
pinned to the first stage arm pivot link
, continue at
84. Select one new:
113-446H TRANSFER LINK WMNT
and one set new:
805-060C PIN COTTER 7/32 X 2
113-448H CYL. PIVOT PIN WMNT
The pin
may be shipped in the link. Remove a
set at one end.
85. Connect one end of the transfer link
to the first
stage arm pivot link
using a pin weldment
and cotter pin
.
86. Repeat step 84 and step 85 for the other arm.
Install Second Stage
Install Second Stage Mount
Refer to Figure 21
If the second stage mount
is already installed,
continue at “Install Second Stage Arms” on page 17.
87. Select two new:
816-166C O-RING 1 ID X 1 1/4 OD X 1/8
These may already be installed.
88. If the O-rings
are not installed, apply general
purpose grease to them, then insert them in the
inner grooves of the first stage arm outer pivots.
89. Select one each new:
113-440H 2ND STAGE MOUNT WMNT
113-442H 2ND STAGE MOUNT PIN
Apply some grease to the mount pin
.
90. Align the pivot holes of the second stage mount
weldment
with the outer pivot holes of the first
stage arm
. Orient the mount’s link lug
to point
out/down (it faces away from the stage stop
From planter front, carefully insert the mount pin
.
Pin
91. Select one set new:
805-060C PIN COTTER 7/32 X 2
113-448H CYL. PIVOT PIN WMNT
The pin
may be shipped in the link. Remove a
set at the free end.
92. Align the free end of the link
with the mount
lug
. Secure with pivot pin
and cotter pin
.
93. Repeat step 87 through step 92 for the other arm.
Figure 20
Transfer Link
29872
41
40
66
42
40
41
40
66
42
66
40
41
42
66
Figure 21
Second Stage Mount
29872
38
39
66
42
40
83
1
38
83
83
38
39
39
38
34
6
39
39
66
42
66
40
42
66