Install cylinders – Great Plains YP925TD Assembly Instructions User Manual
Page 14
14
Flat Fold Marker
Great Plains Mfg., Inc.
113-870M
2012-22-03
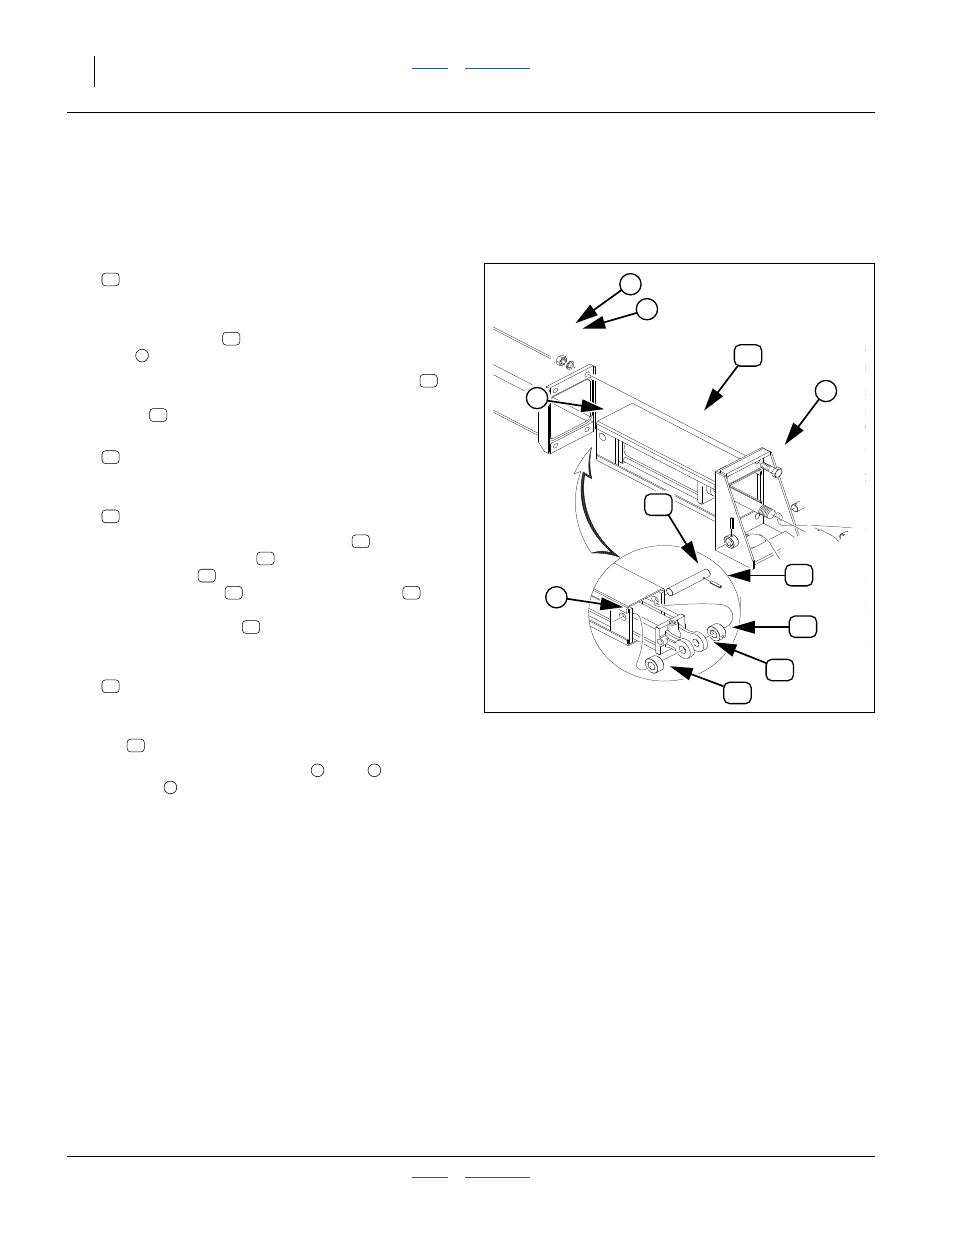
Install Cylinders
Depending on shipment destination and shipping
method, marker arms may be sub-assemblies, or largely
pre-assembled. Skip steps as instructed.
Refer to Figure 17
63. Select one new:
113-435H PLANTER MARKER MOUNT WMNT
This may be part of a larger assembly. If so, unfold
the arm to provide clearance for the cylinder rod.
64. Orient the mount
so that the cylinder pivot pin
hole
is up.
65. Check that the base end elbow of the cylinder
is
down. Slide the cylinder, from the rod end, into the
mount
.
66. Select one new:
113-435D CYLINDER LUG PIN
Note that one end of this pin has a hole.
67. Select two new:
113-437D CYLINDER SPACER W/ HOLE
68. Insert the no-hole end of the lug pin
through the
side wall of the mount
.
Add a spacer
.
Align the cylinder
base lugs with the pin
.
Push the pin through the base lugs.
Add another spacer
.
Push the pin through the other mount side wall.
69. Select one new:
805-180C PIN ROLL 1/4 X 1 1/2 LG PLT
70. Adjust the first spacer and the lug pin to align their
holes. Secure the spacer to the lug pin with the roll
pin
.
71. Select four sets of
5
⁄
8
-11 bolts
, nuts
washers
, saved at step 39 on page 10.
72. Slide the mount into the frame tube. Secure with
saved
5
⁄
8
-11 fasteners.
73. Repeat step 63 through step 72 for the other
cylinder mount.
Figure 17
Cylinder Mount
29872
35
33
1
70
32
67
35
3
4
2
33
33
70
33
32
35
32
33
35
70
32
35
67
67