3s shuttle valve assembly, 3s shuttle bulkhead disassembly, Step 25 – Great Plains 3S-3000 Installation Instructions User Manual
Page 5
Great Plains Mfg., Inc.
3S-3000 and 3S-4000 Installation
5
09/05/2012
194-149M
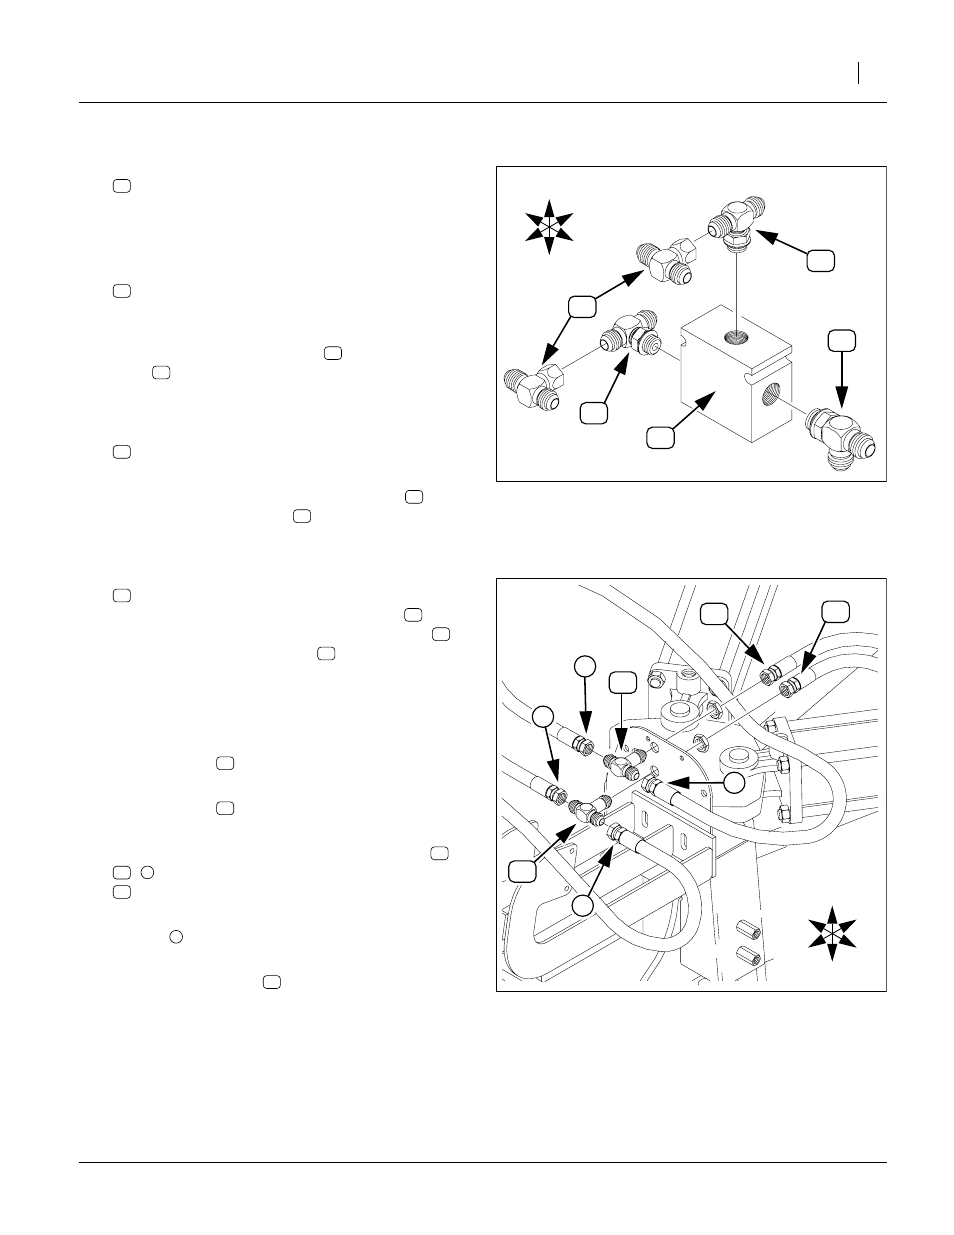
3S Shuttle Valve Assembly
Refer to Figure 5
25. Select one new:
810-344C VALVE SHUTTLE 9/16FORB PORTS
Note: This valve is stamped
85005468
, and the internal
shuttle rattles if the valve shaken gently. When
mounted on the drill, Port 1 will be to drill Right.
26. Select one new:
811-064C TE 9/16MJIC 9/16MJIC 9/16MORB
This is the asymmetrical MJIC/MORB tee. There is
only one of these in the kit.
27. Screw the ORB end of the tee
into Port 2 of the
valve
. Orient the center JIC port of the tee down,
and tighten the ORB jam nut to ORB torque specifi-
cation.
28. Select two new:
811-439C TE 9/16MORB 9/16MJIC 9/16MJIC
This is the symmetrical MJIC/MORB tee.
29. Screw the center ORB ports of these tees
Ports 1 and 3 of the valve
. Orient the end JIC
ports to point Front and Back, and tighten the ORB
jam nut to ORB torque specification.
30. Select two new:
811-193C TE 9/16FJIC 9/16MJIC 9/16MJIC
Screw the center FJIC ports of these tees
the Front-facing ports of the just installed tees
Orient the MJIC ports of tees
Right, and torque to JIC specification. Set valve
aside until step 37.
3S Shuttle Bulkhead Disassembly
Refer to Figure 6
31. Mark the hose
connected to the center port of
the top tee “Lower”.
32. Mark the hose
connected to the center port of
the bottom tee “Raise”.
33. At their FJIC fittings, disconnect all six hoses (
,
) at the two bulkhead tees:
Note: It is not necessary to identify the forward four
hoses
. They are identified by length and source
when reconnected.
34. Remove the two tees
. They are not re-used.
3
1
2
FigureSpacer
Figure 5
Assemble 3S Shuttle Valve
18742
U
D
F
B
L
R
FigureSpacer
Figure 6
Remove Old 3S Bulkhead Tees
18743
U
D
F
B
L
R
4