Procedure – LaMotte AT Visual Series Water Softener Demo Kit User Manual
Page 18
18
PROCEDURE
HOLD FUNCTION: Press HOLD key to freeze display. Press HOLD again to release.
MAINTENANCE: To improve performance, clean the stainless steel electrodes by periodically rinsing them
in alcohol for 10-15 minutes. Replace all 4 batteries if the display becomes faint or disappears, or if the readings
are unstable. If drift is detected while electrodes are continuously exposed to solution for longer than one hour,
allow electrode to fully dry off periodically.
CHANGING BATTERIES: Open the battery compartment lid. Remove old batteries and replace with fresh
ones noting polarity as shown in the battery compartment. Recalibrate Testr after battery change.
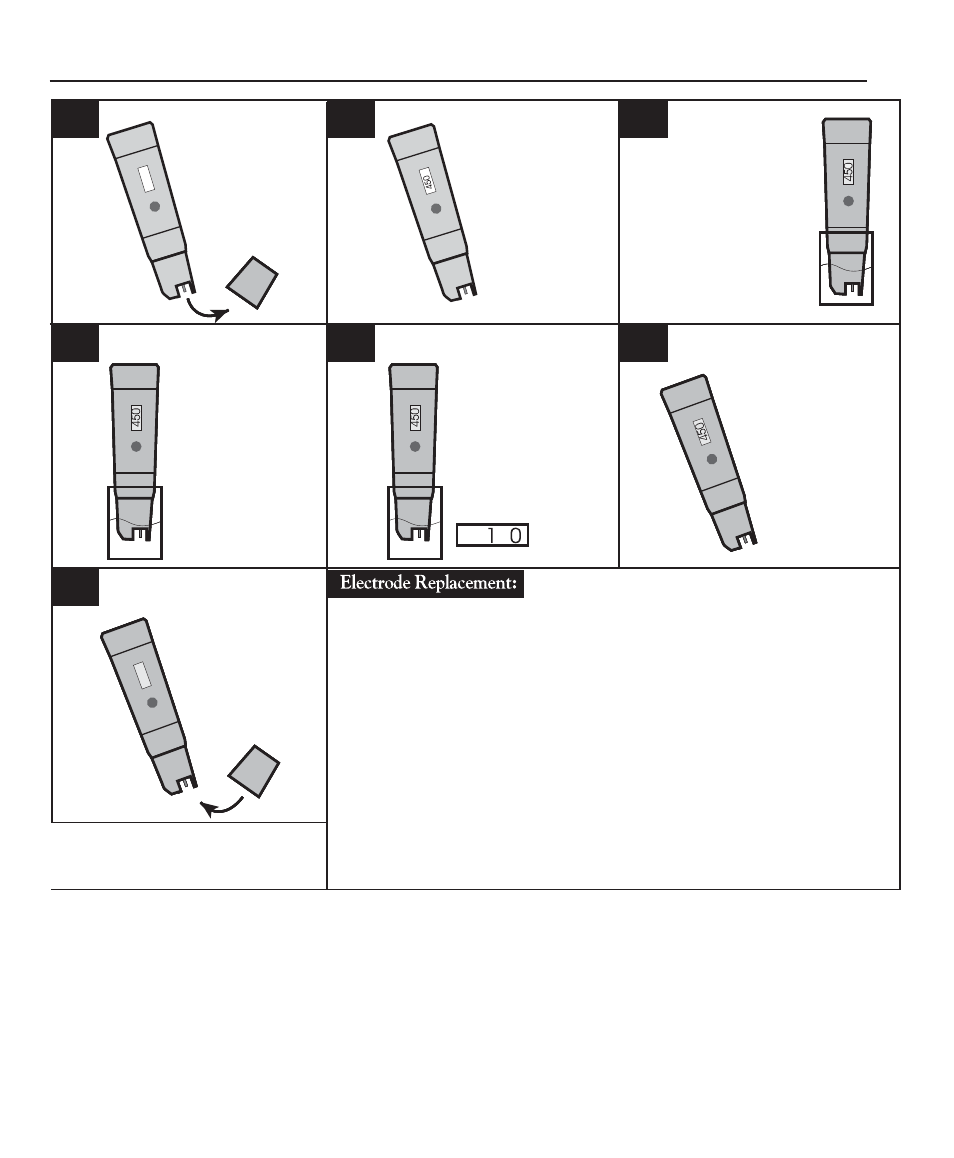
Remove the cap.
Press ON/OFF
button to turn on.
Dip the electrode end
into the test solution.
Make sure the sensor is
fully covered. Stir once.
Let the reading stabilize.
Allow time for
the Automatic
Temperature
Compensation to
correct the
readings for
solution
temperature
changes.
Note the reading once
the display stabilizes.
If the solution is
above the range of the
TDSTestr, the
display will show:
Press the ON/OFF
button to turn off Testr.
Note: Testr will
automatically shut
off after 8.5
minutes of
non-use.
Replace the cap.
You can replace the electrode module at the
fraction of the cost of a new Testr. When the Testr fails
to calibrate or gives fl uctuating readings in calibration standards, you need to change
the electrode.
1. With dry hands, grip the ribbed Testr collar with electrode facing you.
Twist the collar counter clockwise. Save the ribbed Testr collar and
O-ring for later use.
2. Pull the old electrode module away from the Testr.
3. Align the four tabs on the new module so they match the four slots
on the Testr. Caution: Take care to align pins carefully. Bent or broken
pins will cause the meter to malfunction.
4. Gently push the module onto the slots to seat in position. Push the
smaller O-ring fully onto the new electrode module. Push the collar
over the module and thread it onto place by fi rmly twisting it clockwise.
1.
2.
3.
4.
5.
6.
7.